Input using drag and drop
Overview
Enter actual man-hours in the timesheet.
This section explains how to enter actual man-hours and useful functions for input.
Preparation - Setting Break Times
Before entering actual work hours in the timesheet, it is recommended to set break times such as lunch breaks.
Actual work hours cannot be entered during the time periods set as break times, which is useful for preventing input errors.
Operating Procedure
-
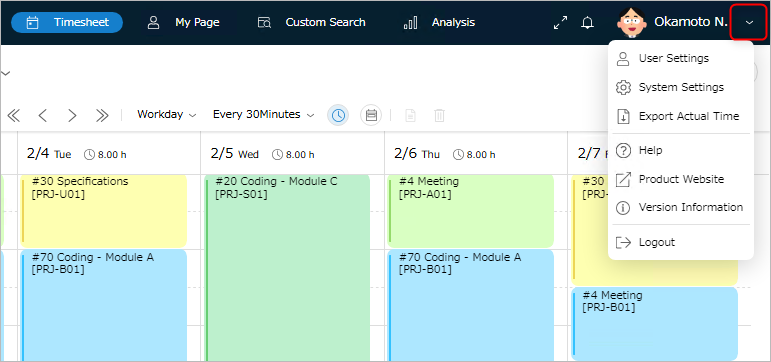
Click the icon to the right of your login name displayed in the global navigation.
-
Select "User Settings".
-
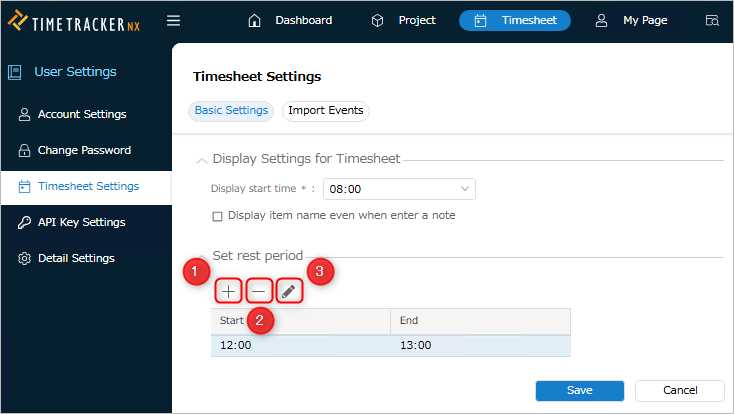
Click "Timesheet Settings" in the left-hand menu.
-
Click the "Basic Settings" tab.
-
Enter the settings for the timesheet.
Settings Action to be performed Add a break time Click the "Add" icon① Delete an existing break time Select the break time and click the "Delete" icon② Edit an existing break time Select the break time and click the "Edit" icon③ -
Click the "Save" button.
Notes
- Multiple break time periods can be set.
- Break times must be set individually by the user.
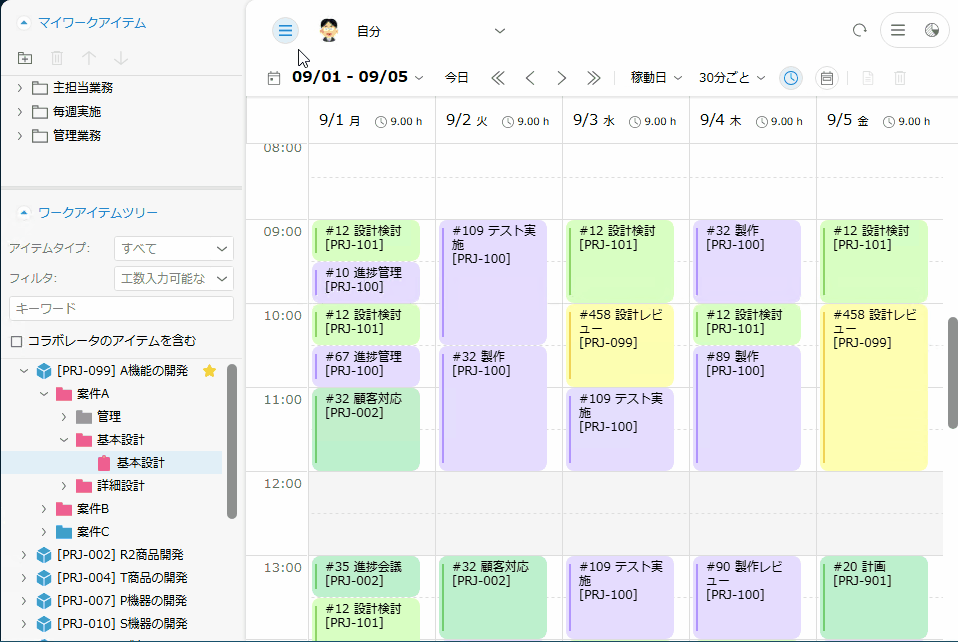
Entering Actual Man-Hours
Actual man-hours can be entered in the timesheet.
Procedure
-
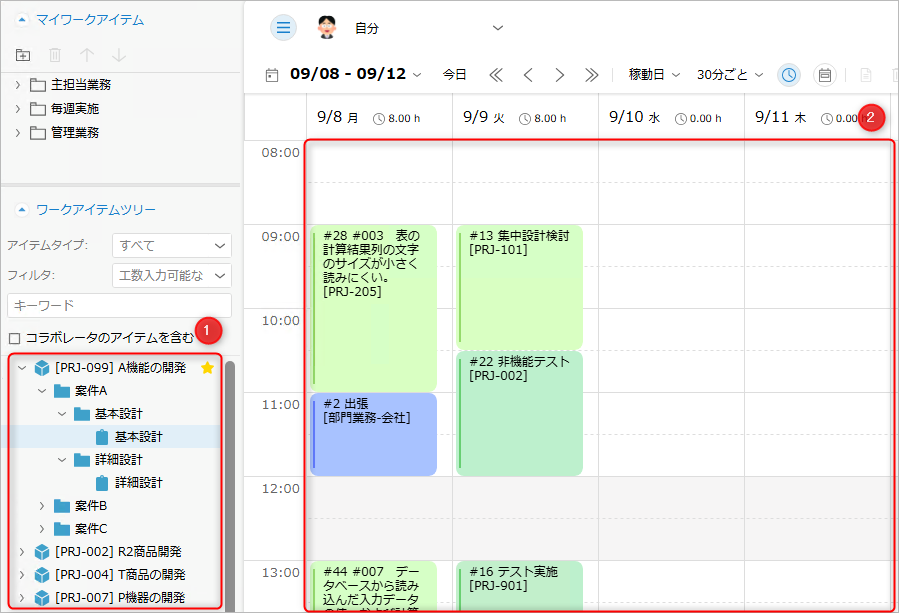
Select an item in the "Work Item Tree"①.
-
Drag and drop the selected item into the corresponding time slot in the "Man-Hour Input Pane"②.
Useful Usage Methods
-
In addition to the work item tree, you can also input using the following methods:
- Using My Work Items
- Inputting from the Event Area
This reduces the effort of searching for items in the tree, allowing you to easily input actual work hours.
- Using My Work Items
-
You can display the total work hours for each day.
The total work hours are updated in conjunction with the input of actual work hours.
You can also toggle the display on and off using the "Daily Work Hours Display" icon ③.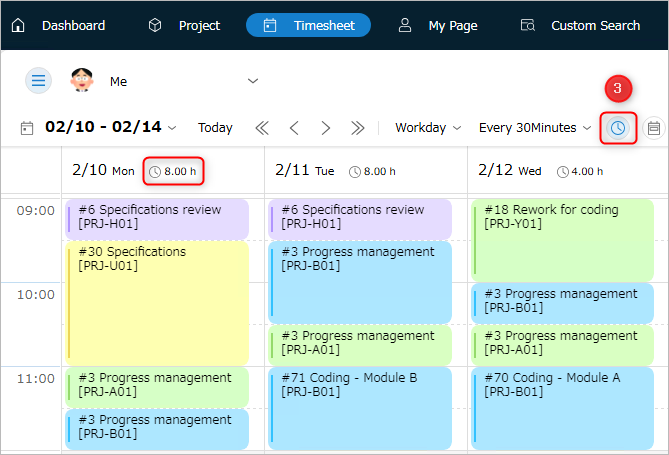
-
The work item tree can be toggled on/off with a single button.
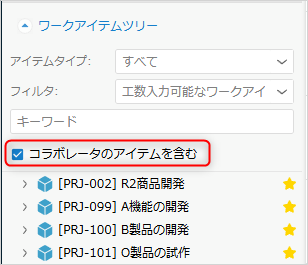
Utilizing Collaborators
To enter man-hours into a timesheet, you need to assign resources to the target item.
However, the preparation required to enter man-hours is extensive, such as assigning permissions to most items in the project for review.
"Collaborators" refer to "collaborators," and TimeTracker RX allows you to enter man-hours without assigning resources.
The procedure for assigning collaborators involves the following two steps:
-
The project administrator assigns the target member to a collaborator.
For detailed instructions, please refer to "Making Members Collaborators." -
Members assigned as collaborators enable the following settings in their timesheets.
Notes on Entering Actual Effort
If the item for entering actual effort is not displayed, please check the following:
- Only work items assigned to a resource will be displayed on the timesheet.
- Work items matching the following will not be displayed, even if assigned:
- Actual effort input is locked
- Included in a completed project
- Project viewing permission is not granted
- Actual effort can only be entered for work items at the end of the tree.
Actual effort cannot be entered for items with child items.
Entering Across Other Actual Efforts
Even when entering work performed intermittently, you can enter the effort all at once.
This is extremely convenient as it eliminates the need to repeatedly enter the actual work hours for the same work item.
Please refer to the second video.
Operation Procedure
-
Select the bottom or top edge ① of the target actual work hours.
-
Drag across other actual work hours. ②

Editing Actual Work Hours
You can change the time of the entered actual work hours.
The following edits are possible:
Changing the Time of Actual Work Hours
You can change the time of the actual work hours using the following operation.
- Change the start time: Drag the top edge of the actual work hours.
- Changing the end time: Drag the bottom edge of the actual work time.
- Moving actual work time: Select the target actual work time and drag and drop it to the desired time slot.
- You can also move it to a different day.
- You can select multiple actual work time and move them all at once.
- To select multiple actual work time, hold down Ctrl and click the target actual work time.
Copying Actual Work Time
You can copy actual work time that you have already entered.
This saves you the trouble of searching for the target work item in the work item tree in the following cases:
- Entering the same actual work time as the work item entered yesterday
- Entering the actual work time for a work item that you work on regularly
There are two ways to copy actual work time: dragging and dropping the actual work time and using the keyboard.
Each operation can achieve the following:
| Operation | Drag & Drop | Keyboard Operation |
|---|---|---|
| Copy Multiple Results | ○ | × |
| Copy Across Weeks | ○ * | ○ |
| Overwrite Entered Results | × | ○ |
- By moving the display period to show across weeks, you can copy using drag and drop.
Copying with Drag and Drop
- Used when copying actual work hours on the same screen.
You can also input multiple actual work hours at once. - Select the target actual work hours, and while holding down the Ctrl key, drag and drop them to the destination time slot.
It is also possible to copy to a different day on the same screen. - To copy multiple actual work hours at once, hold down Ctrl and click the target actual work hours to select multiple times.
Copying with Keyboard Operation (Ctrl+c→v)
You can copy actual work hours using the copy operation commonly used in Windows OS.
The following usage methods can reduce the effort required for entering actual work hours.
| What you can do | Benefits |
|---|---|
| Copy actual work hours, switch the display range, and paste | You can copy actual work hours across weeks |
| Pre-select the time zone for copying | No need to adjust the time zone after copying |
| Overwrite existing actual work hours | Convenient when changing actual work hours |
Deleting Actual Work Hours
You can delete actual work hours.
- Select the target actual work hours, right-click, and select "Delete".
- You can also select multiple actual work hours and delete them all at once.
- Hold down Ctrl and click the target actual work hours.
Entering Notes
You can leave notes about the work for individual actual work hours.
- Registering notes makes your work content more specific and is helpful when reviewing later.
- It is also included in the output items of the actual work export function (when outputting by actual unit).
Select the target actual man-hours, and the "Memo" field will appear by performing one of the following actions:
Please enter the work details.
- Double-click
- Right-click and click "Show Details".

For details, please refer to the following link: "Display Item Name When Registering Actual Man-Hours Memos"
Process Classification/Work Classification Settings
You can set process classification/work classification for actual man-hours.
Process Classification/Work Classification
This information is used to subdivide work items from the perspective of processes such as "design" and "implementation".
The aggregated data from process classification can be used in the following functions.
Select the actual effort you want to set, right-click, and select "Show Details."
Then, select the appropriate item from the "Process Classification"/"Task Classification" list.
Switching Timesheet Display
You can switch the granularity (day, working days, week) displayed on the timesheet.
You can also move the display period in daily or weekly increments.

- Switching Display Period: Click the icon ① to switch.
| No. | Icon | Name | Description |
|---|---|---|---|
| 1 |  | Day | Displays only 1 day |
| 2 |  | Working Days | Displays 5 days from Monday to Friday |
| 3 |  | Week | Displays 7 days from Monday to Sunday |
- Moving the display period: Click icon ② to move.
Also, you can specify the start date of the display period by clicking on the displayed period.
| No. | Icon | Name | Description |
|---|---|---|---|
| 1 |  | Move Previous | Move one unit past in the displayed days |
| 2 |  | Move Previous Day | Move one day past |
| 3 |  | Move Next Day | Move one day future |
| 4 |  | Move Next | Move one unit future in the displayed days |
Customizing the Work Item Tree
The display of the Work Item Tree can be freely customized by the user.
Organizing projects makes daily time entry more efficient.
Filtering Work Items
Work items can be filtered and displayed according to user-specified conditions.
Filtering reduces the effort required to find items and simplifies time entry.

There are three types of filters:
-
Item Type
- Useful when searching for items by item type (task, etc.).
- Item types registered as "item types that can be entered for actual time" will be included in the list.
-
Filter
-
Useful when searching for items based on specific conditions (recently used items, etc.).
-
Select filter conditions from the list below.
Filter Name Items to Display What Can Be Confirmed Leader's Work Items Leader's Items Tasks You Are Leading Today's Work Items Items with a Plan Start Date Before Today and Incomplete Tasks to Do Today Work Items for the Next 2 Weeks Incomplete Items with Any of the following
- Plan Period is Within 2 Weeks
- End Date Has Not ArrivedCheck Tasks Scheduled for the Immediate Period. Work Items in Progress Items That Are Incomplete and Have Actual Effort (Actual Time is Not 0h) Tasks in Progress Incomplete Work Items Incomplete Items Tasks That Will Occur in the Future Work Items Behind Plan Items That Have Passed the Plan End Date but Are Not Completed Tasks That Are Behind Plan
-
-
Keywords
Useful for searching for any project or item.- Displays items containing the specified string as a keyword.
- You can also specify multiple keywords below and narrow down the results with an AND condition.
- Project Name, Project Code, Work Item Name
- Keyword input can be cleared using the "×" button.
- To specify multiple keywords, enter a space between them.
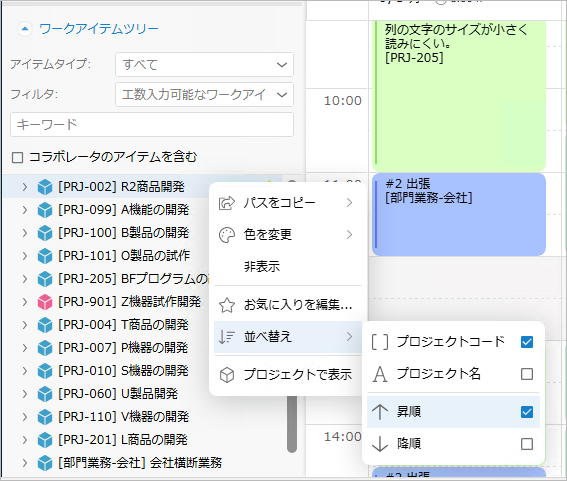
Changing the Project Order
- Users can set the order in which projects are displayed in the work item tree.
- Right-click the work item tree and select "Sort".
- You can set ascending or descending order by project code or project name.
Displaying Favorite Projects at the Top
By setting frequently used projects as favorites, they can be displayed at the top of the work item tree.
This makes it easier to find work items for actual time entry.
Operating Procedure
-
Hover your cursor over the target project in the work item tree.
-
Click the star icon (☆) that appears to the right of the project name.
The star icon will become active and the project will be displayed at the top of the work item tree.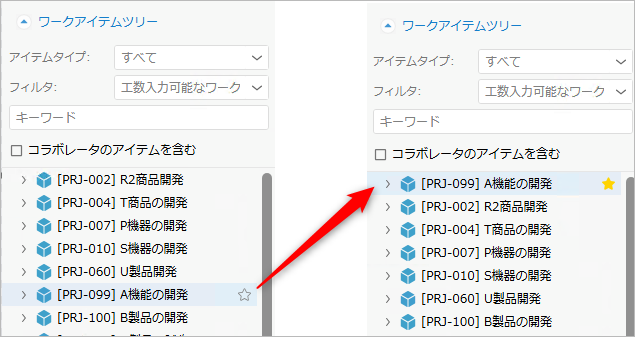
-
Clicking the star icon will remove the favorite setting, and the target project will return to its original position.
Notes
- If you have set multiple favorites, they will be displayed according to the "sorting" you have set.
- Favorite settings are set for your own timesheet.
They will not be reflected when entering the actual work of other users.
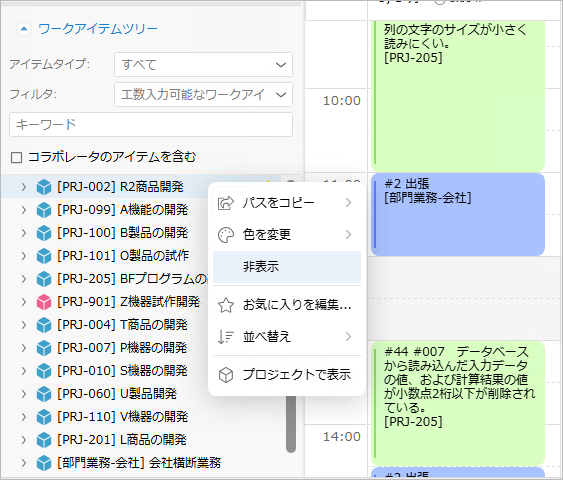
Hide Unnecessary Projects
Projects not used for actual work entry can be hidden on the work item tree.
-
Simplifying the tree by displaying only the necessary projects makes effort entry more efficient.
-
Select the target project on the work item tree and right-click to display the menu.
-
You can unhide projects by right-clicking and selecting "Unhide" from the menu that appears, then selecting the project you want to unhide.
Notes
- Project hiding settings are applied to your own timesheet.
This setting will not be reflected when entering other users' actual work hours.
Color-coding Actual Work Hours
The actual work hours you enter can be displayed on the timesheet with different colors for each project.
You can see at a glance which projects you have allocated time hours to.
Right-click the project in the work item tree and select your preferred color from "Change Color".
- The selected color will be displayed on the timesheet (Figure ① below).
- You can check the selected color in Figure ② below.
