Change user settings
Overview
Introducing the settings for each user in TimeTracker RX.
Changing account information
Introducing the user information that users can change, how to change it, and restrictions based on permissions.
-
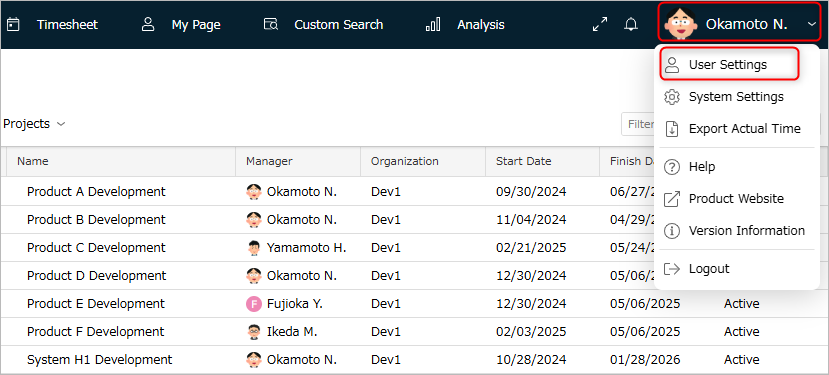
Click the login name displayed in the global navigation.
-
Select "User Settings" from the menu that appears.
-
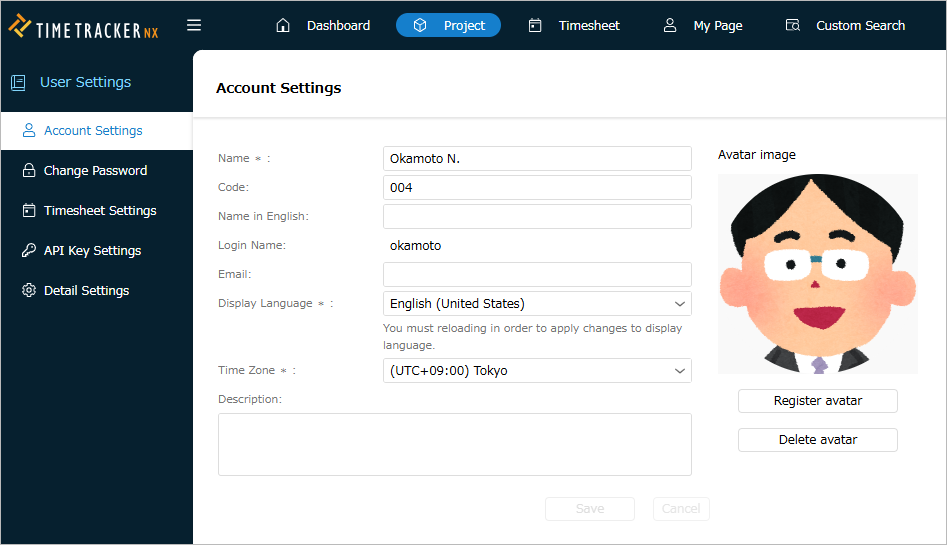
Select "Account Settings" from the menu on the left.
-
Edit the content of the item you want to change or select it from the pull-down menu.
-
Click the "Save" button to save the changes.
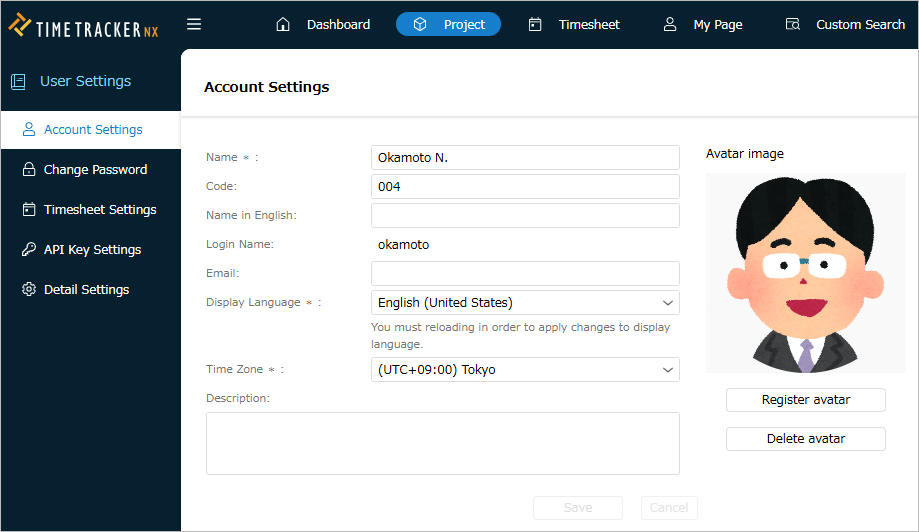
Account Information
Here is an introduction to the items that can be changed on the account settings screen.
| Item | Description |
|---|---|
| Name | You can change the name that is displayed on the screen. If you change it, other users will also see the changed name. |
| Code | By setting this item, you can search and filter using the code. |
| English name | You can set or change the English name. If you set this item, both Japanese and English names will be displayed in the user selection list, etc. |
| You can set or change the email address. Note that the email address is an item prepared for future feature expansion. | |
| Display language | You can switch the display language on the screen between Japanese and English. The display language can be set for each user. |
| Time zone | Set the time zone to use TimeTracker. |
| Description | Set the description for the account to be displayed. |
Please make sure that the time zone of the scheduler server and TimeTracker are the same.
If they are different, there will be a discrepancy in the time of the retrieved schedule.
Restrictions based on permissions
In the system role settings, there are some items that can only be edited if you have the "Change account settings" permission.
See below for the correspondence between editable items and permissions.
- Users with "Change Account Settings" permission
- Name, code, English name, email, description
- All users
- Display language, time zone
Please contact your administrator for your own permission settings.
Timing of changes reflected
The timing of changes reflected varies depending on the item.
Changes are reflected at the following times.
| Reflection timing | Item |
|---|---|
| When "Save" button is clicked | Name, code, English name, email, description |
| When re-login | Display language |
| When browser is reloaded | Time zone |
Setting avatar
Users can register their favorite image as an avatar.
By registering an avatar, you can distinguish yourself from other users by appearance on each screen of TimeTracker RX.
This section introduces the steps for users to register an image to be their avatar.
You must allow the use of avatar images in the Admin system operations.
For details, see the following link: "Setting system operations"
Registering an avatar
-
Click the login name displayed in the global navigation.
-
Select "User Settings" from the menu that appears.
-
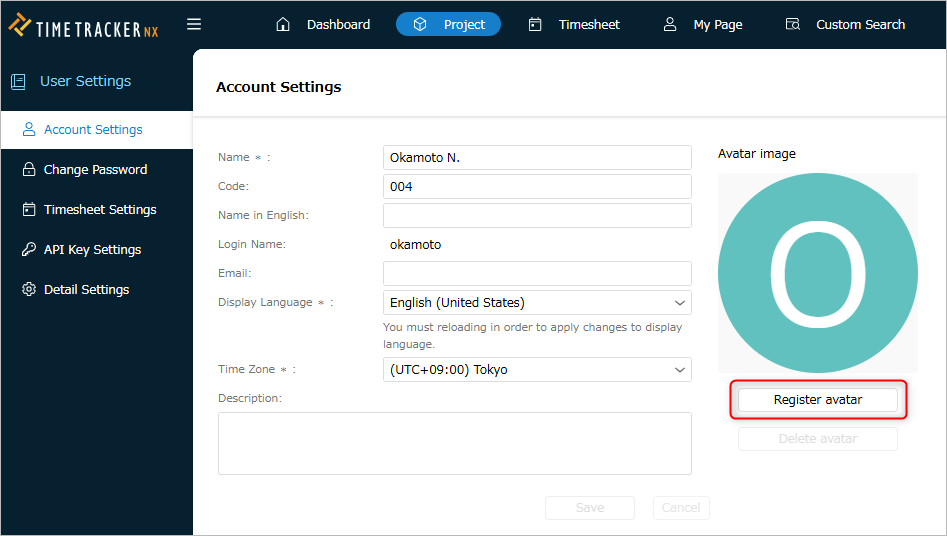
Select "Account Settings" from the menu on the left.
-
Click "Avatar Registration" on the screen on the right.
-
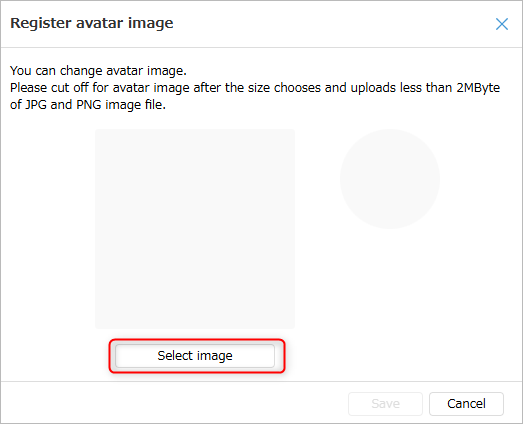
Click "Choose Image" in the "Register Avatar Image" dialog.
-
In the "Open" dialog, select the image file you want to use as your avatar.
-
Click the "Save" button to save the avatar.
Changing/Deleting an Avatar
In step 4 of "Registering an Avatar", do the following.
- To change: Select the image you want to change in "Register Avatar".
- To delete: Click "Delete Avatar".
Change password
Users can change the password for logging in to TimeTracker themselves.
Here is how to change it.
-
Click the login name displayed in the global navigation.
-
Select "User Settings" from the menu that appears.
-
Select "Change Password" from the menu on the left.
-
Enter your current password and the new password.
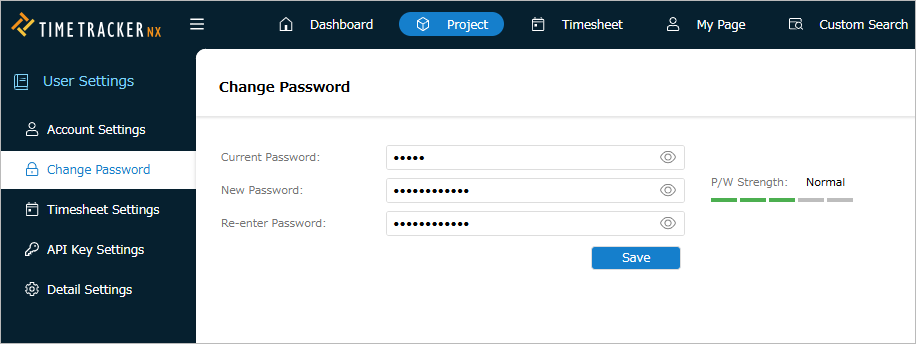
-
Click the "Save" button to save the changes.
Change timesheet settings
The following items can be set for timesheets on a per-user basis.
- Timesheet display start time
- Item name display when registering memos
- Break time
- Import settings when integrating with scheduler
First, perform the following operations to open the settings screen.
-
Click the login name displayed in the global navigation.
-
Select "User Settings" from the menu that appears.
-
Select "Timesheet Settings" from the menu on the left.
-
Select "Basic Settings" on the screen on the right.
After performing each operation, click the "Save" button to save the changes.
Display start time
Select the display start time from the pull-down list in the Timesheet display settings section.

Display item name when registering memo for achievements
Check "Display item name when registering memo" in the Timesheet display settings section.
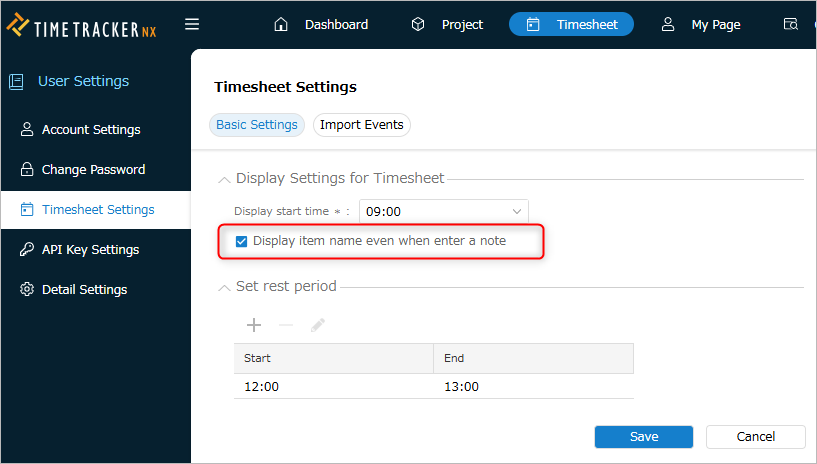

Standard break time
Add/delete/change break time in the Break time settings section.

- You will not be able to enter results for the time period set as a break.
- If you set multiple times such as daytime and evening, make sure the times do not overlap.
If you need to enter results for the time period set as a break, cancel the setting.
Note that this setting does not affect results entered before.
Setting up schedule import
See the following link for setup instructions for schedule import.
"Link with Calendar"
Generate API key
Click "Issue API key" on the following screen, copy the generated API key, and use it.
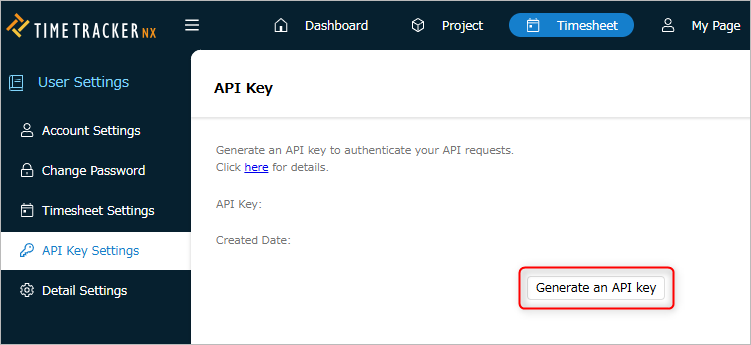
- If you want to discard the API key you created, click "Disable API key".
- There is no validity period for API keys.
If you want to switch API keys, disable them once and generate a new key.
The API key you created can be used for the following functions.
-
TimeTracker Reporting: First login
-
TimeTrakcer Analytics: Create a data source
-
Excel integration add-in: Set connection information
User-specific settings
Remember tree expansion state
TimeTracker RX timesheets and Gantt tables have item hierarchies.
If you want the screen to remain open as it was last time, check the box below.
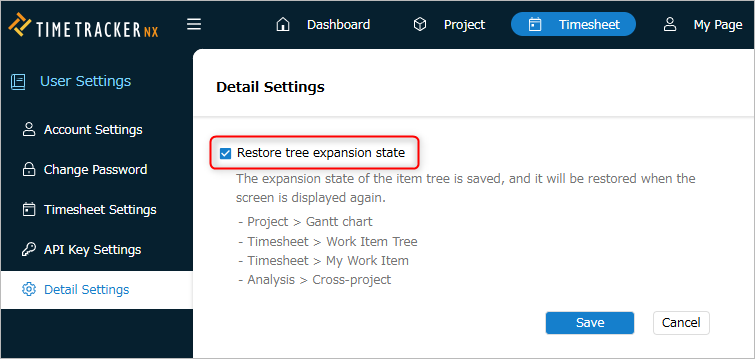
This will save you the trouble of unfolding each item one by one when you open the screen, allowing you to start working straight away.
Please also consider the load on your server PC when deciding whether to check or not.