Working with analysis reports
Overview
When you create a report, data is retrieved from the TimeTracker RX database and an analysis report is output.
This section explains how to check the output report and how to operate the report screen.
Notes
In TimeTracker Analytics, you can view all data except for cost-related fields.
- Only users who have been granted cost permissions in their system role can view cost-related fields.
- In TimeTracker RX, you can also view data that cannot be viewed due to security settings.
For example, analysis results for projects that you do not have permission to view are also displayed.
If you do not want to refer to other projects, do not deploy the server configuration file.
Consider using the pivot analysis function of TimeTracker RX.
For details, see the following link: "TimeTracker RX Pivot Analysis Function"
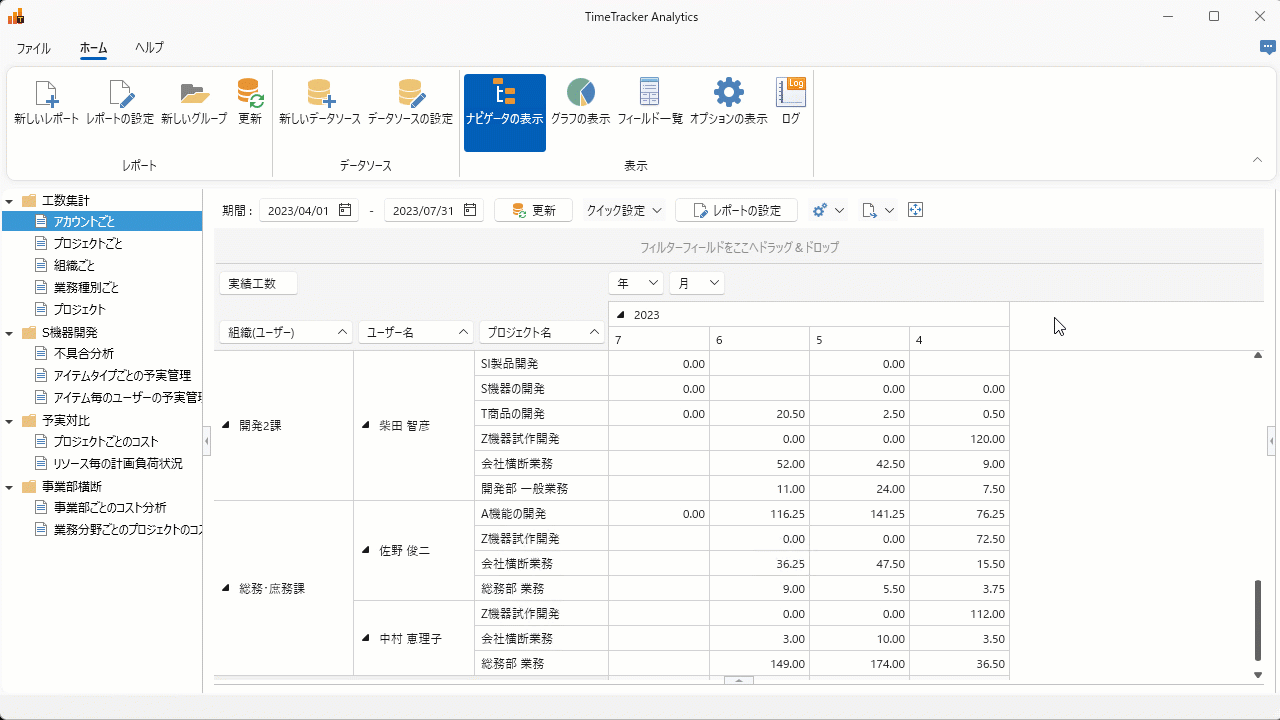
How to read the report screen
You can change the display of the report in the following way.
| No | What you can do | Detailed explanation |
|---|---|---|
| ① | Change the period to be analyzed. | "Period to be analyzed" |
| ② | Get data from the TimeTracker RX database. | If the contents of the database are updated after data is obtained from TimeTracker RX, it will be updated to the latest information. |
| ③ | Change ① by selecting from the preset period. | - |
| ④ | Open the report settings dialog. | "Create an analysis report" |
| ⑤ | Operate the specified report. | "Operations for the report" |
| ⑥ | Export the analysis results to another file. | "Export externally" |
| ⑦ | Maximize the analysis report. | Return to the original size by performing one of the following operations. ・Click the "F11" button. ・Click the following button  |
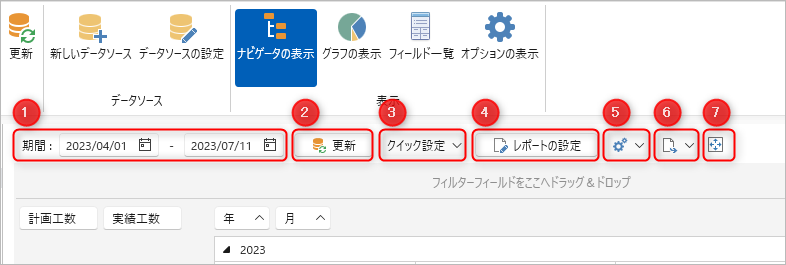
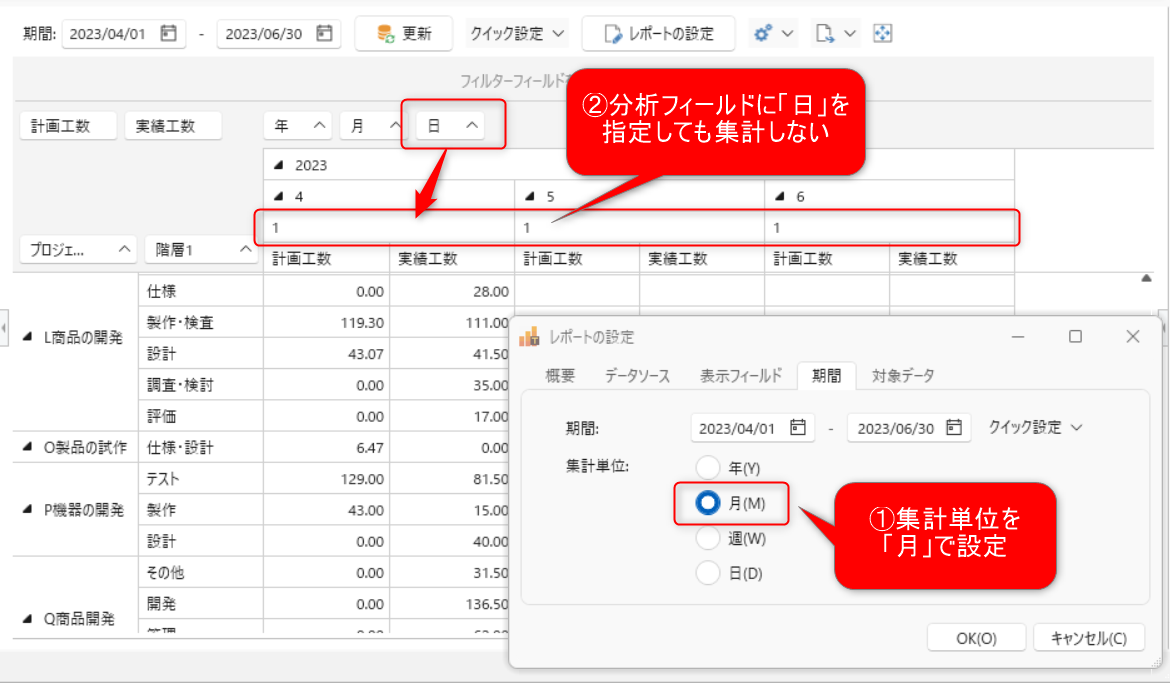
About the analysis period
The analysis period varies depending on the "aggregation unit" specified when creating the report.
For details, see step 5 in the following link. : Create an analysis report
The aggregation unit also affects the output of the analysis results as follows.
If you want to aggregate by "day" in the case below, change the aggregation unit to "day".
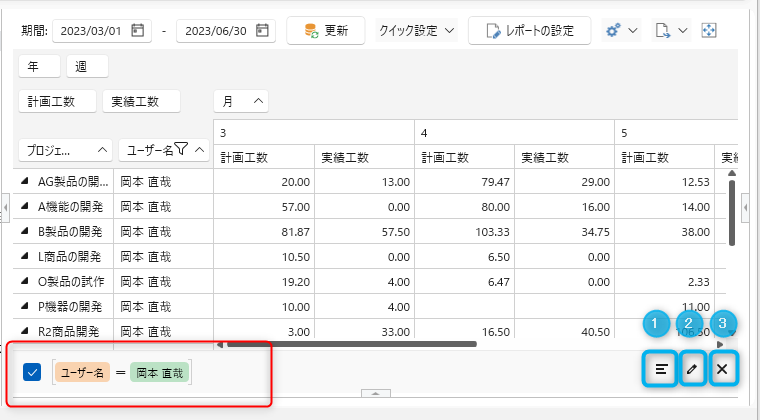
Report operations
Click to display the following menu.

-
The items to be expanded/compressed are ① and ② in the figure below.
You can partially perform the same operation by right-clicking on the field (③).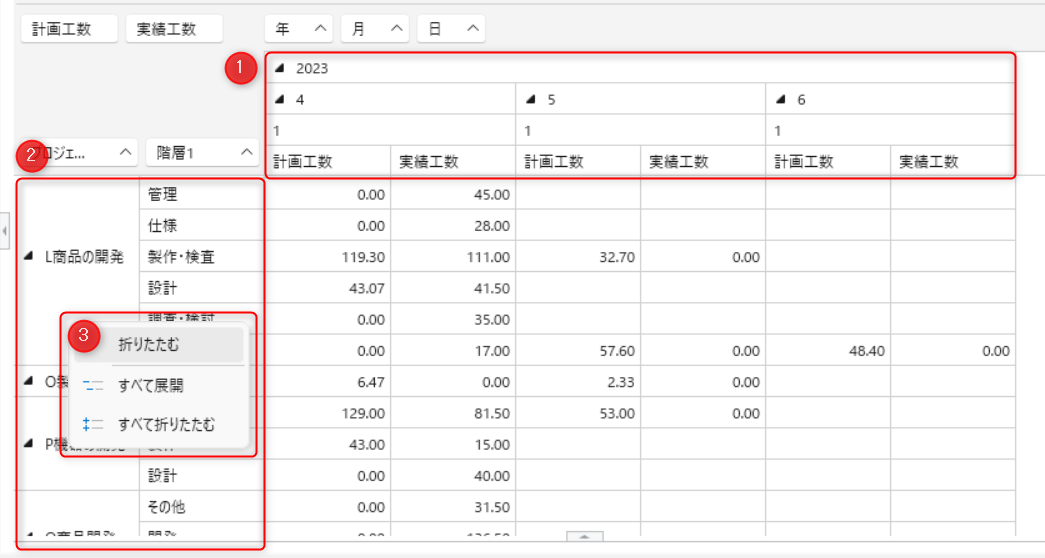 |
| -
Copy copies the selected range of grid/graph to the clipboard.
The operation method is the same as the following link: "Copy and Paste"
Setting grid options
Click "Show Options" on the Home ribbon to change the content displayed in the grid.
-
Display of total row
Switch between displaying and hiding ① to ④ in the figure below.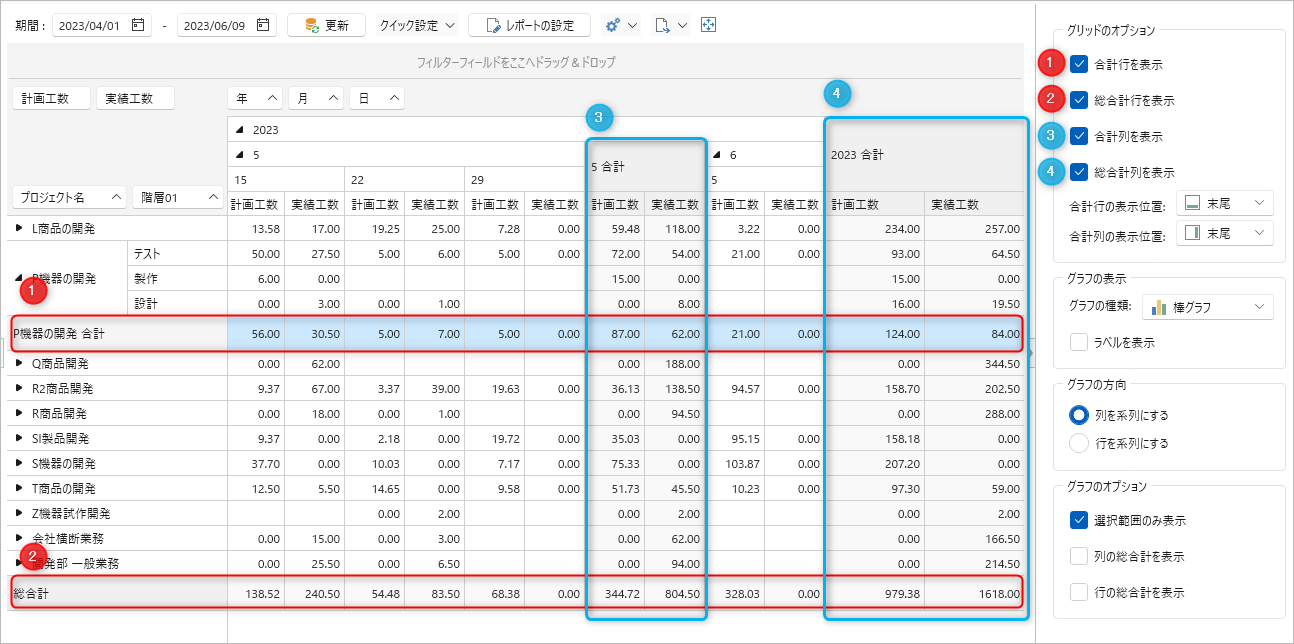
-
Display position of row
Switch the display location of the total row and column as shown in the figure below.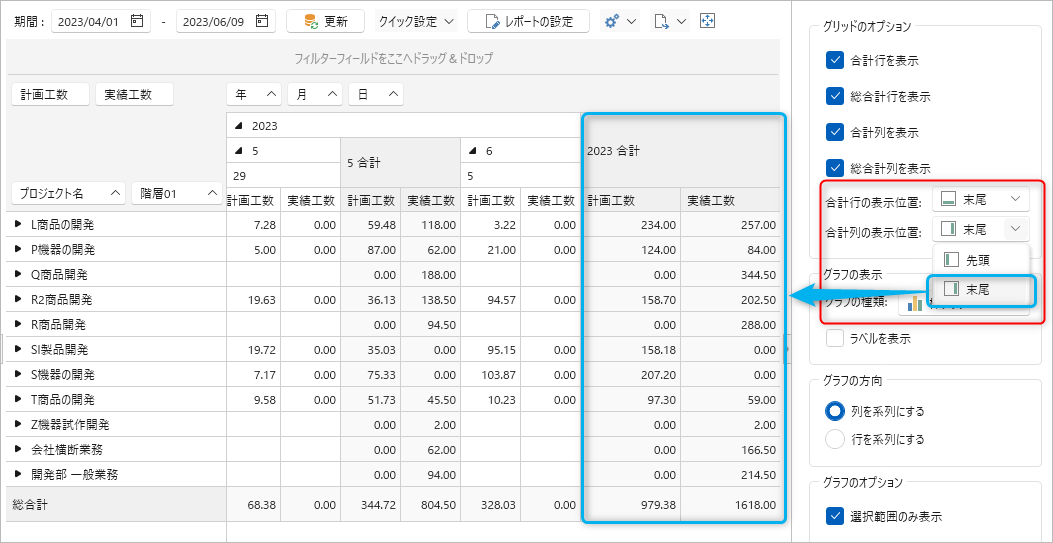
Change view
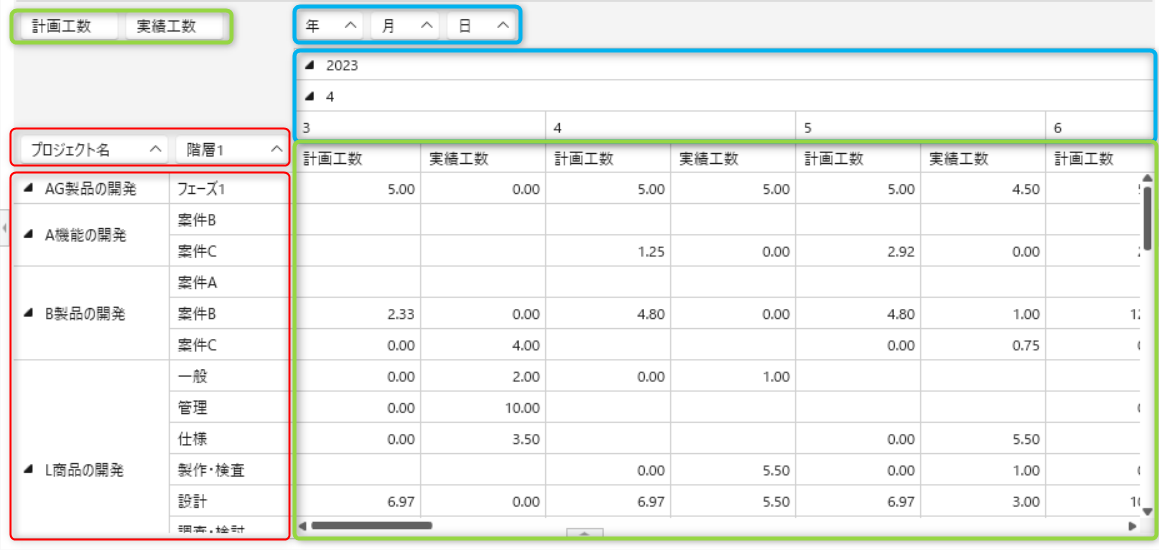
As shown below, the analysis view aggregates the values of fields specified by row (red), column (light blue), and value (yellow-green).
Rows/columns are grouped and aggregated in the order specified from left to right.
Example) Year → Month → Day
If you change the order by dragging and dropping the mouse, the change will be reflected immediately.
If you want to display the latest information, click the "Update" button.
Depending on the update frequency and amount of data, it may put a strain on the server PC.
You can reduce the communication load with the server by rearranging the fields, checking the report output, and clicking "Update" if there are no problems.
Show/hide fields
Show fields
Click "Field List" on the Home tab to display a list of available fields.
Add fields by dragging and dropping.
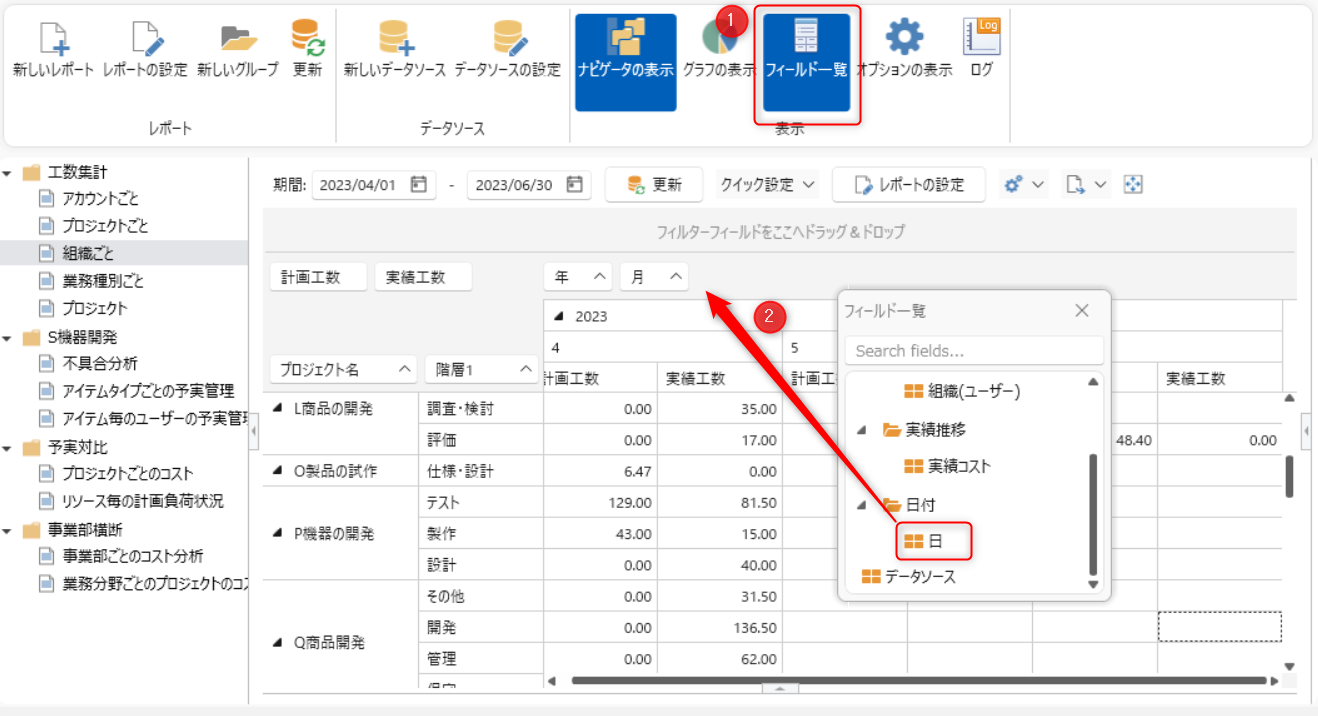
Displays fields that contain keywords in the field name.
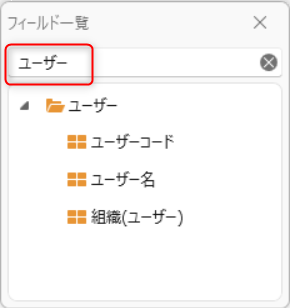
If the target field is not in the field list, click the "Report Settings" button and select the target field using the procedure in the following link. : "Create an analysis report"
Hide a field
Do the following to remove fields that you do not want to use in the analysis.
① Drag and drop to a location that is not to be analyzed.
② Drag and drop the target field to the "Field List".
③ Right-click on the target field and select "Hide".
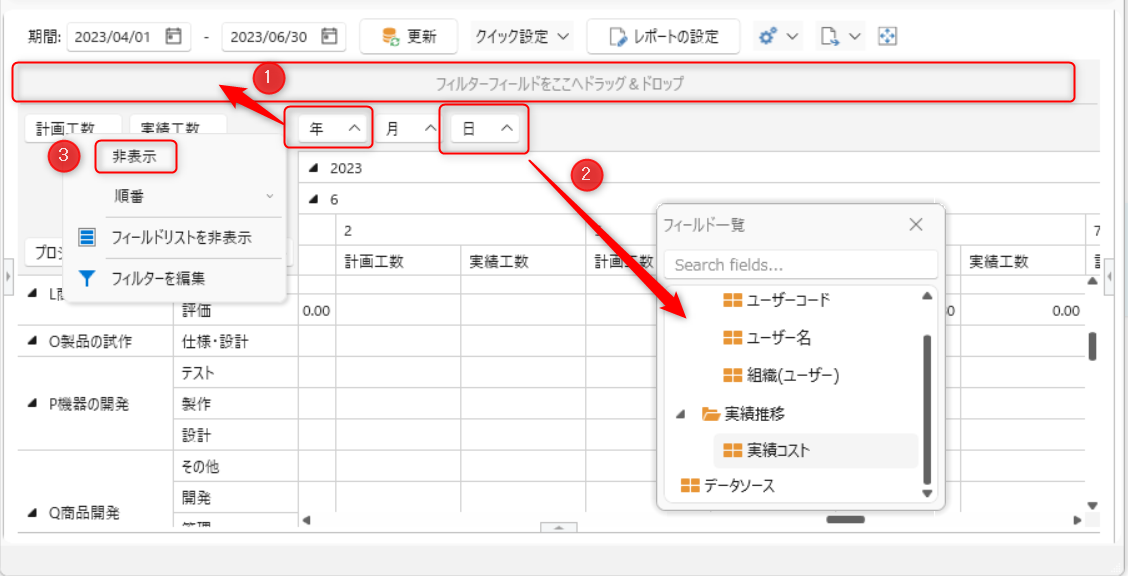
If you want to display them again, drag and drop them into the report.
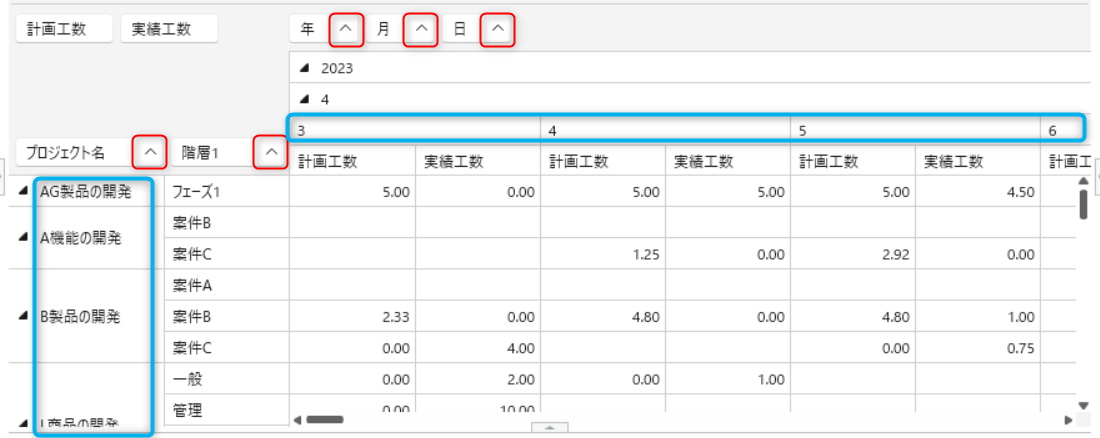
Change the row/column sort order
Sort by field order
Click the symbol next to the field name (red frame in the figure below) to change the sort order.
- Switch between ascending and descending order.
- For character strings, the order is alphabetical order.
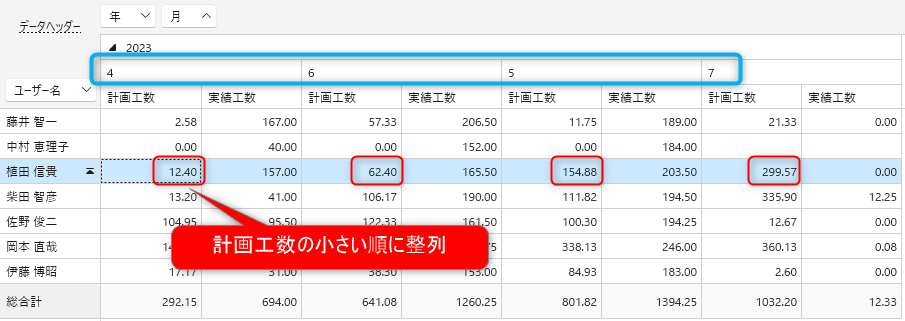
Sort by aggregated values
You can also sort by aggregated values.
For example, click the row/column field you want to sort as shown in ② below.
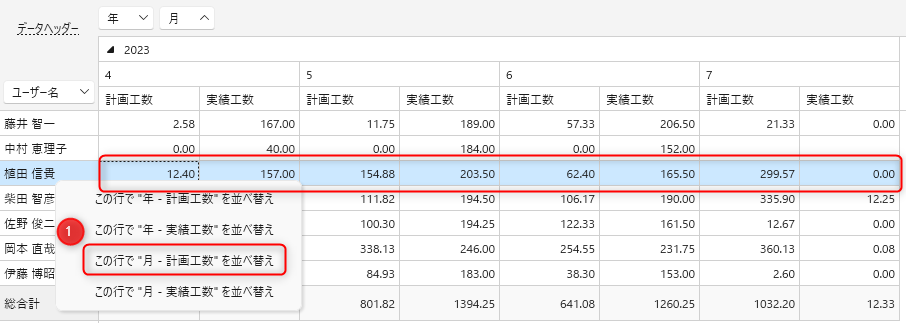
The results will be sorted in the specified order.
Filter aggregated results
You can narrow down the displayed content from the aggregated results by specific conditions.
Select the target according to the purpose of your analysis and visualize the facts efficiently.
The filtering method changes depending on the target field.
- Row/column fields
- Value fields
Filtering row/column fields
There are two main ways to filter, and the display during filtering is as follows.
- Set conditions with simple filter
- Set conditions with filter editor
- Red frame: Conditions of the displayed filter
- ①: Display the history of filter conditions.
- ②: Launch the "Filter Editor" and change the filter conditions. : "Filter Editor"
- ③: Clear the filter.
1. Set conditions with simple filter
Select the target field and select the symbol in ① below.
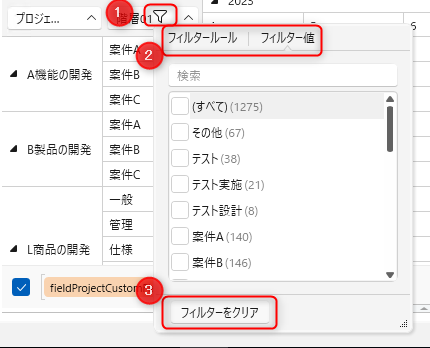
There are two types of filtering methods, as shown in ② above.
- Filter by value.
- Filter by rule.
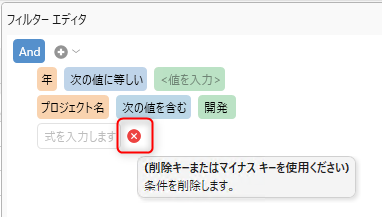
2. Set conditions in the filter editor
Right-click on the field to be filtered and click "Edit filter" to open the filter editor.
- You can enter filter conditions as shown in ① and ② below.
- Click the light blue "∨" to display the options (③ to ⑤) to add.
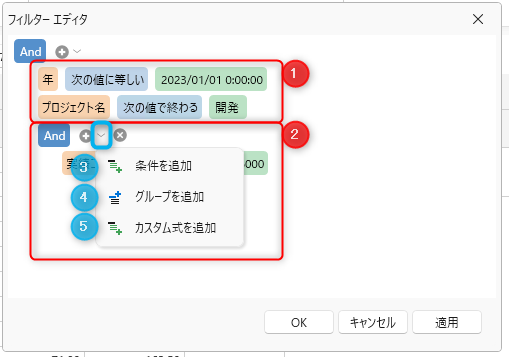
Define filter conditions by combining conditions such as AND/OR.
How to use the formula editor
Select "Add custom formula" to launch the formula editor.

- ①: Define the formula.
- Select the field from ②.
- Enclose the string in single quotes.
- ②: Select the field to use in the formula.
- ③: Select a group from the options (②).
- ④: Description of the selected field.
Value Field Filter
Clicking Filter in the value field will display the distribution of values as a histogram as shown below.
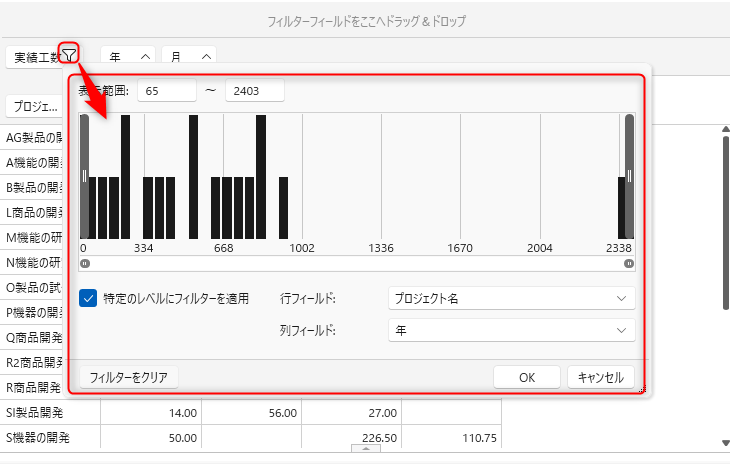
Specify the range to be displayed using the following method.
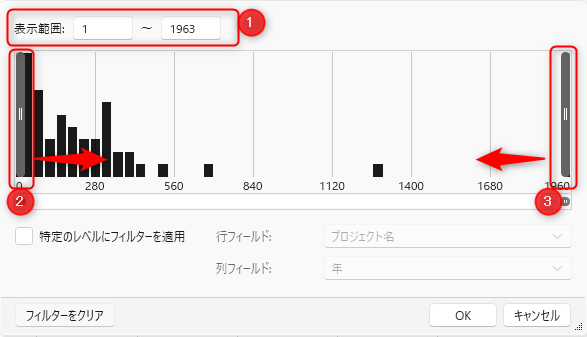
- Specify the value of ①.
- Move ② and ③ on the histogram to specify the range.
Click the "OK" button to display the fields in the specified range.
-
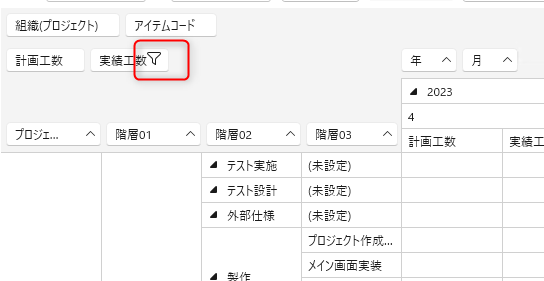
The following mark is displayed for filtered fields.
-
To clear, display the filter editor again and click "Clear filter".
- Check "Apply filter to specific level" and specify row/column fields to display at the specified granularity.
- Click the "OK" button to display the fields at the specified granularity.
Example) If you specify "Row: Project, Column: Year" as shown below, projects with less than N hours per year will not be analyzed.
