Create an analysis report
Overview
TimeTracker Analytics aggregates all data entered in TimeTracker RX, such as costs, process classifications, and custom field values.
Create an analysis report based on the data you want to aggregate.
Creating an analysis table
From here, we will explain the steps to create an analysis report.
-
Open the new report creation dialog.
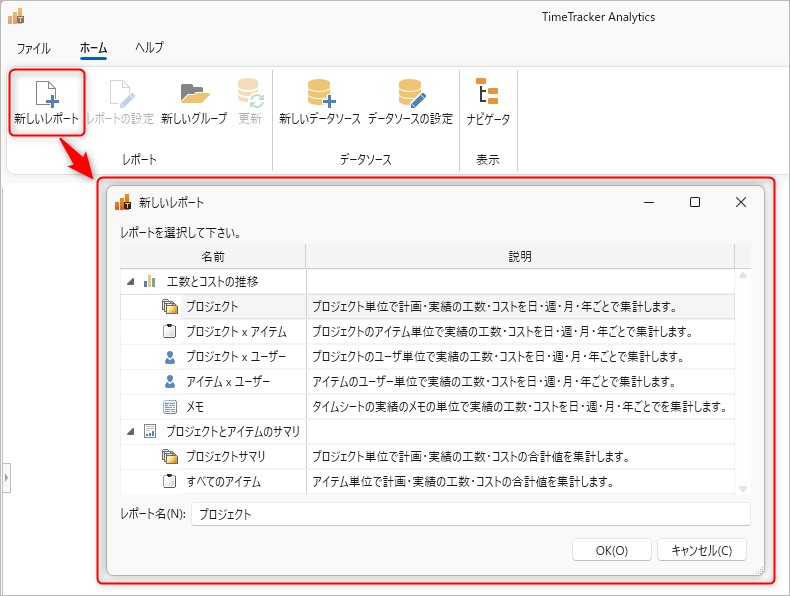
There are two main types of analysis reports:
- Trends in labor hours and costs
- The target data is aggregated for a specified period.
- The aggregated results are displayed in units such as days, weeks, months, and years.
- You can freely change the unit of aggregation.
- Project and item summary
- Aggregates the planned/actual times/cost totals in the specified unit.
Analysis report detailsAlthough there are detailed items in the two types above, the analysis content is the same, only the preset display fields and analysis data are different.
Example) "Project" is the project axis, "Item x User" is the user axis, etc. - Trends in labor hours and costs
-
Select the target report, enter the report name, and click the "OK" button.
If you want to change the report type (transition of man-hours and costs/project item summary), create the report from scratch. -
Make sure that the target data source is selected in the "Data source" field.
For details on the data source, see the following link. : "Data source settings" -
In "Display field", select the field you actually want to analyze.
Selecting a field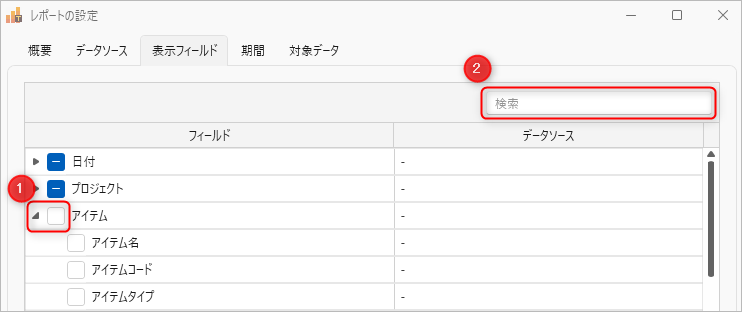
- ①: Check a group to check all the fields it belongs to.
- ②: Enter the field name to display the target.
-
Specify the "period".
-
This item is set when you select the "Effort and cost trends" analysis report.
-
The report will be aggregated in the unit specified in "Aggregation unit".
Depending on the unit specified, the upper limit of the period that can be aggregated is as follows.- Year: 10 years
- Month: 5 years
- Week: 1 year
- Day: 2 months
If you do not need to aggregate by day, we recommend specifying "week" or "month".It works more smoothly because it processes a chunk of data.
-
-
Select the target data.
When you select the filter target, the target data will be displayed, so please check it.
Click the "OK" button to complete the creation of the analysis report.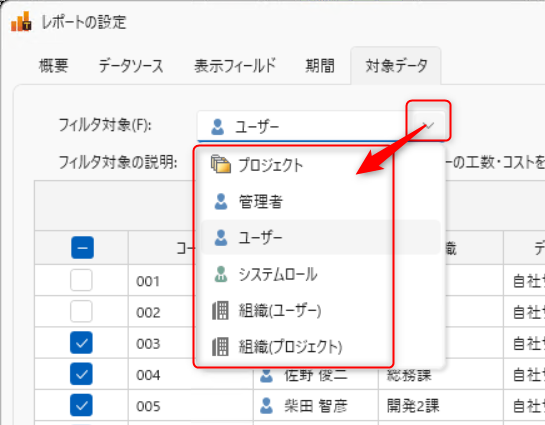 To narrow down the target data, please refer to the following link: "Select target data"
Select target data
In the Select target data tab, select the data to analyze.
If there are many data, you can select efficiently by narrowing down the data using the following method.
-
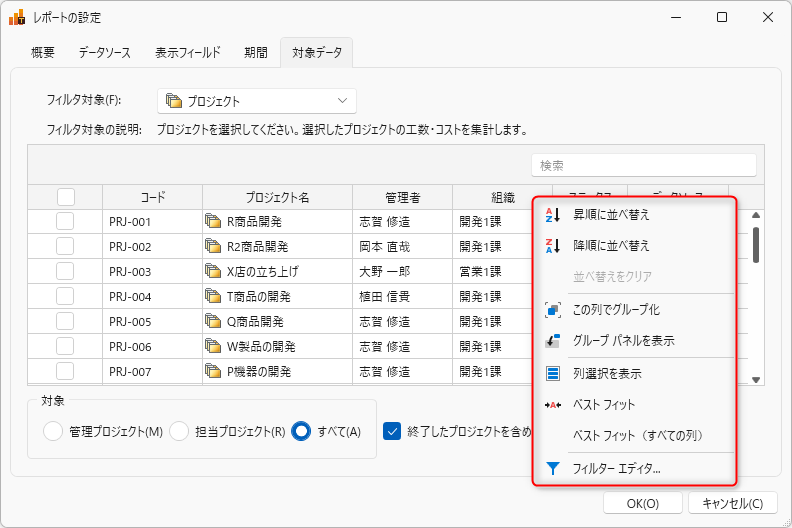
Filter
Click ①. There are condition filters (②) and value filters (③).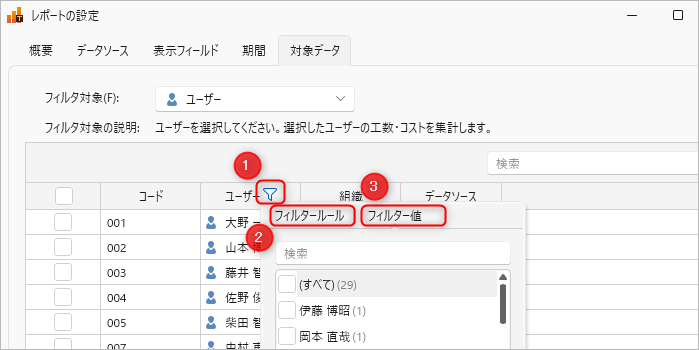
You can also filter selected data. -
Change sort order
Click on the area (①) where the field name is not displayed.
Filter by the target column.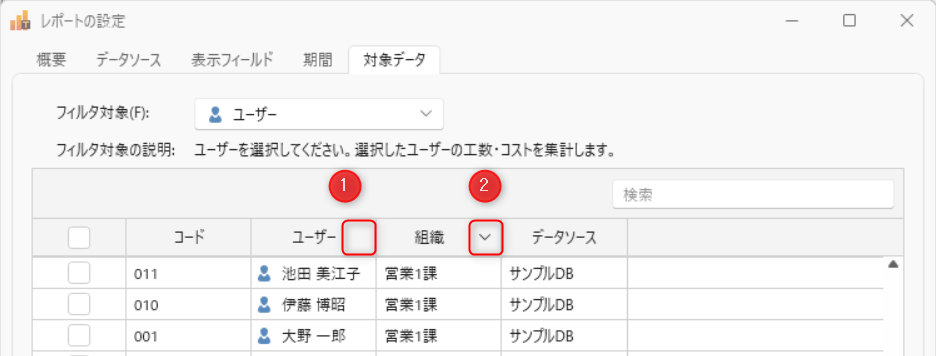 ② is the column whose sort order has been changed. Click again to change the ascending/descending order.
 -
Grouping
Group and organize the data displayed in the list.It is useful to display the group panel.Right-click on the column header and select "Show group panel" to display it.
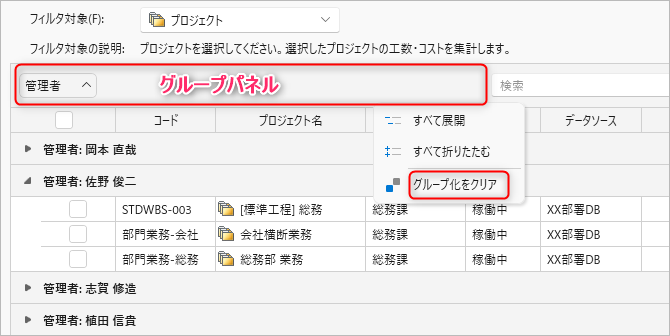
- To group the relevant column
- Right-click the header of the column you want to group and select "Group by this column".
- Drag and drop the relevant column into the group panel.
- To ungroup
Right-click the group panel and select "Clear grouping".
- To group the relevant column
-
Showing/hiding columns
Right-click the header of the column and click "Show column selection".
You can toggle the display of columns on and off in the "Column selection" dialog that appears.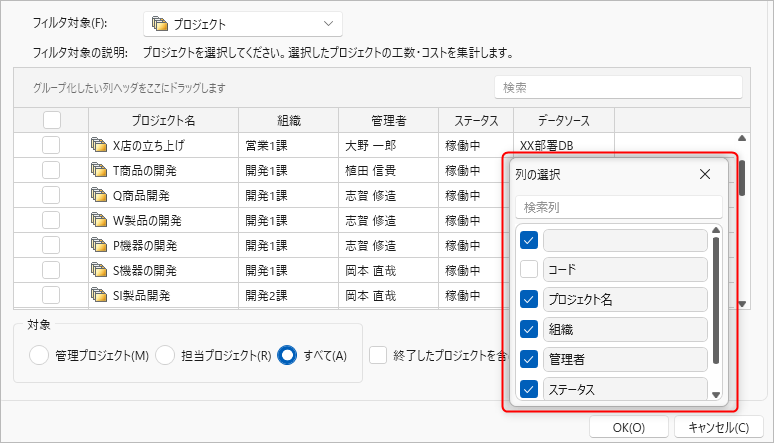
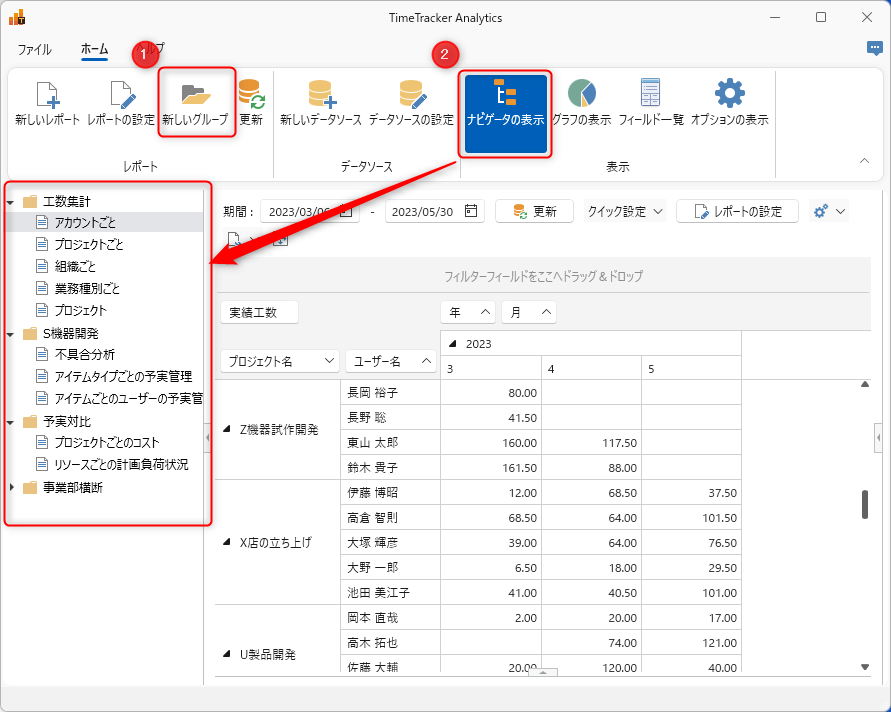
Group display of analysis report
Create a group in "New group (①)" to classify the analysis report you created by the unit you want to manage.
Sharing analysis reports
Currently, TimeTracker Analytics does not allow you to share the analysis reports you create.