Install
The Excel Integration Add-in is a convenient feature that allows data to be linked between TimeTracker and Excel reports.
To use the Excel Integration Add-in, you must first install it on the client PC.
This page explains the installation procedure for the Excel Integration Add-in.
Installation
The installation procedure for the Excel Integration Add-in is as follows:
- Administrator privileges are required for the target client PC to perform the installation.
- If you have already installed an older version, simply run the installer for the new version.
-
Run "TimeTrackerExcelAddinInstaller【version number】.exe" included with the TimeTracker installer.
-
Click "Next" on the "Welcome to the TimeTracker Excel Integration Add-in Setup Wizard" screen.
-
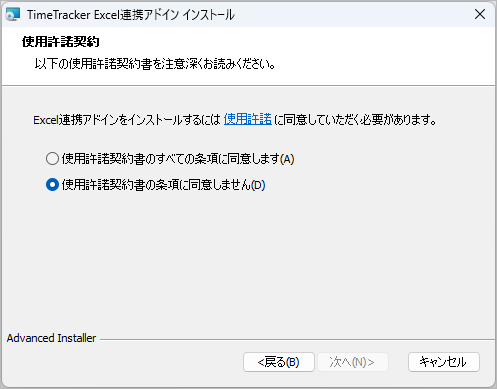
On the "License Agreement" screen, select "I agree to all the terms of the license agreement" and click "Next."
-
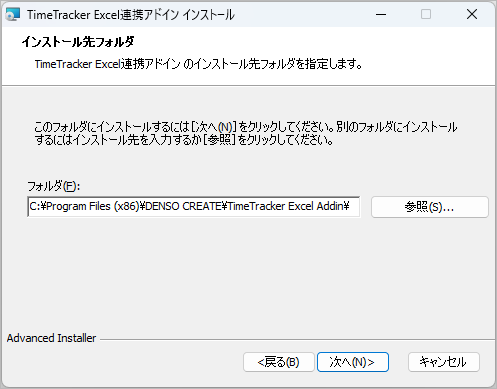
On the "Installation Folder" screen, specify the installation location for the Excel integration add-in and click "Next."
-
On the "Installation Preparation Complete" screen, click "Install."
The installation will begin, so please wait for it to complete.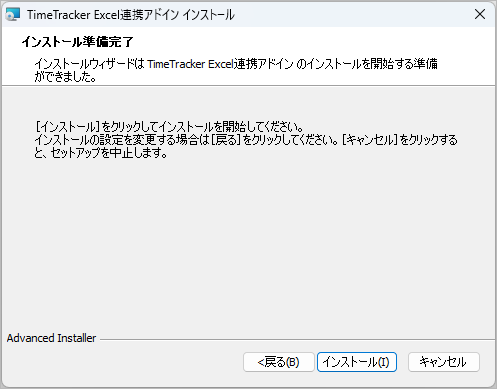
-
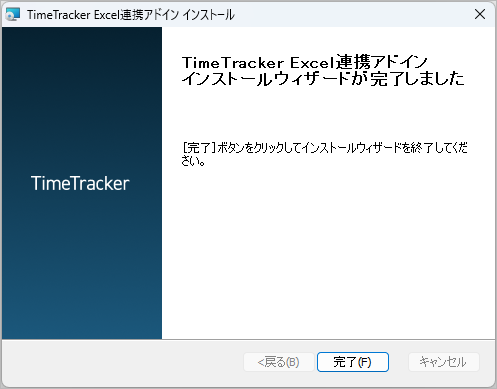
On the "Installation Complete" screen, click "Finish" to complete the installation.
Installing the Excel integration add-in adds a "TimeTracker" tab to the Excel ribbon.
Please close Excel and then restart it.
For first-time users, please configure the connection information using the method described in the following link.
"Setting the information required for integration"
Silent Installation
The Excel integration add-in can also be installed using silent installation, which does not require any on-screen operation.
TimeTrackerExcelAddinInstaller(version number).exe /qr
Setting the Information Required for Integration
Enter the information for the TimeTracker you want to integrate with.
- This process should be done the first time you use it. Once set up, you won't need to configure it again.
- You can also change the connection information later using this procedure.
Select the "TimeTracker" tab in Excel.

Set the various items and try performing the Excel integration operation.
Setting Connection Information
Enter the following in the settings dialog that appears.
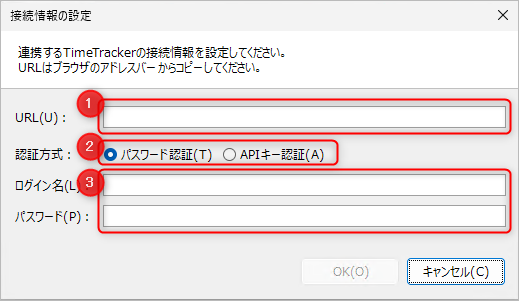
- ① TimeTracker URL
The URL of any screen, such as the timesheet or planner, is acceptable.
- ② Type of Authentication Information
- ③ Authentication Information: The content to enter differs depending on ②.
- For "Password Authentication": Specify the login name and password used to log in to TimeTracker.
- For "API Key Authentication": Enter the key obtained using the procedure "Generate API Key".
Click the OK button, and the settings are complete when "Settings have been applied" is displayed.
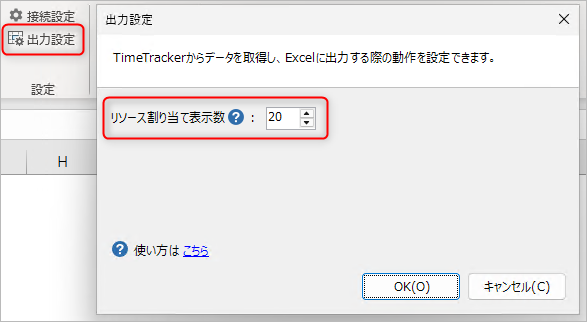
Resource Assignment Settings
Resources assigned to TimeTracker items will have their resource names listed in the "Resource Assignment" column when reflected in Excel.
Set the maximum number of resources whose names are displayed using the following method:
Uninstalling
Uninstall any unnecessary Excel integration add-ins from the list of applications in the Control Panel. The name displayed in the application list will be "TimeTracker Excel Integration Add-in".