Setting up SSO with SAML authentication
Overview
SAML authentication is configured in the following three steps:
-
Configure the necessary information for TimeTracker RX and the linked service.
-
Verify that the integration is possible.
-
Configure the users to enable SSO.
Please check the following link for important notes regarding the configuration: "SAML Authentication Notes"
Configuring TimeTracker RX and the Linked Service
This example uses Microsoft Azure AD to configure TimeTracker RX and the linked service.
The screens may change depending on the provider. Please check with your provider for details.
-
Log in to TimeTracker RX with a user account that has administrator privileges and open the system administration screen.
-
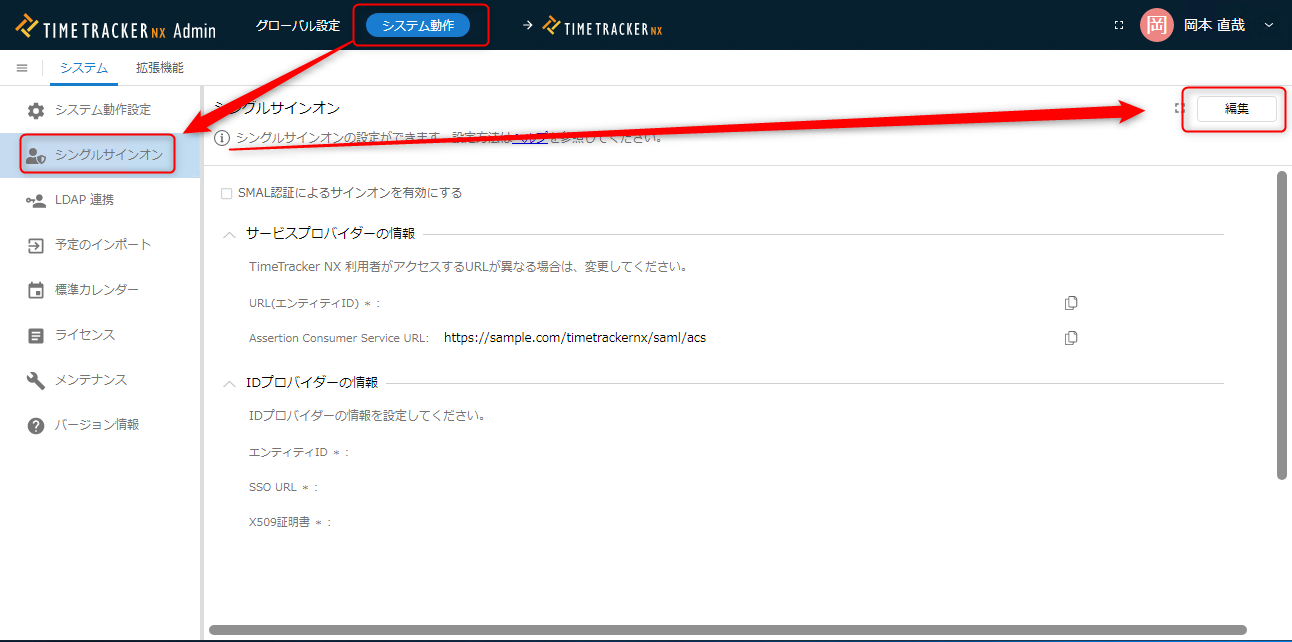
Navigate to the screen shown in the image below and click the "Edit" button.
-
Check "Enable sign-on with SAML authentication" (① in the image below).
The "URL (Entity ID)" and "Assertion Consumer Service URL" will be displayed; copy and paste them into a text editor.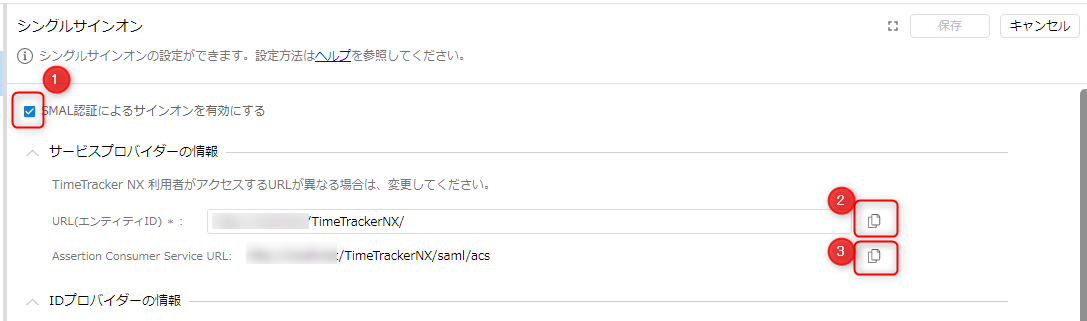 You can copy the values by clicking ② and ③.
 -
Log in to the following link with your Microsoft account. : "Microsoft 365 Admin Center"
-
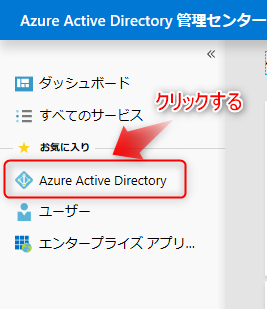
Click "Azure Active Directory" from the side navigation.
-
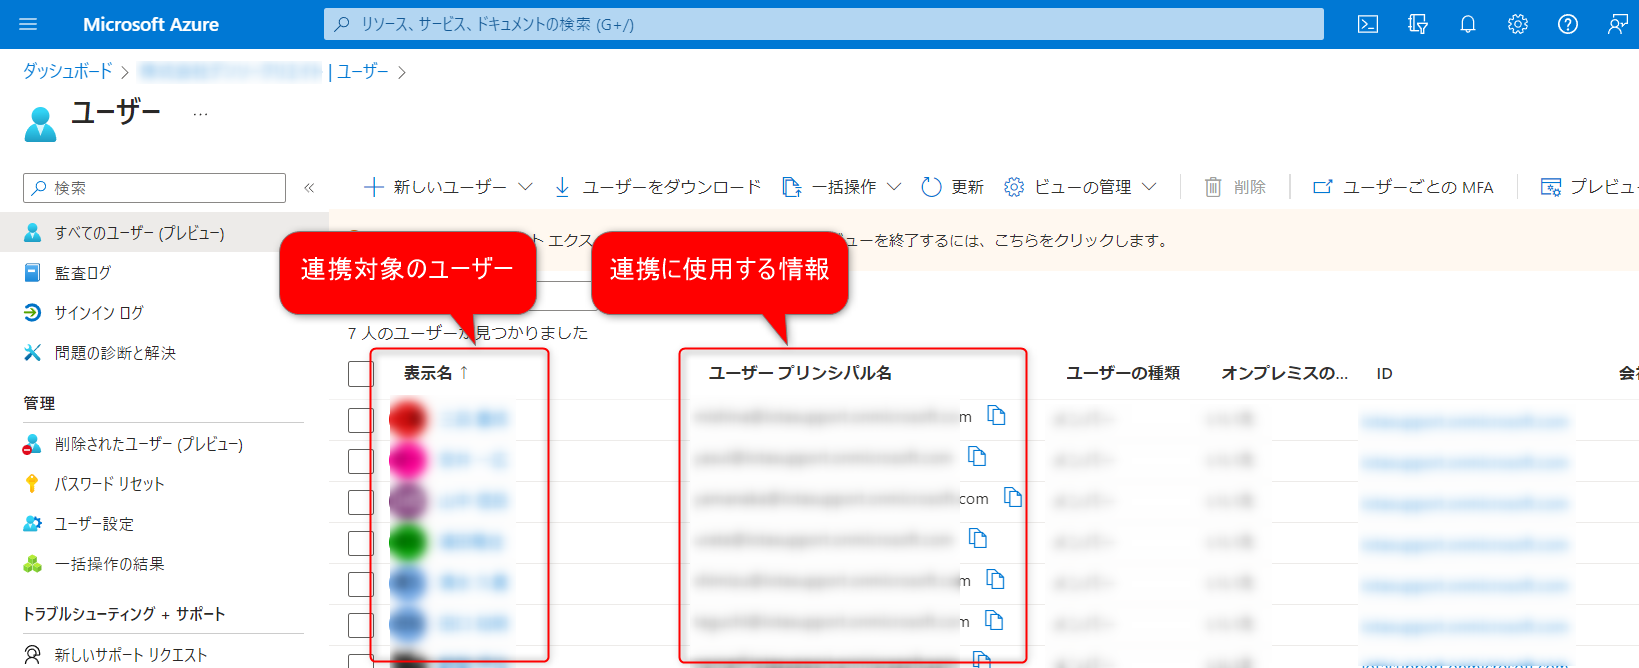
Click "Users" from the side navigation on the next screen.
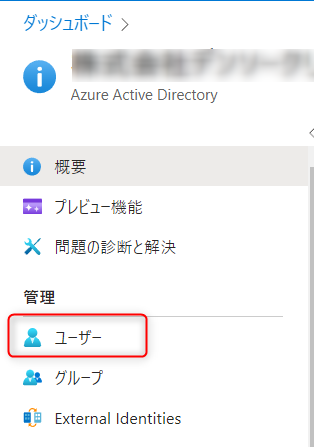
The users displayed on the next screen are the users to be linked.
If there are any missing users, please add them beforehand.
-
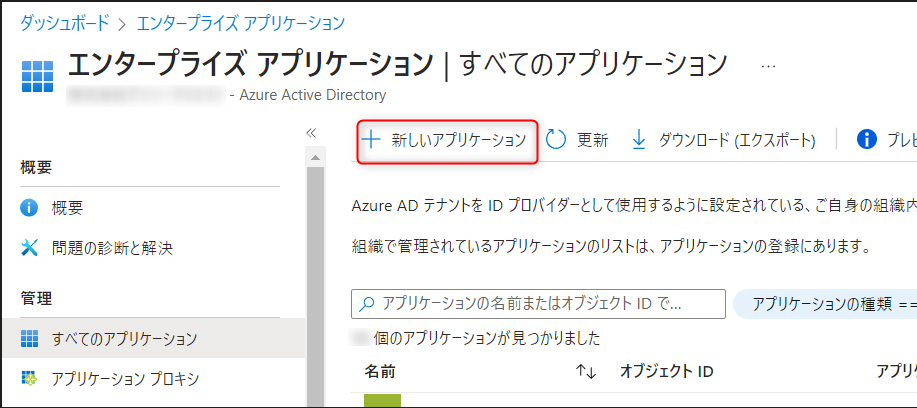
Click "Enterprise Applications" from the side navigation.
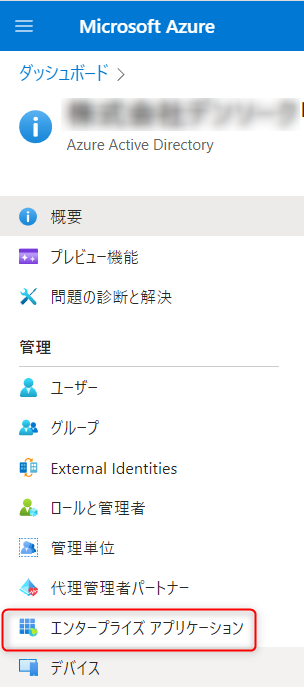
On the next screen, click "New Application".
-
On the next screen, perform the following steps and click "Create".
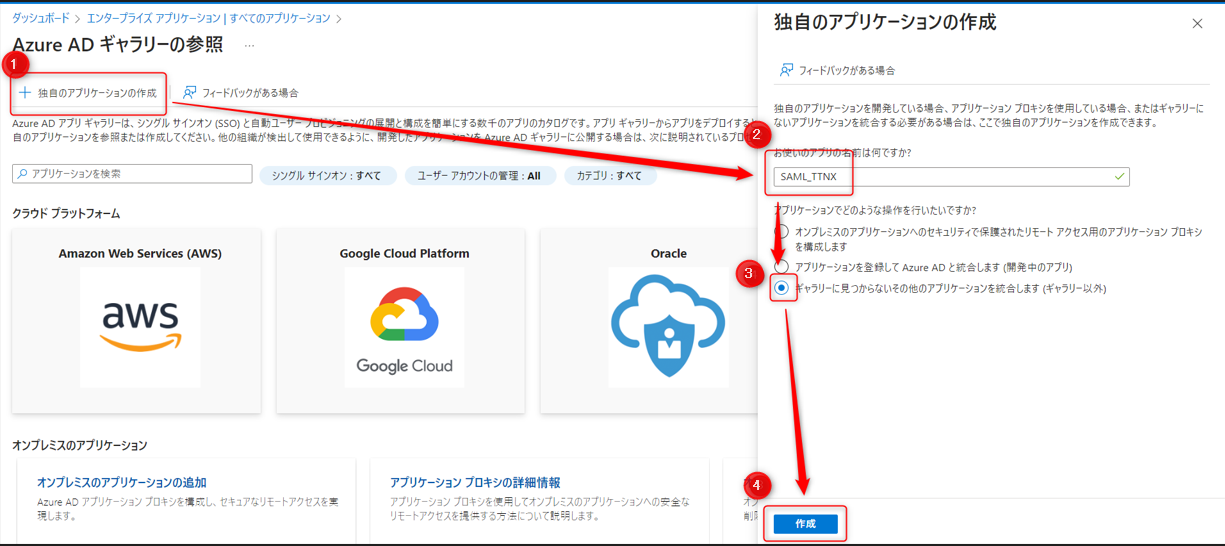
- ②: Give it a name of your choice.
- ③: Check this box.
-
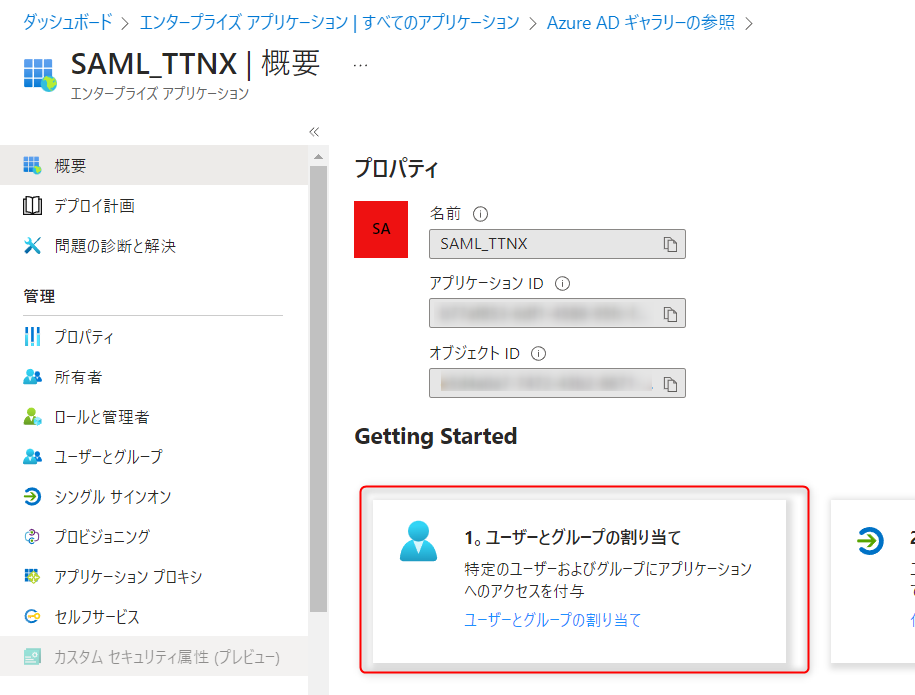
On the next screen, click "Assign Users and Groups".
On the next screen, click "Add User or Group".

-
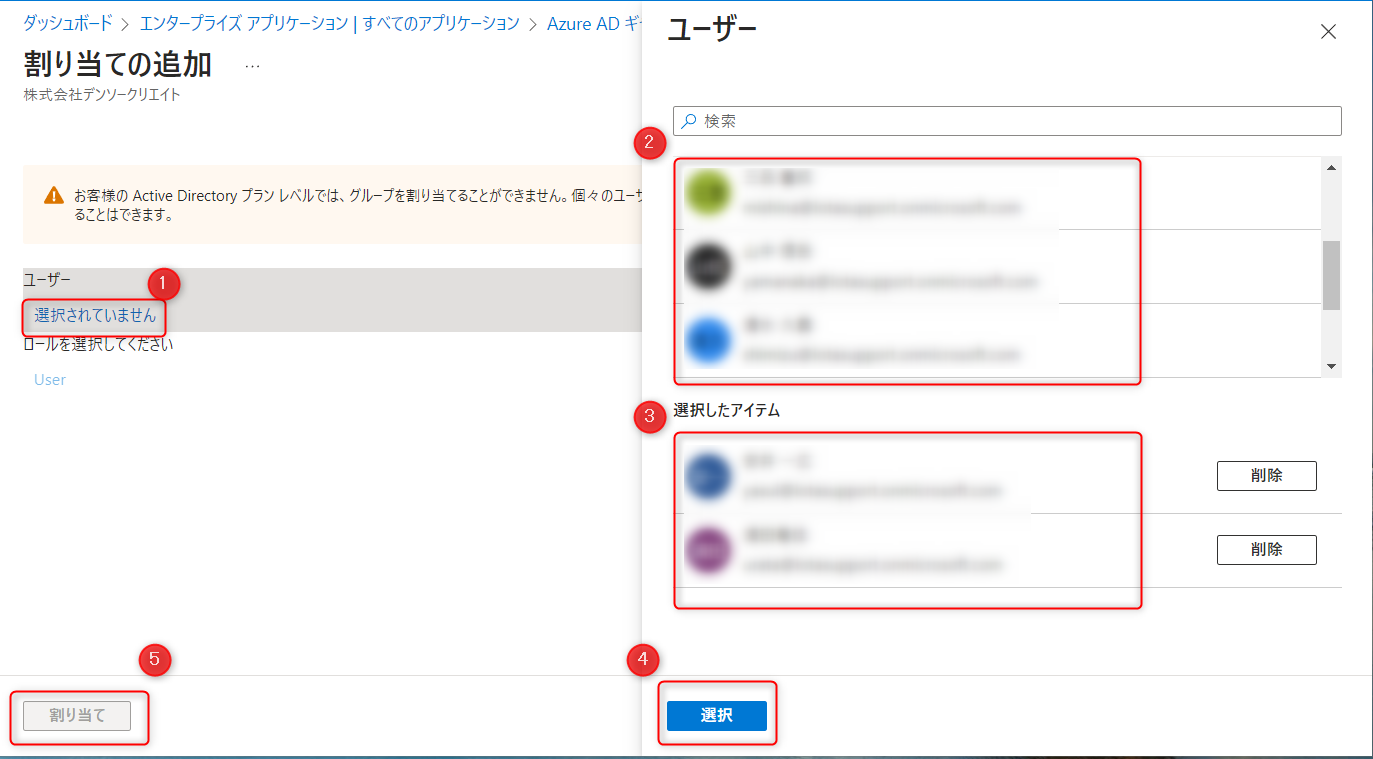
On the next screen, perform the following steps to add a user.
-
Clicking ① will display a settings dialog on the right.
-
Select the target user from ②. Once selected, they will appear in ③.
-
Clicking "Select" in ④ will activate ⑤. Click ⑤.
-
-
On the next screen, select the following.

-
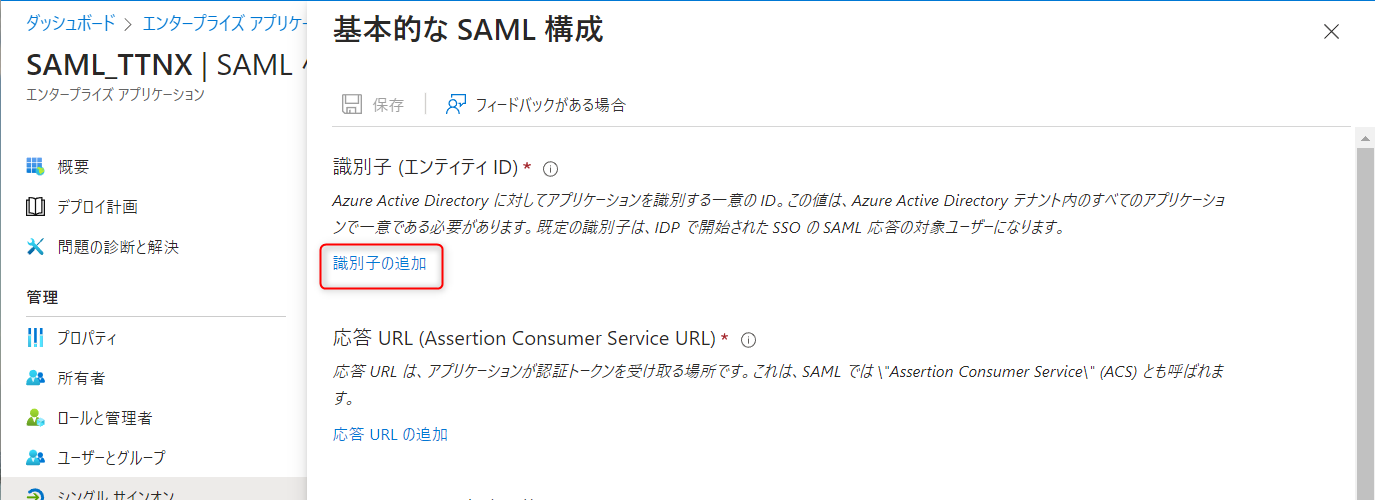
On the next screen, click "Settings".
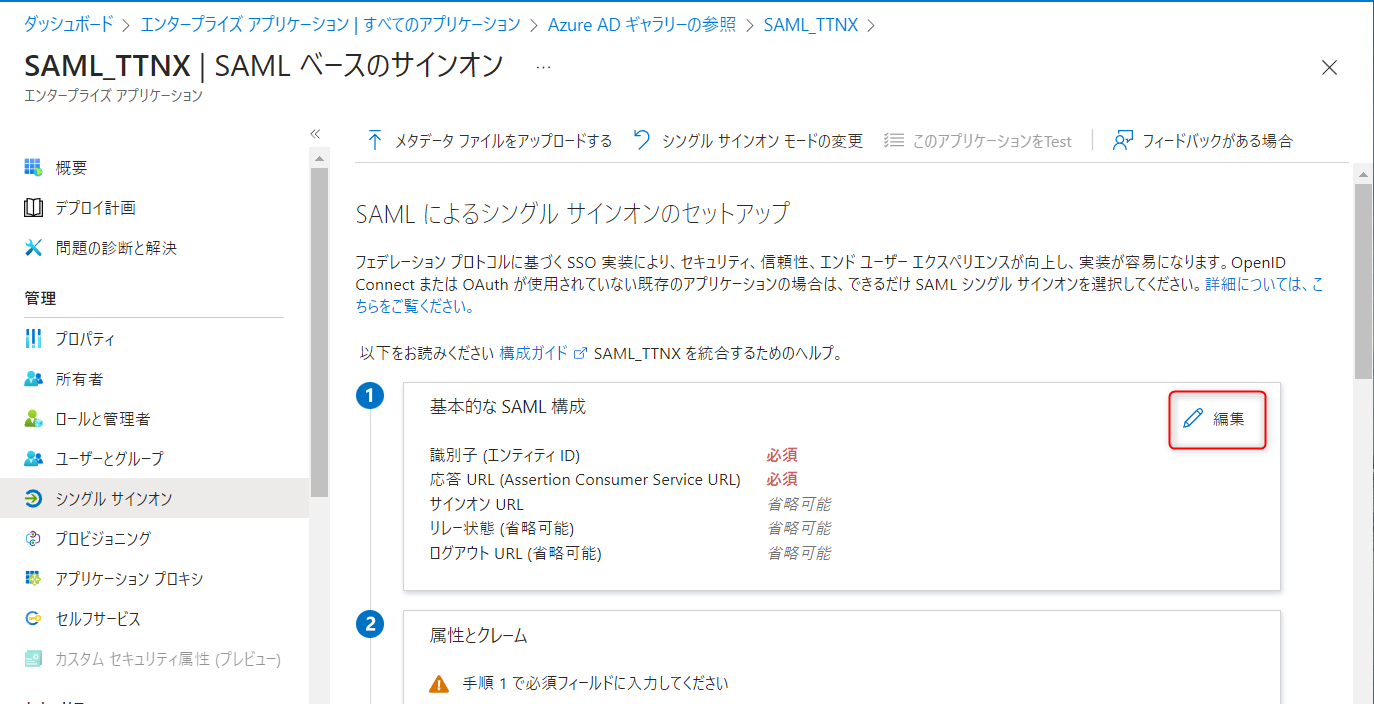
On the next screen, click "Add Identifier".
-
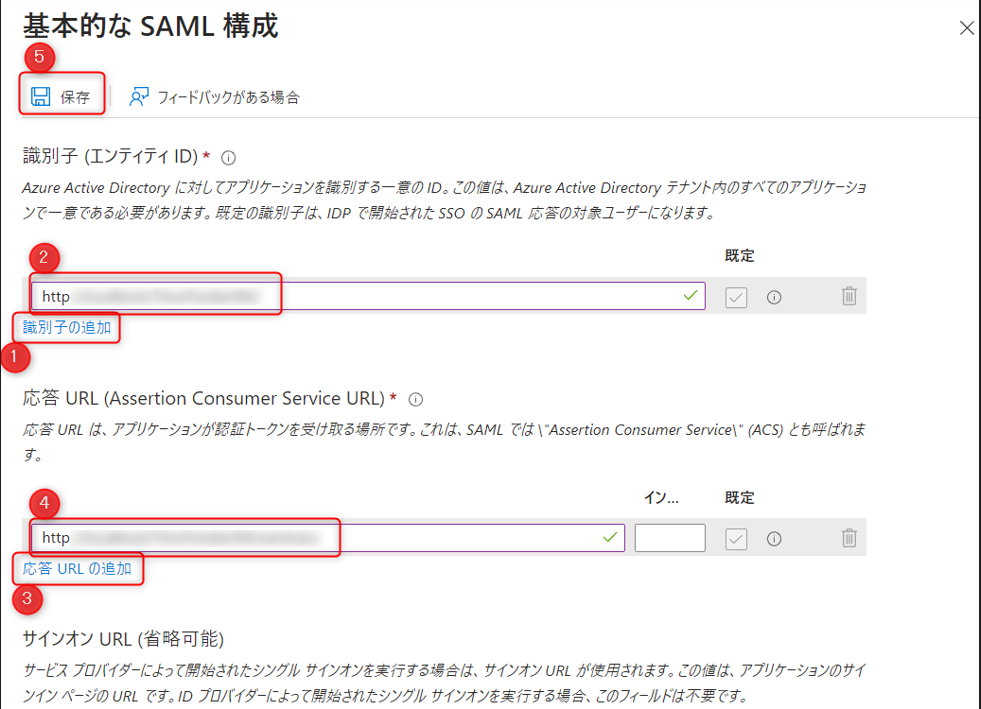
Perform the following operations in the displayed dialog box.
-
Click ① and paste the "URL (Entity ID)" noted in "Step 3" into ②.
-
Click ③ and paste the "Assertion Consumer Service URL" noted in "Step 3" into ④.
-
Click Save in ⑤.
-
-
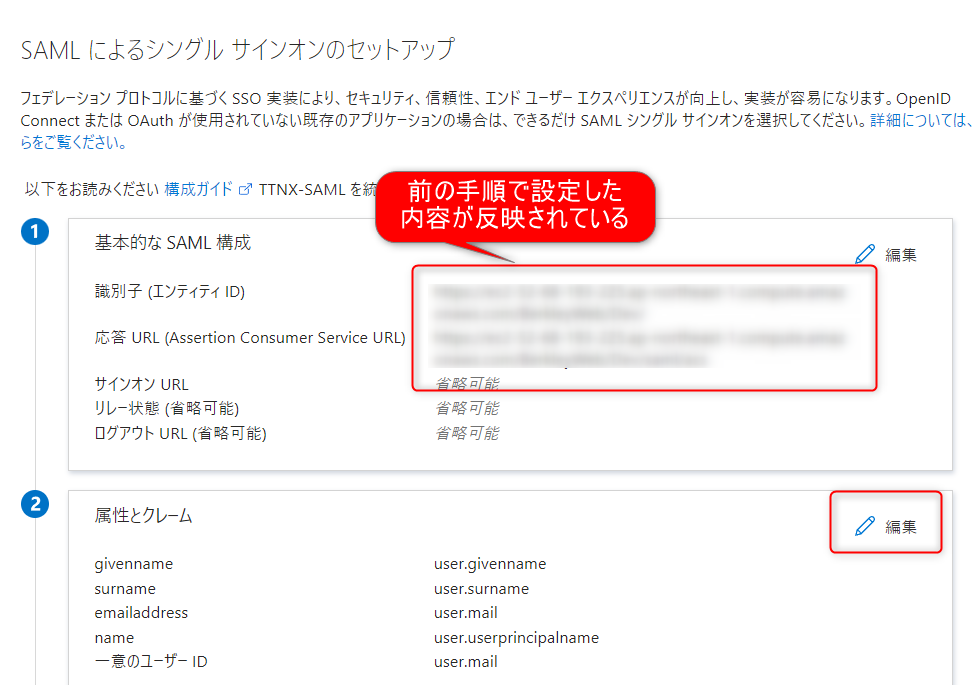
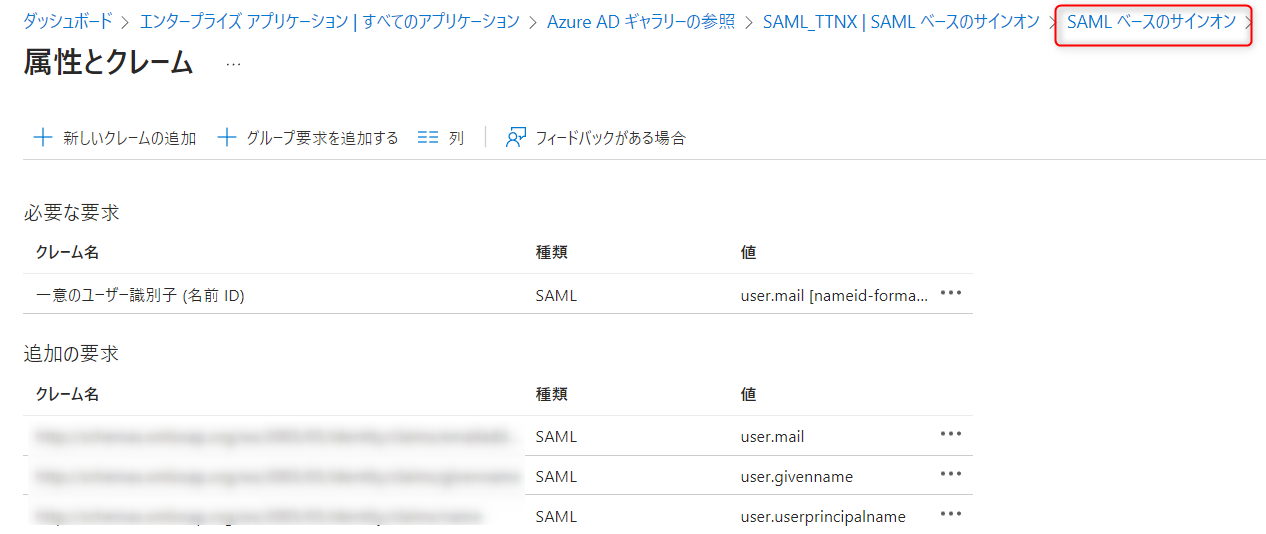
On the next screen, confirm that the settings you configured in the previous step are reflected. ② Click "Edit" under "Attributes and Claims".
-
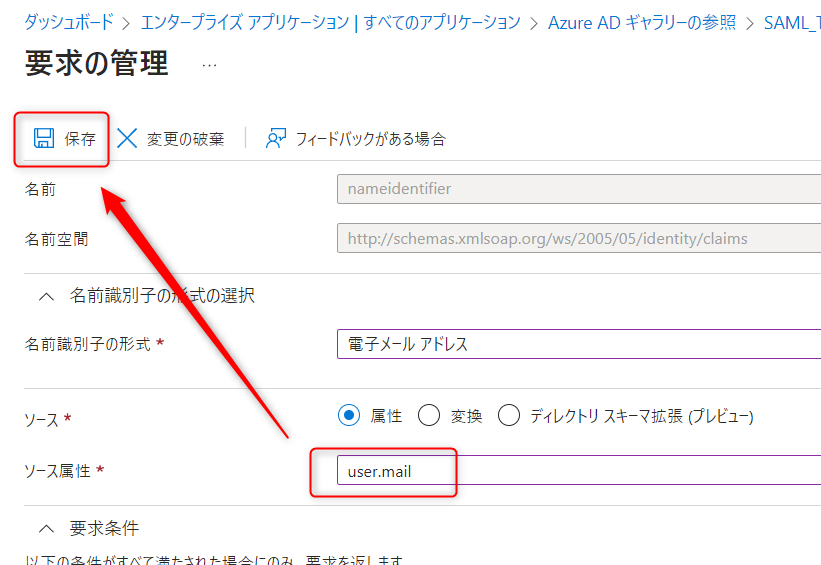
On the next screen, double-click "Unique User Identifier".
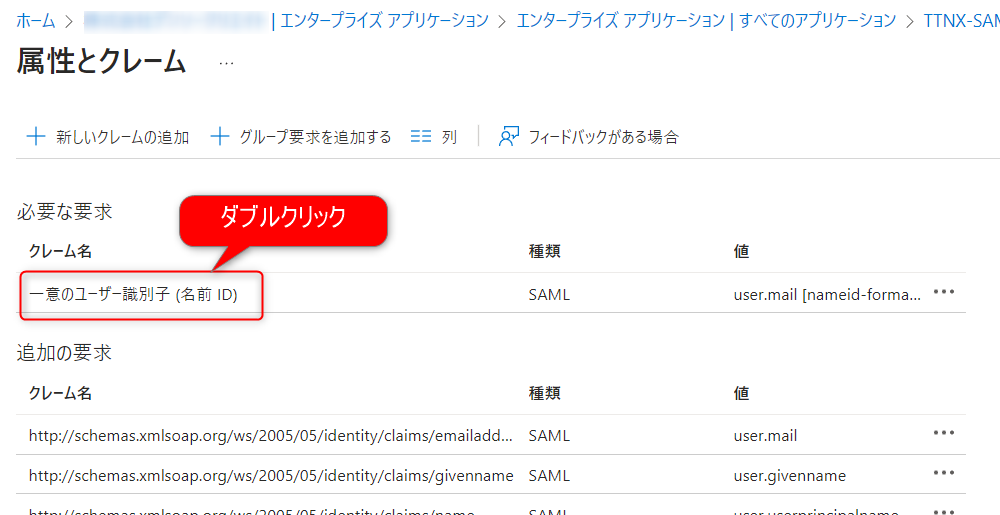
In the dialog box that appears, enter "user.mail" in "Source Attribute" and click "Save".
-
On the next screen, click "SAML-based Sign-On" to proceed.
-
On the next screen, copy the "App Federation Metadata URL" under "③ SAML Certificate".
You can copy it by clicking ① in the image below.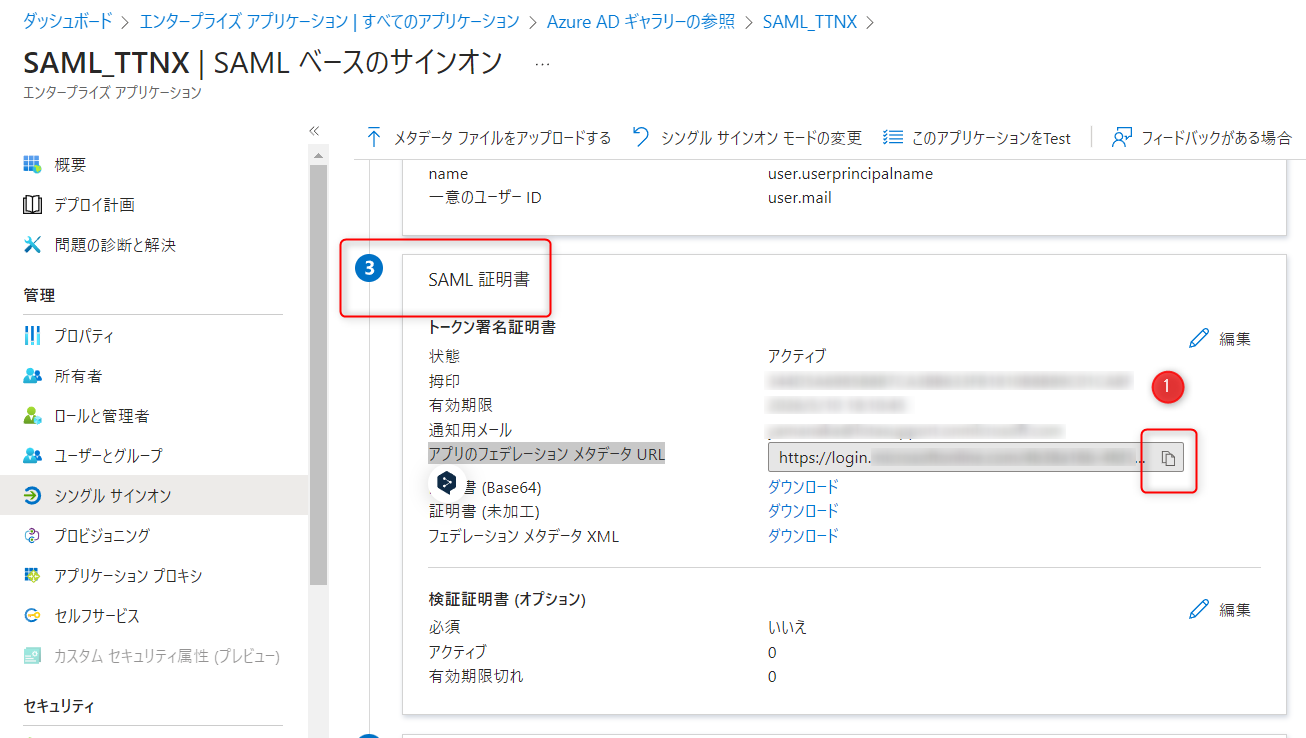
-
Open the URL you copied in the previous step in your browser.
Search for the keyword "<X509Certificate>" and copy the string between "<X509Certificate>" and "</X509Certificate>". ~
~ 
Paste the string you copied here into the "X509 Certificate" field in the TimeTracker RX settings screen.
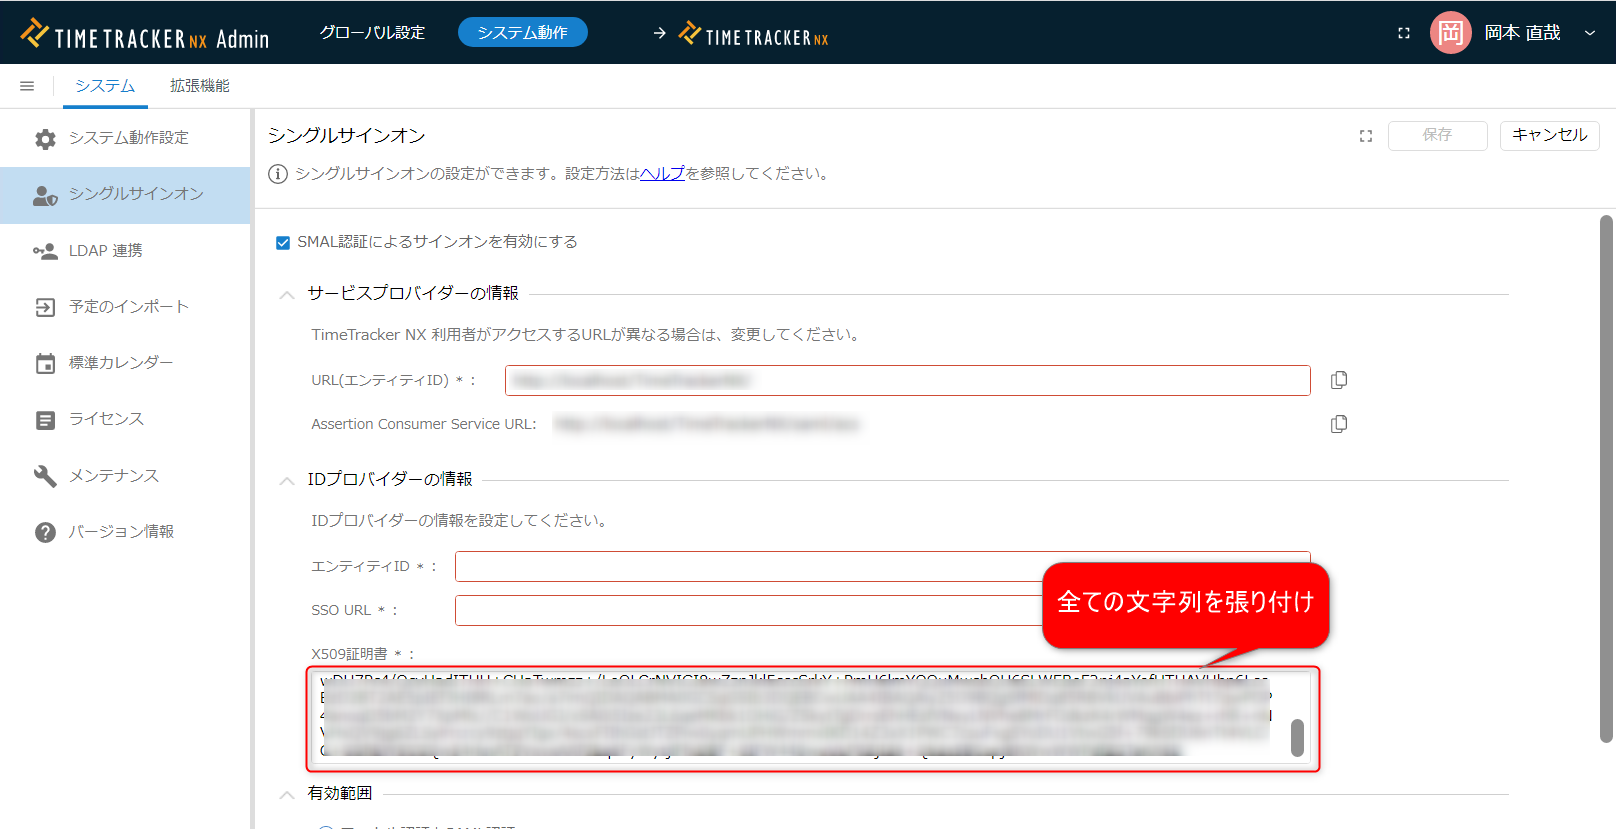 Authentication will not work correctly if the pasted string is incomplete. Please check the range you are copying.
 -
Return to the Microsoft Azure AD settings screen and paste the values of the following items in "④ Setup of [Set-up App Name]" into TimeTracker RX.
Microsoft Azure AD Item TimeTracker RX Item Login URL SSO URL Azure AD Identifier Entity ID 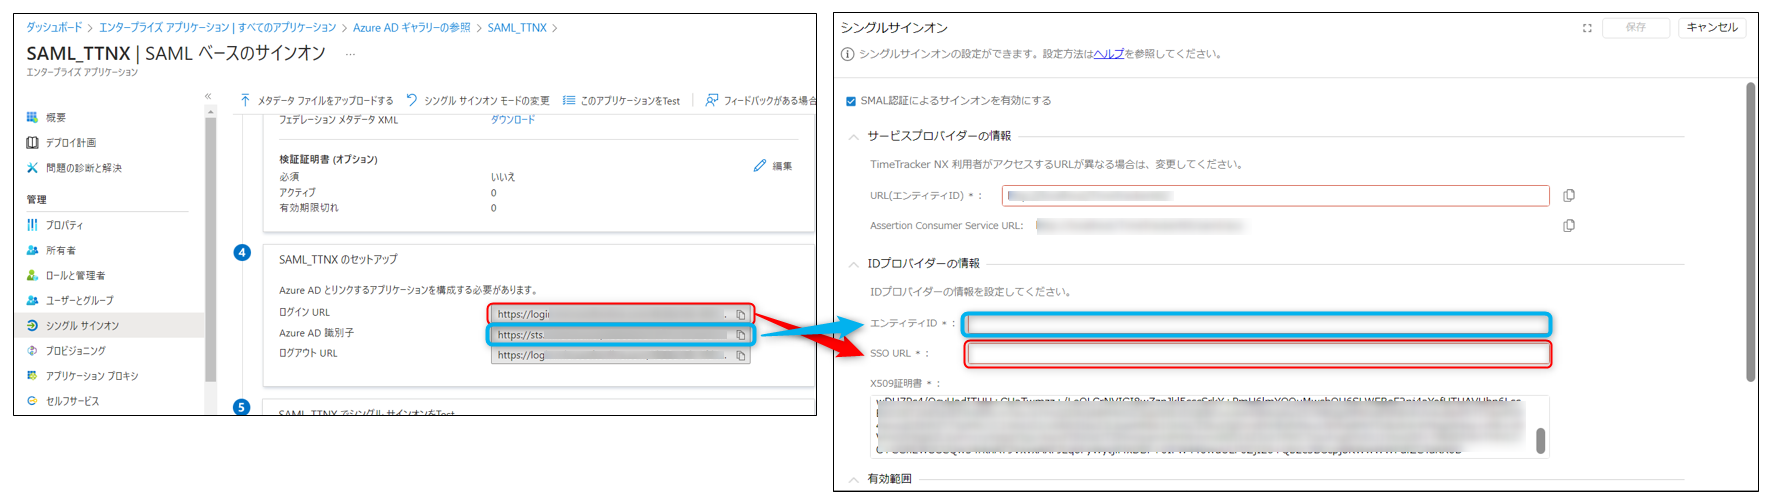
-
On the TimeTracker settings screen, confirm that "Scope" is checked as "Local authentication and SAML authentication," and
Click "Save."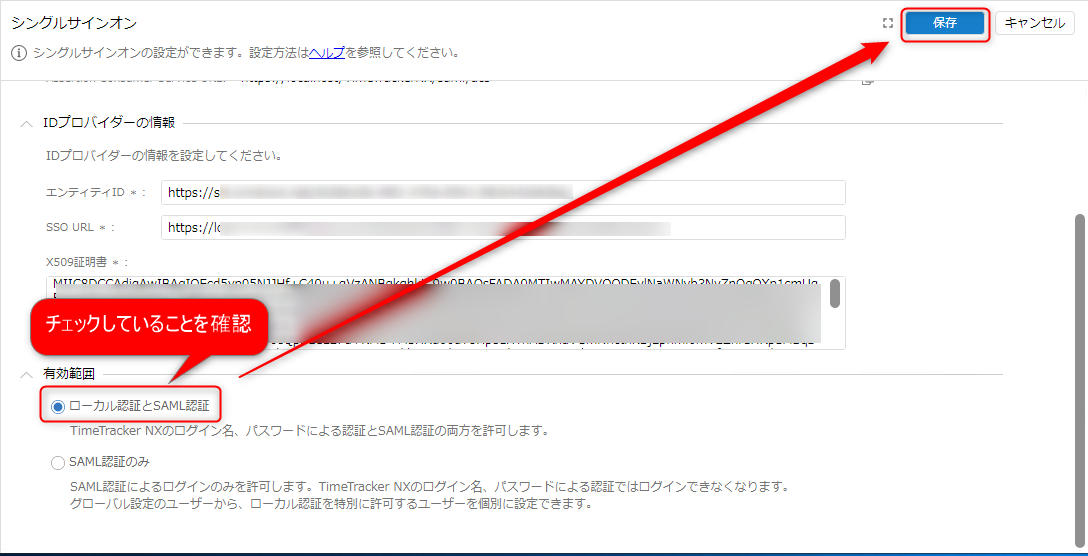 If "SAML authentication only" is checked, you will not be able to log in if the authentication settings fail.
First, confirm that SSO integration works correctly with "Local authentication and SAML authentication."
The setup is now complete.
Next, let's check if the settings are correct.
Checking Settings
-
Log out of TimeTracker RX and log in with an account that has administrator privileges. If SSO integration is enabled, you will see the following login screen.
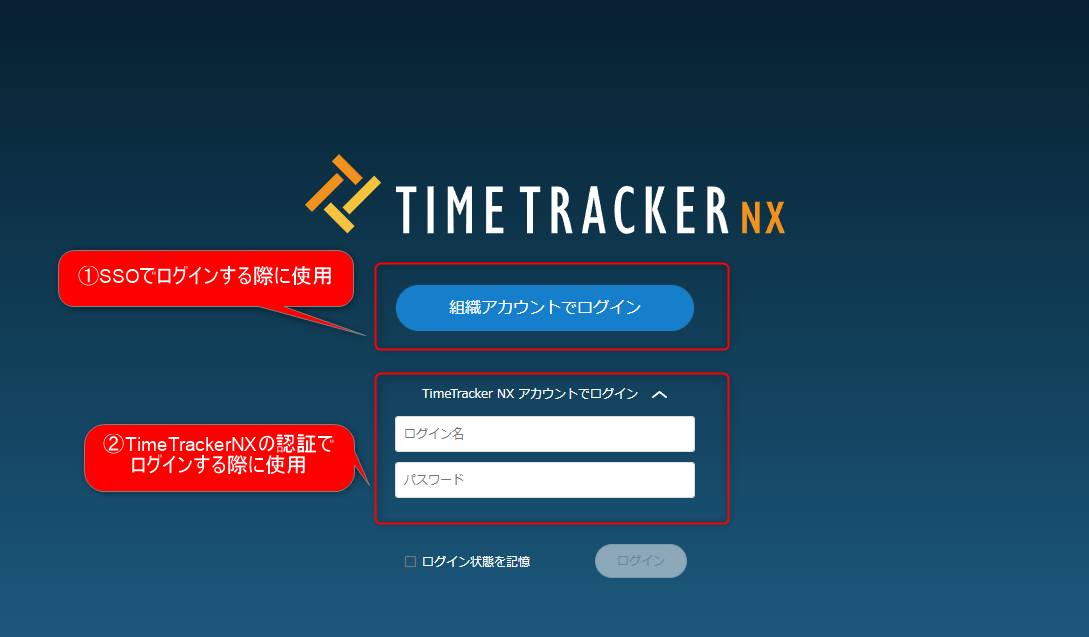
Select ② and log in with your TimeTracker RX account and password.
-
Set the integration key in the user information for the user attempting SSO integration. This attempt should be performed by the user who operated the Microsoft Azure AD screen in the "Setting up TimeTracker RX and the integrated service" procedure.
-
Open the user list on the system administration screen.
-
In the user's "Email" field, enter the "User Principal Name" of the Microsoft Azure AD to be integrated.
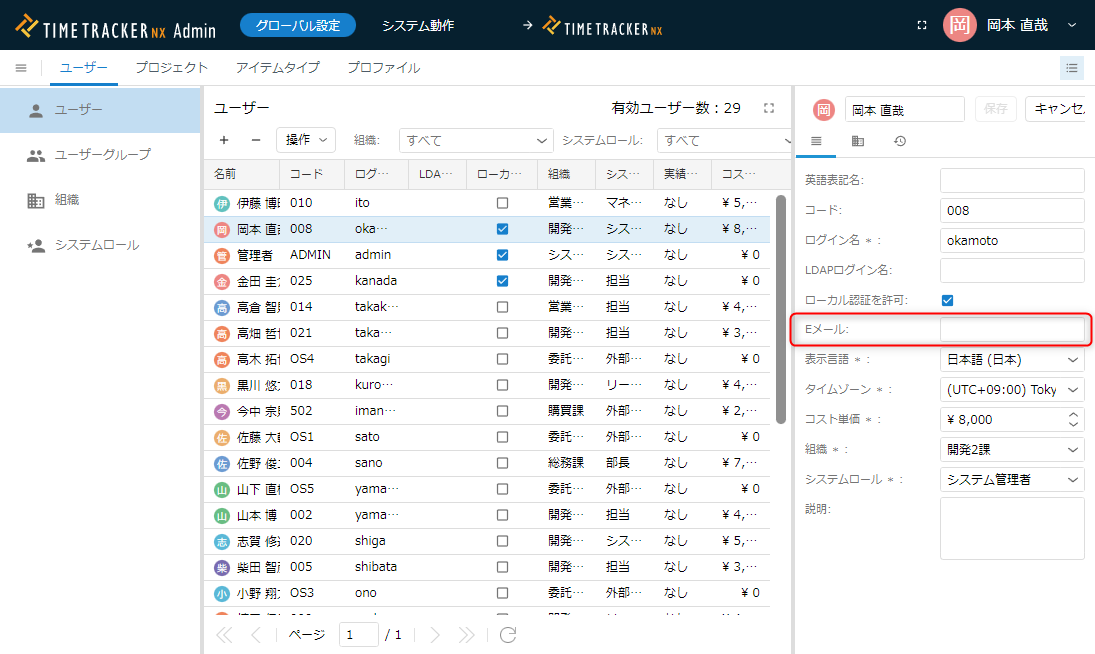 The "User Principal Name" is the item displayed on the following Microsoft Azure AD screen.
 -
-
Click the "Test" button under "⑤ Test Single Sign-On with [Configured App Name]" on the Microsoft Azure AD settings screen.
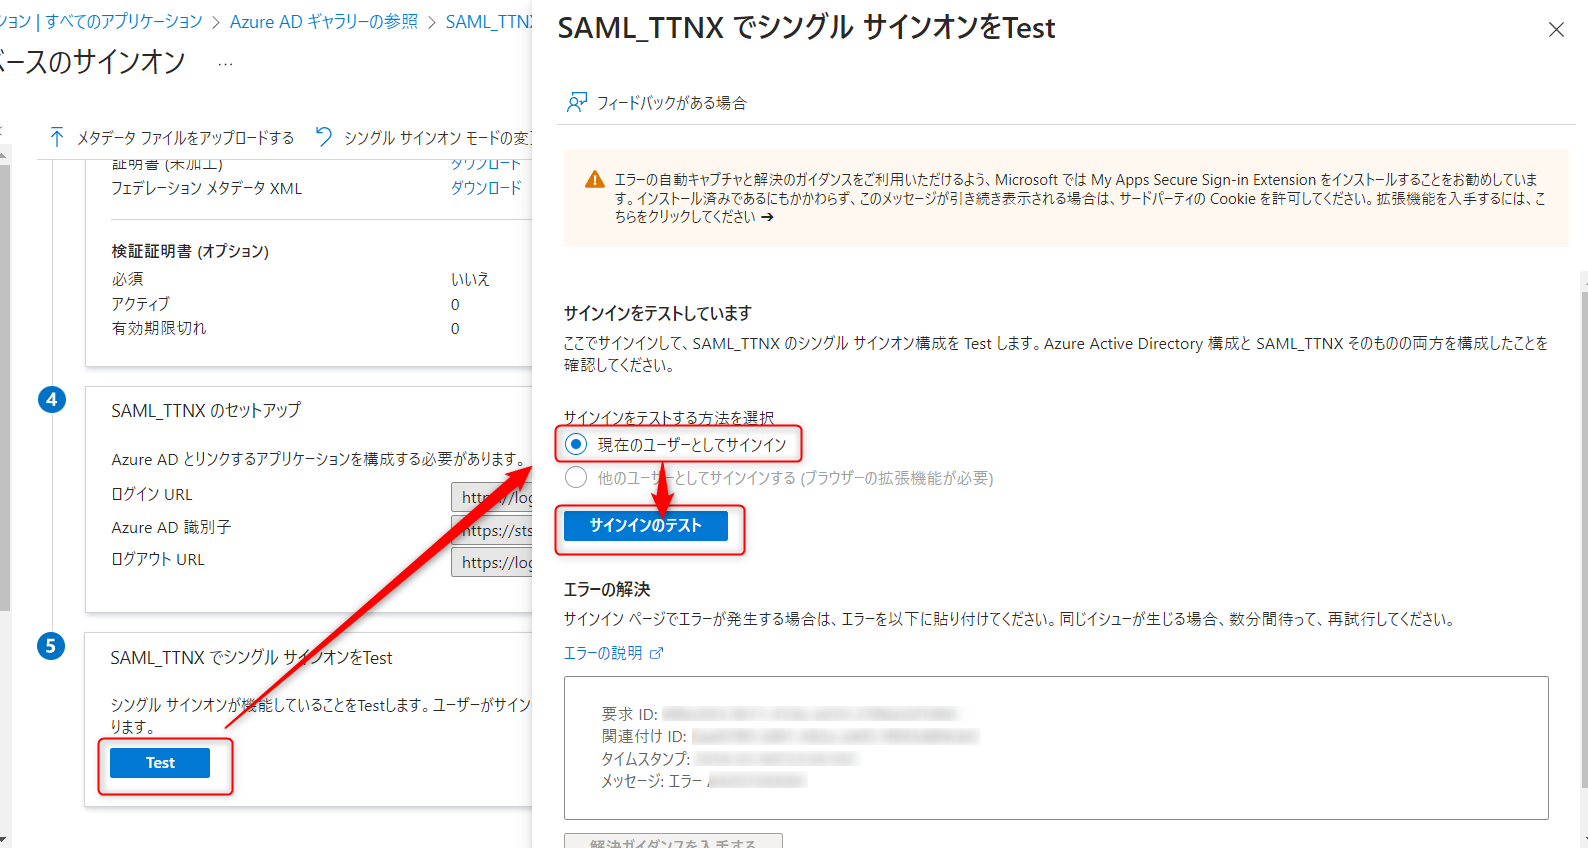
If you can log in to TimeTracker RX, the setup is successful.
This confirms that SSO is configured.
You can also log in by clicking "Log in with organizational account" on the TimeTracker RX login screen.
You can close the Microsoft Azure AD screen without any problems.
Afterward, if you switch the "Scope of Use" to "SAML Authentication Only" on the TimeTracker settings screen, local authentication will be disabled.
Next, let's enable SSO for each user.
Setting Users to Enable SSO
Set up SSO for each user.
Set it up in the following two steps.
-
Set the information for the authentication destination service.
Authentication will be done using the email address as the key.
Edit "Email" for each user using the same method as in the following link: "Procedure 2 for Checking Settings" -
Select and enable users to enable local authentication.
Select the target from the user list and check "Allow Local Authentication" on the editing screen.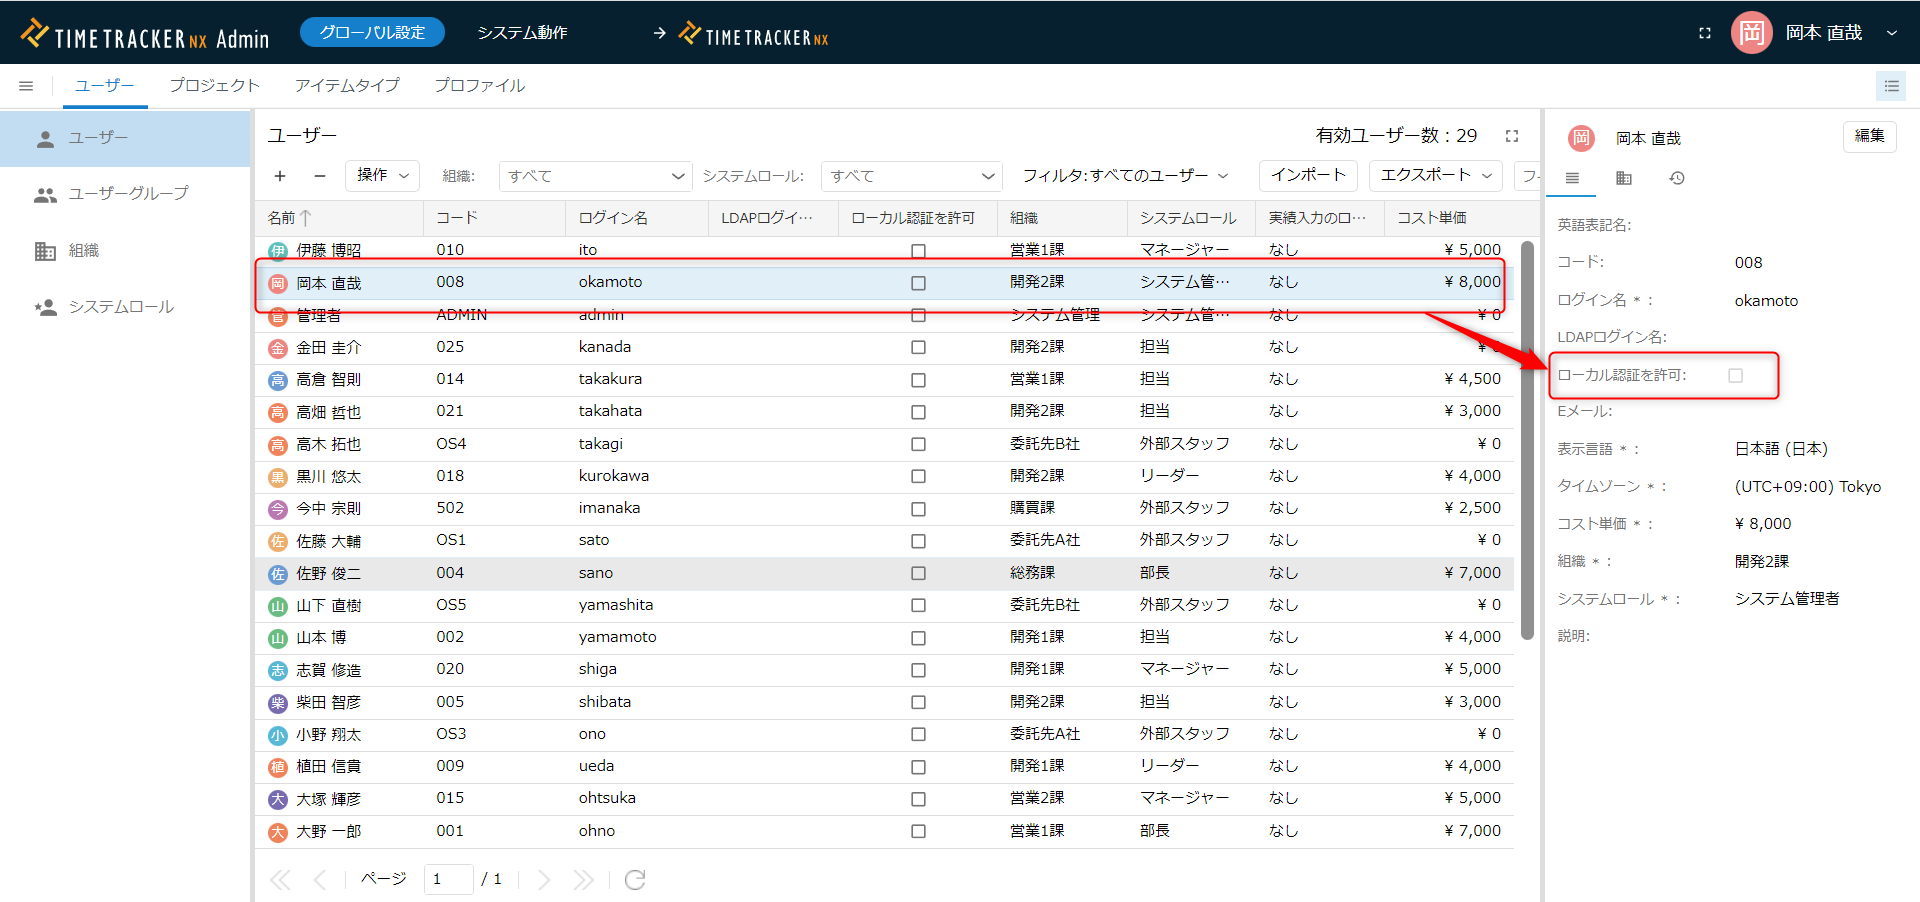
Setting up each user individually from the settings screen is time-consuming.
You can set them up all at once using the function in the following link: "Export/Import User Information"
Notes on User Settings
- You cannot set the same email address for multiple users.
- Users with a blank "Email" field and who have not checked "Allow Local Authentication" will not be able to log in.
You must set one of these.
- There is a possibility that SSO authentication may become impossible due to some trouble, such as when communication with the SSO authentication destination becomes impossible.
In that case, users who have not enabled this item will not be able to log in, so
At least one user should be allowed to use local authentication. - On the other hand, allowing local authentication for many accounts creates password management hassle and security risks.
For example, consider restricting local authentication to users with system administrator privileges.
How to Log In with Local Authentication
When SSO authentication is enabled, the following screen will be displayed upon login.

Clicking the red box above will allow you to log in with the account and password set for TimeTracker RX.
Notes on SSO Authentication
Here are some points to note when enabling SSO authentication.
(There are no issues if you do not use the SSO function)
Enabling HTTPS Access
To implement this function, the URL must be SSL authenticated.
Please ensure that the URL accessing TimeTracker RX starts with "https".
Settings Required When Using "SAML Authentication Only"
Enabling SAML authentication eliminates the need to enter the login name and password saved in TimeTracker RX.
However, some functions will not be available as is, so please use one of the following methods.
| Function | Use API Key | Enable Local Authentication |
|---|---|---|
| Excel Integration Add-in | 〇 | 〇 |
| Web API | 〇 | 〇 |
| TimeTracker Reporting | 〇 | 〇 |
| TimeTracker Analytics | 〇 | 〇 |
| Actual Man-Hour Input from Mobile Devices | × | 〇 |
The necessary settings for each are shown below.
-
Using API Key
This method uses an "API key" instead of an account name and password for authentication.
For details, please refer to "Generating an API Key".If you do not use "Inputting Actual Man-Hours from Mobile Devices," you can operate with "SAML Authentication Only." -
How to Enable Local Authentication
- Depending on the scope of use, please set one of the following:
- To enable local authentication for all users:
In the TimeTracker settings screen (No. 20 in the linked procedure), set "Scope of Use" to "Local Authentication and SAML Authentication." - To enable local authentication only for those who want to use the function:
In the procedure "Setting Users to Enable SSO For," check "Allow Local Authentication" for the target users.
- To enable local authentication for all users:
- When using the target function, please enter the account name and password set in TimeTracker RX.
- Depending on the scope of use, please set one of the following:
Preparing for Problems Connecting to the Authentication Server
If SSO becomes impossible due to some trouble, please disable SSO using one of the following methods:
- A user who can also perform local authentication logs in and disables SSO.
- Forcibly disable SSO.
We recommend configuring it to work as described in option 1.
1. A user who can also use local authentication logs in and disables SSO.
Log in using the procedure in the following link: "How to log in with local authentication" On the single sign-on settings screen, uncheck "Enable sign-on with SAML authentication."
Please initialize it using the procedure in the following link: "Change password"
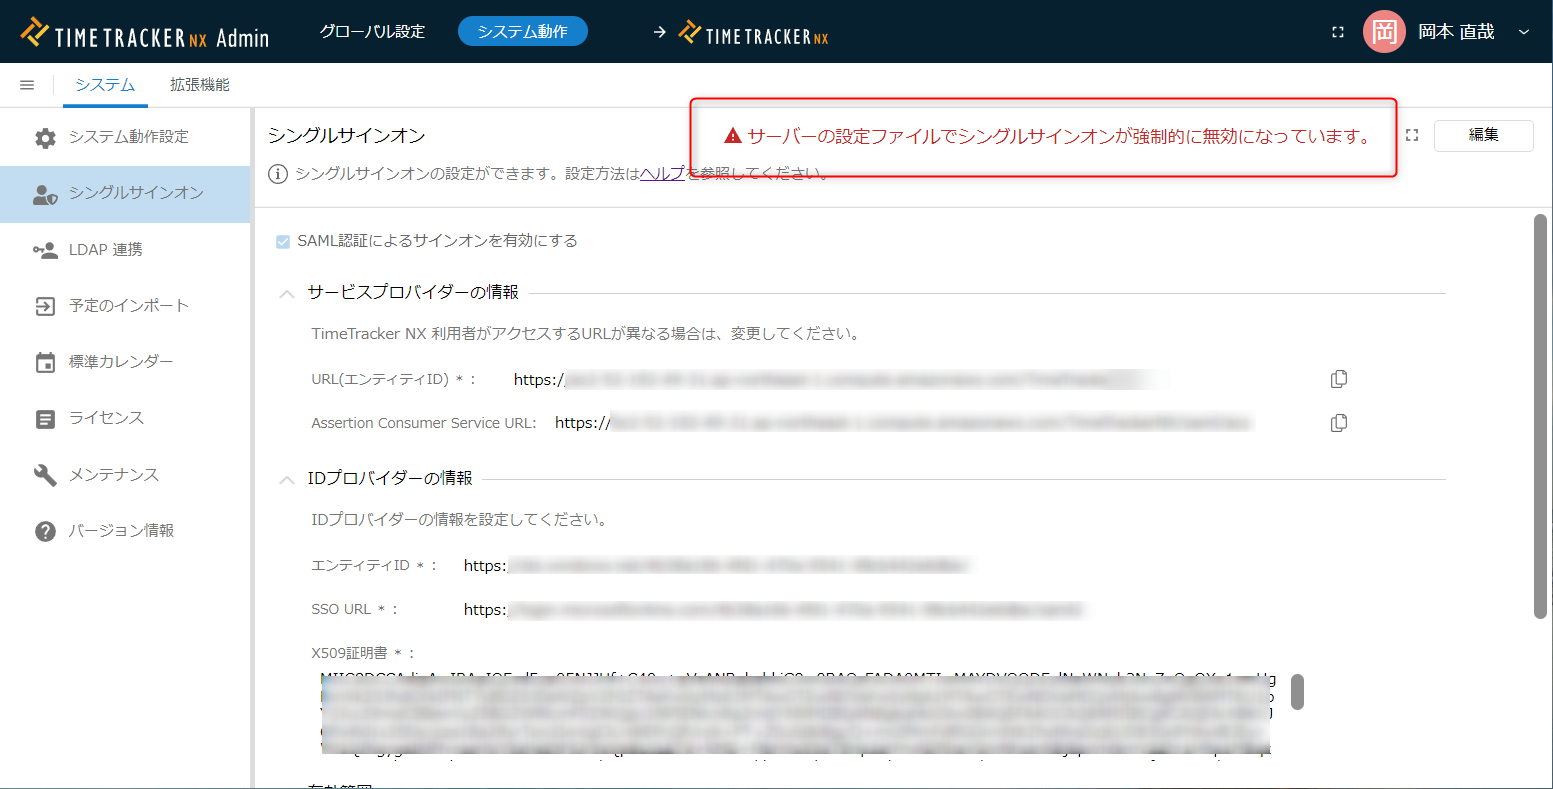
2. Forcibly disable SSO
This method disables SSO by updating the configuration file stored on the TimeTracker RX server PC.
Please resolve this using the following steps.
- Open "appsettings.json" located directly under the TimeTracker RX installation folder.
- Search for the keyword "sso" and change the following value to "true".
"Saml": {
    "ForceDisableSamlSso": false, ← Change this
    "UseIdpSession": true
},
- Reopen the TimeTracker RX login screen.
If it's already open, refresh your browser.
You can log in with the login account and password you set for TimeTracker RX.
After the problem is resolved, revert the value you changed in step 2 back to its original value.