Managing Profiles
Overview
A profile is a predefined set of various project settings.
By applying it to a project when creating a new project, you can achieve the following:
- Create projects smoothly without the hassle of initial setup.
- Easily reflect changes to standard settings within the company or department in each project.
How to Use Profiles
We recommend creating separate profiles considering the content of each business area (see Figure ② below).
By assigning a profile when creating a project, the profile's contents will be reflected in the project (see Figure ③ below).
This is extremely convenient when creating multiple projects with the same settings.

By utilizing inheritance/reflection, you can reflect profile changes to each project
after project creation, so changes to rules and processes can be reflected immediately.
Profile Structure
The profile has the following structure:
-
Basic Project Information
- Version-Common Information
- Version-Specific Information For details, please refer to the following link: "Changing Basic Profile Information"
-
Item Types to Use
For details, please refer to the following link: "Managing Item Types" -
Item Type-Specific Settings
- Definition of Process Classification and Work Classification
- Constituent Fields
- Screen Layout
- Selectable Statuses
This section explains how to manage profiles.
Common Procedure
As a common prerequisite for managing profiles, first perform the following steps:
-
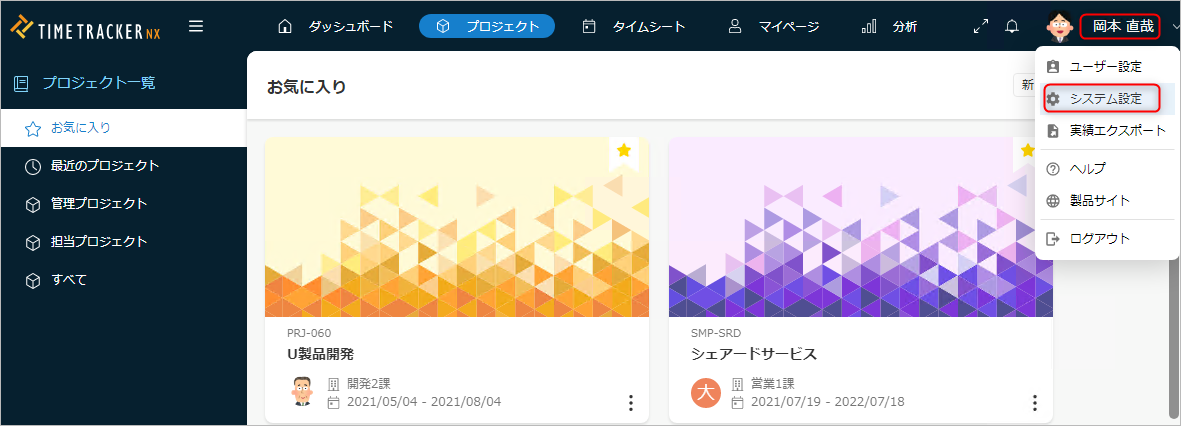
Click your login name in the TimeTracker RX global navigation.
-
Select "System Settings".
-
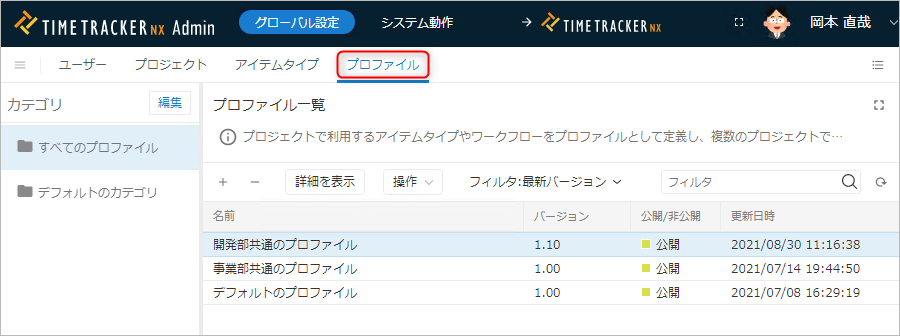
Click "Profiles" in the local navigation.
-
Select the target profile from the profile list.
-
Click the "Show Details" button at the top of the profile list.
Categorizing Profiles
Organize your profiles by creating categories using the following steps.
-
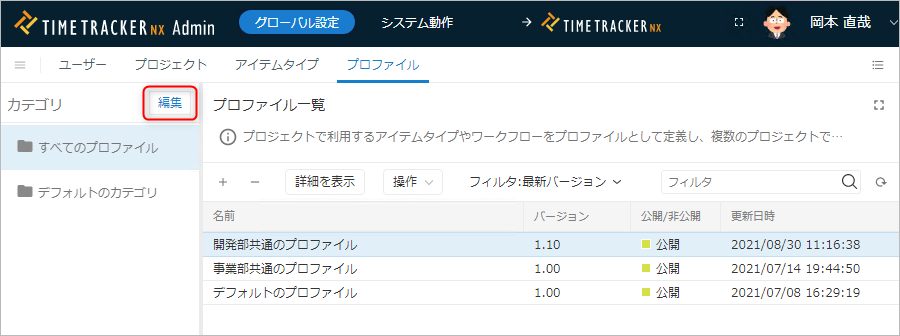
Click the "Edit" button on the left side of the screen.
-
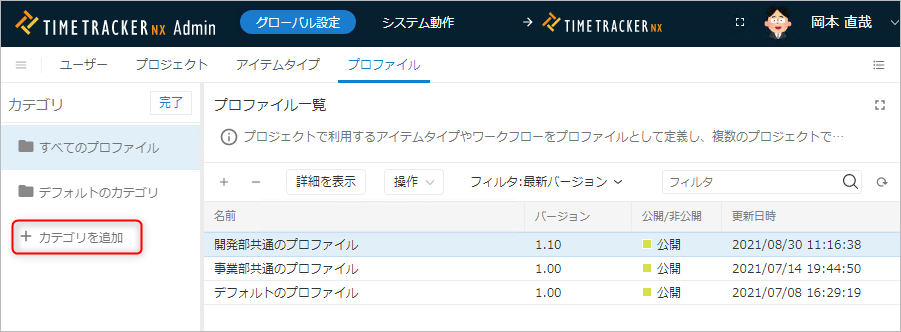
Click "Add Category".
-
Enter a name for the added category.
-
Click the "Done" button.
-
Set the created category as the basic information of the profile.
For details, please refer to the following link: "Changing Basic Profile Information"
Adding and Deleting Profiles
Adding
Add a profile to apply to the project.
There are several ways to create a profile:
- Create a new one.
- Create a profile based on an existing one.
Creation Procedure
-
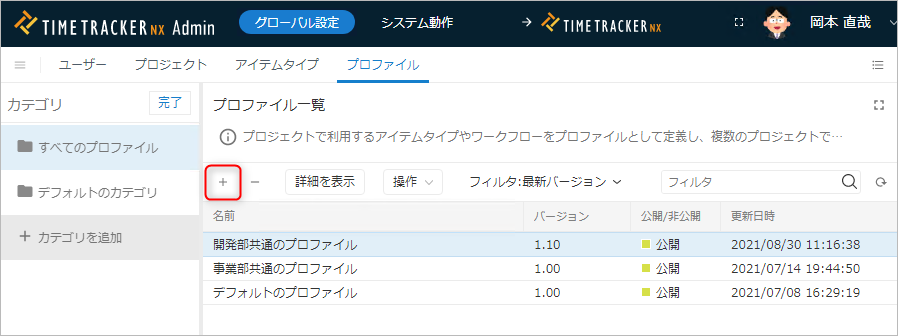
Select the category to store the profile from the left menu.
-
Click the "+" icon at the top of the profile list.
-
Select how to create the profile in the "Create Profile" dialog.
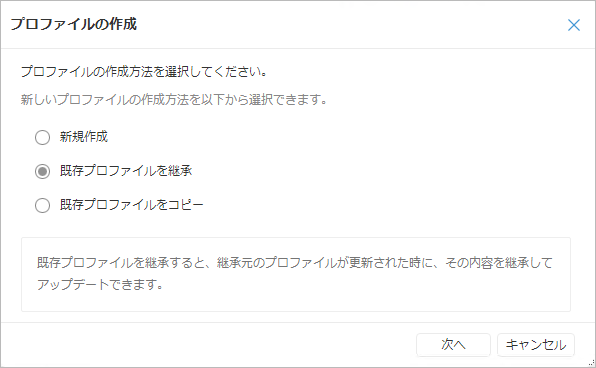
The methods for creating a profile are as follows:
| No. | Item | Description |
|---|---|---|
| 1 | Create New | Used when setting up a project from scratch. General item types (tasks, packages) are defined. |
| 2 | Inherit Existing Profile | Inheriting an existing profile allows you to achieve the following: - Inherit the settings of the inherited profile. - Reflect changes made to the inherited profile. For the concept of inheritance, please refer to the following link: "About Inheritance" |
| 3 | Copy Existing Profile | Create a profile by copying an existing profile. - This is convenient when you want to save time creating a profile. - Changes to the source profile will not be reflected. |
If you select "Inherit Existing Profile" or "Copy Existing Profile," select the source profile to inherit/copy.
Hover your cursor over the profile to display the version; select the desired version.
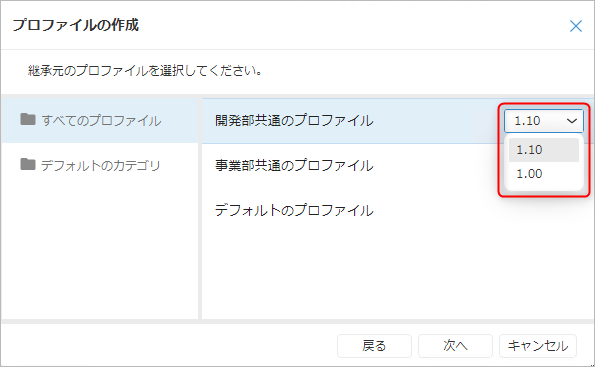
If the profile is not set to "Public," it will not be displayed in the list.
If the target is not displayed, please check the profile settings.
-
Enter the basic profile information.

The input fields are as follows:
No. Item Description 1 Name Profile Name 2 Code Profile Code 3 Version Profile Version
This must be set to a unique value for each target profile.4 Description Profile Description -
Click the "Done" button.
Deleting
You can delete unnecessary profiles using the following steps.
Even if you delete the profile from which it is inherited, the inherited profile can still be used.
-
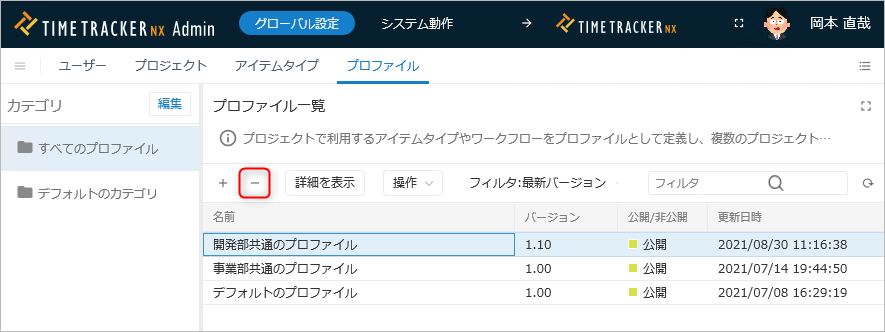
Select the profile to delete from the profile list screen.
-
Click the "-" icon at the top of the profile list.
Restoring Profiles
You can restore deleted profiles using the following steps.
Use this if you accidentally deleted a profile or want to reuse a deleted profile.
- On the profile list screen, select "Deleted" under "Filter".
- Select the target profile. Multiple selections are possible.
- Click "Actions" at the top of the profile list.
- Select "Restore".
Setting Profile Basic Information
The basic information (code, public information, etc.) of the added profile can be changed using the following steps:
-
Select the target profile.
-
Click the "Show Details" button at the top of the profile list.
-
Specify the version to edit and click the "Edit" button.
-
Change the profile's basic information.
The profile's basic information can be classified into the following three categories: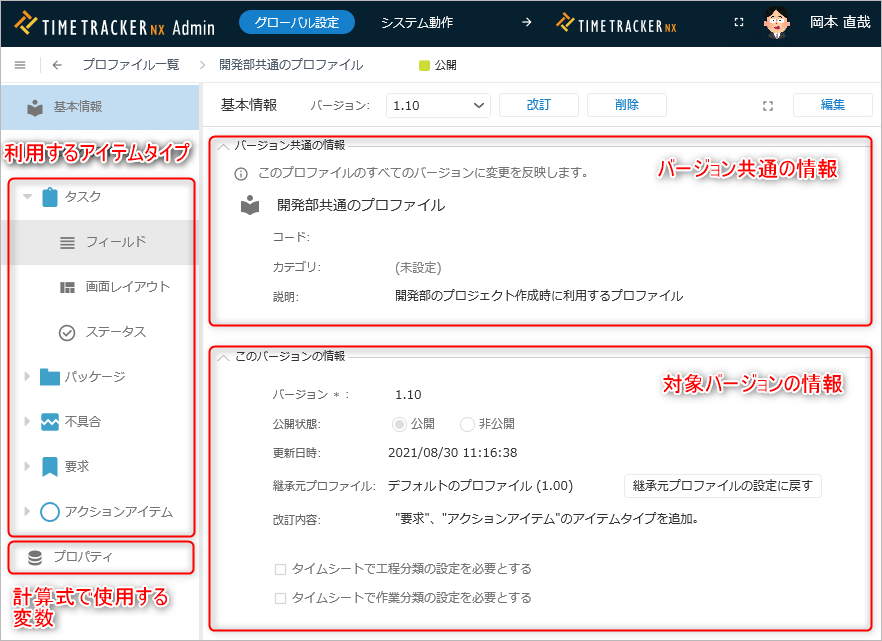
Update each category using the operations described below.
-
Click the "Save" button.
Version-Common Information
Configure the following items:
- Name: Profile name.
- Code: Profile code.
- Category: Profile category.
Enter the category added via the following link: "Categorize Profiles" - Description: Profile description.
- This will also be reflected in other profiles of different versions.
- The "Update" button will not be displayed in inherited profiles.
Version-Specific Information
Configure the following items:
- Version: Profile version (See the following link for details: "Version Control")
- Publication Status: Whether or not it can be published to other profiles
- Update Date: Date the profile settings were updated
- Inherited Profile: Information of the inherited profile (profile name and version)
- Revision Details: Changes from the previous version
- Require setting process classification (task classification) in the timesheet: Check this box if you must set it when entering man-hours.
Setting Item Types to Use
Set items for each item type.
See the following video (5:50~) for the overall flow.
The specific items to configure are as follows:
| No. | Item | Description |
|---|---|---|
| 1 | Process Classification | This information subdivides work items into processes such as "Design" and "Implementation". |
| 2 | Task Classification | This information subdivides work items into tasks such as "Review" and "Rework". |
| 3 | Field Configuration | Sets the fields used in the project. By defining only the necessary fields, project management can be simplified. |
| 4 | Screen Layout | Sets the layout of items displayed on the work item properties screen. You can change it to suit your operations, such as displaying frequently checked fields at the top. |
| 5 | Status | Defines the status options. You can measure progress by associating status with progress rate values. |
Defining Item Types
You can set the item types that will be available in projects to which this profile is applied.
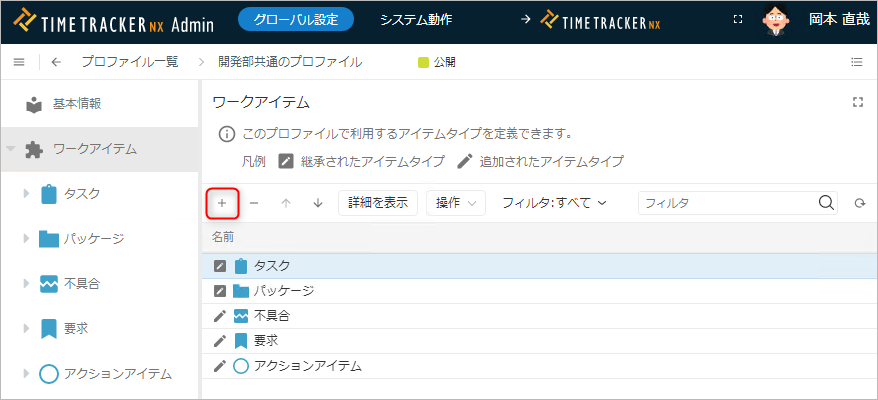
Adding Item Types
-
Select the target profile.
-
Click the "Show Details" button at the top of the profile list.
-
Select "Work Items" from the menu on the left.
-
Click the "+" icon at the top of the work item list.
-
In the "Select Item Types to Add" dialog box, move the item types you want to add to "Add to."
-
Click the "OK" button.
Restoring Item Types
- Select the target profile.
- Click the "Show Details" button at the top of the profile list.
- Select "Work Items" from the menu on the left.
- Select "Deleted" in "Filter."
- Select the item types you want to add. Multiple selections are possible.
- Click "Actions" at the top of the item type list.
- Select "Restore."
Changing Item Type Settings
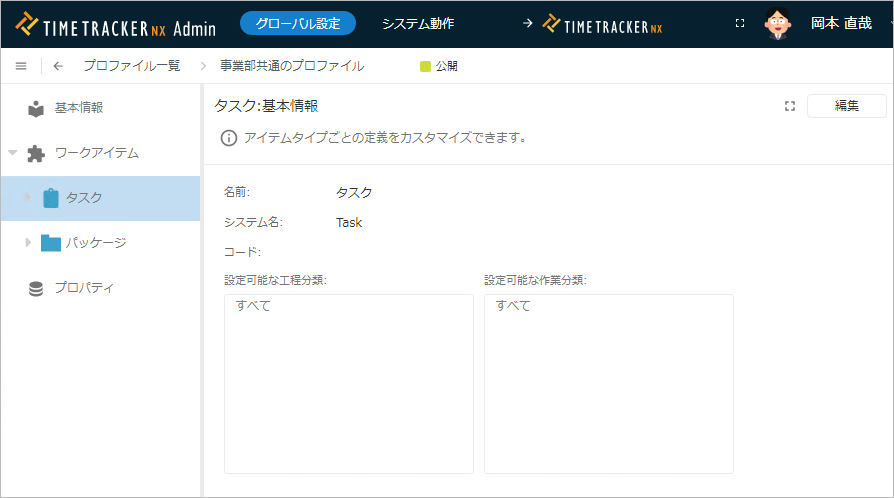
Setting Process and Task Classifications
You can set process and task classifications for each item type used in your project.
-
Select the target profile.
-
Click the "Show Details" button at the top of the profile list.
-
Select the target item type (task or package) from the menu on the left.
-
Click the "Edit" button.
-
Click the "+" button to the right of "Configurable Process Classifications".
-
In the "Select Process Classification to Add" dialog, move the process classification you want to add to "Add to".
-
Click the "Save" button.
Defining Fields
You can define the fields used in your project for each item type.
Adding Fields
You can add custom fields using the following method:
-
Select the target profile.
-
Click the "Show Details" button at the top of the profile list.
-
Select "Fields" for the target item type from the menu on the left.
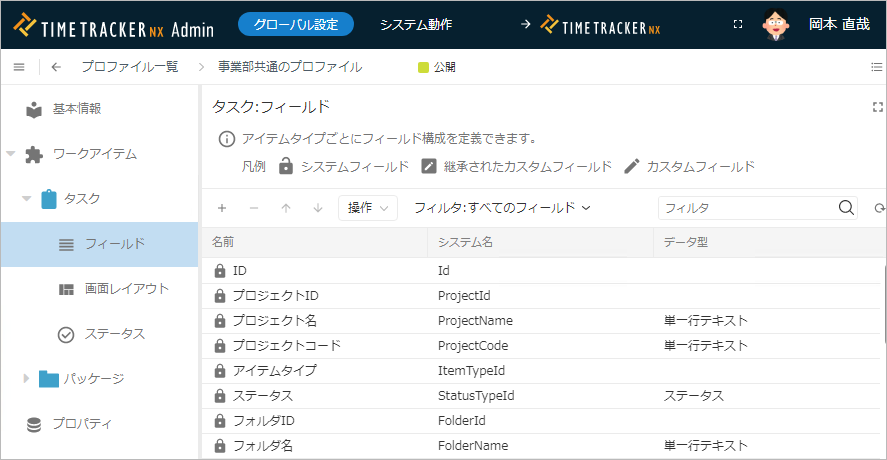
-
Click the "+" button at the top of the field list.
-
In the "Select Field Type to Add" dialog, move the field type to be added to "Add Target".
-
Click the "OK" button.
For details on calculation formulas, please refer to the following link. : "Using Formulas"
Deleting Fields
You can delete unnecessary fields that do not fit the purpose of the item type.
- Select the target profile.
- Click the "Show Details" button at the top of the profile list.
- Select "Fields" for the target item type from the left-hand menu.
- Select the field to delete.
- Click the "-" button at the top of the field list.
Changing Fields
You can also change defined fields later.
- Select the target profile.
- Click the "Show Details" button at the top of the profile list.
- Select "Fields" for the target item type from the left-hand menu.
- Click the "Properties" icon in the local navigation.
- Click the "Edit" button.
After changing the field content, click the "Save" button.
Field Settings Usage Examples
Select the field you want to configure and perform the following steps:
-
Define options using a dropdown list when users input data
Restricting the values that can be entered is useful when aggregating and analyzing data at the organizational or project level.Enter the strings to be used as options in the "Options" field, separated by commas or line breaks.

-
This applies to fields with the data type "Single Line Text".
-
Deleting all options will make the field freely editable by the user.
-
-
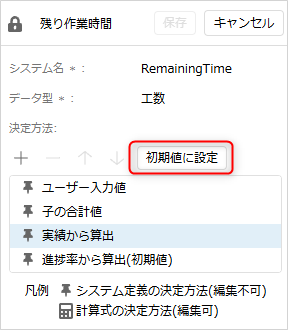
Change the default value for how field values are determined
Each field has a "Value Determination Method," and a default value is set for each field.- Value determination methods include user input, weighted average, and calculation formula.
- This is automatically applied when you add an item in the Gantt table.
Select the determination method you want to set and click the "Set as default" button.
Defining the screen layout
The screen layout of fields displayed in the item properties of a work item can be customized.
- You can set the fields to display and their order for each item type.
- If the number of fields becomes large and cumbersome, you can organize them by grouping them.
The procedure is as follows:
-
Select the target profile.
-
Click the "Show Details" button at the top of the profile list.
-
Select the "Screen Layout" for the target item type from the menu on the left.

-
Click "Specify Screen Layout".
-
In the "Screen Layout Settings" dialog, check "Specify Screen Layout".
-
Customize the fields to display as follows:
No. Editing Content Operation 1 Add to Display Target Select the target field from "Fields" and click "→". 2 Remove from Display Target Select the target field from "Screen Configuration" and click "←". 3 Create Group Select "Operation" - "Add Group". 4 Change Order Drag and drop the fields to move them. -
Click the "OK" button.
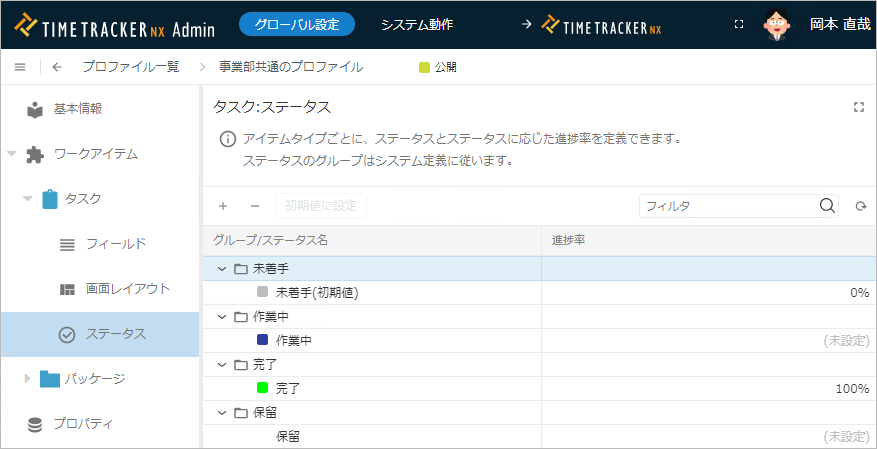
Defining Status
The progress of work items can be managed not only by the progress rate value but also by the status.
Define the status options for each item type.
By associating status and progress percentage values, project-specific progress management becomes possible.
Adding Statuses
You can add statuses that match the characteristics of work items from the statuses defined in the system.
-
Select the target profile.
-
Click the "Show Details" button at the top of the profile list.
-
Select "Status" for the target item type from the menu on the left.
-
Click the "+" button at the top of the status list.
-
In the "Select Status Type to Add" dialog, move the status to be added to "Add Target".
-
Click the "OK" button.
Deleting Statuses
You can delete unnecessary statuses that do not match the purpose of the item type, such as those added by mistake.
- Select the target profile.
- Click the "Show Details" button at the top of the profile list.
- Select "Status" for the target item type from the menu on the left.
- Select the status to delete.
- Click the "-" button at the top of the status list.
Changing the Status Progress Rate
Change the value reflected in the progress rate when a status is selected.
When the progress rate value is updated and exceeds this value, the status will be automatically updated.
- Select the target profile.
- Click the "Show Details" button at the top of the profile list.
- Select "Status" for the target item type from the menu on the left.
- Enter the progress rate in the "Progress Rate" column for the status.
Revising a Profile
Profiles reflect the rules and processes defined for the company.
When company processes are updated, you can manage them by linking the process and profile versions.
There are several ways to change a profile. Please refer to the respective linked pages.
- Create a new version while keeping the previous version. : "Version Control"
- Update the current version. : "Change Profile Basic Information"