Setting up schedule import
Overview
TimeTracker RX can import event information registered in the calendar.
System administrator settings are required to link with the following applications.
- Google Calendar
- Microsoft Outlook (Microsoft 365)
This section explains how a system administrator can enable the calendar function.
Please set up the link for each user who will enter actual times.
Link to procedure: "Import from Calendar"
Overview of calendar link settings
System administrators should enable the calendar link function by following the steps below.
For details, see the following link: "Detailed setup steps"
Step 1: Get an API key.
To get calendar information from Google Calendar/Microsoft 365 Outlook,
you need to get an API key for each application.
It is a unique identifier used to authenticate requests associated with an application.
When linking calendars, a person with administrator privileges for the target application must obtain an API key.
Please obtain an API key from the following website.
To obtain an API key, you must obtain an account for the application.
| Calendar to be linked | From |
|---|---|
| Google Calendar | Google Cloud Platform |
| Microsoft Outlook (Microsoft 365) | Microsoft 365 Administration Center |
Step 2: Register the obtained API key in TimeTracker RX.
- Set the information of the obtained API key in the system administration screen.
- This operation should be performed by a person with administrative privileges for TimeTracker RX.
After setting up the above, each user will follow the steps in the following link to set up the integration: "Integrate with Calendar"
Detailed setup procedure
This chapter introduces detailed setup methods for each calendar.
Google Calendar setup
Please follow the steps below to set up.
Obtaining an API key
-
Log in to the following link with your Google account. : "Google Cloud Platform"
-
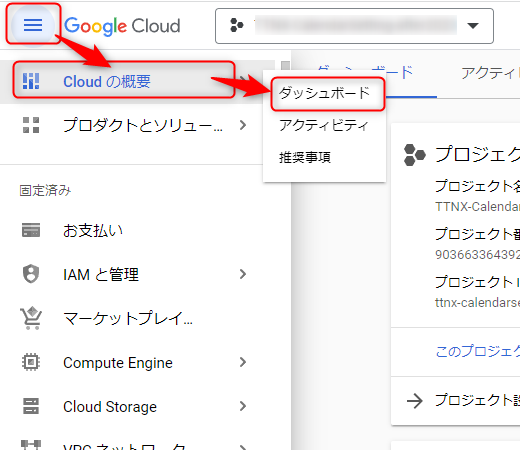
Click "Dashboard" from the side navigation.
-
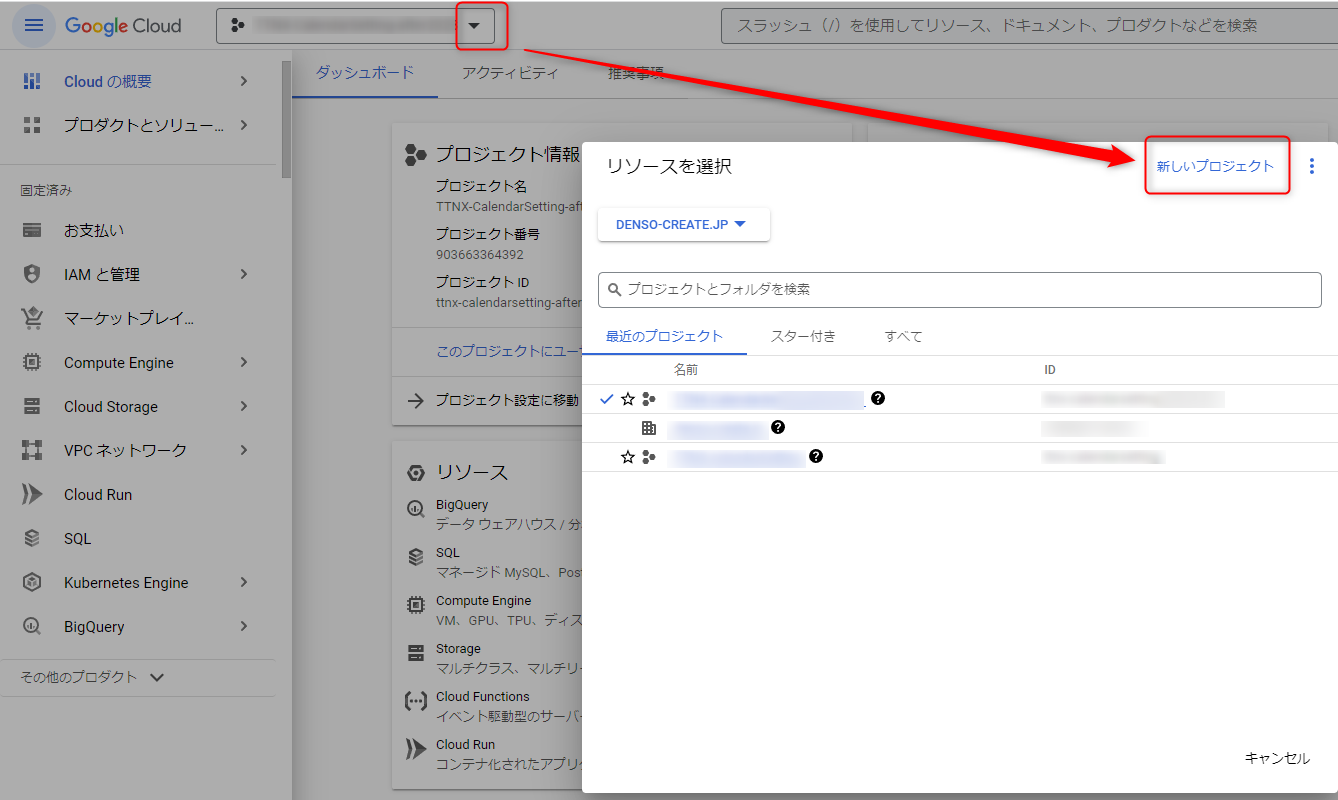
Click "New Project".
-
Enter a project name of your choice and click the "Create" button.
(No other settings are required.)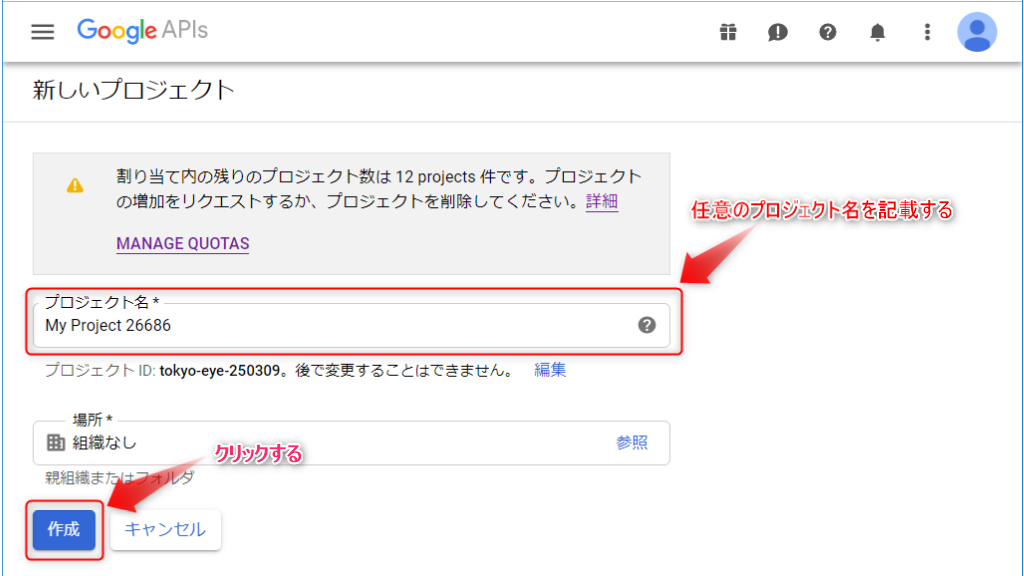
-
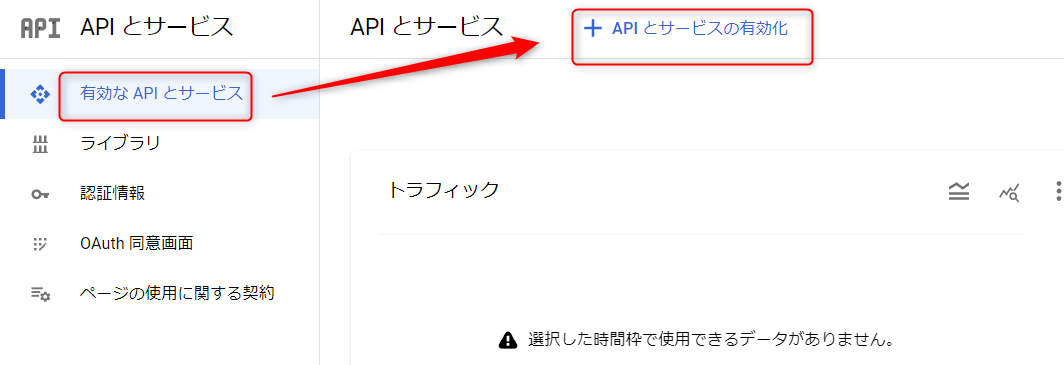
Click "Go to API Overview" on the dashboard, and click "Enable APIs and Services" on the screen you are redirected to.

↓
-
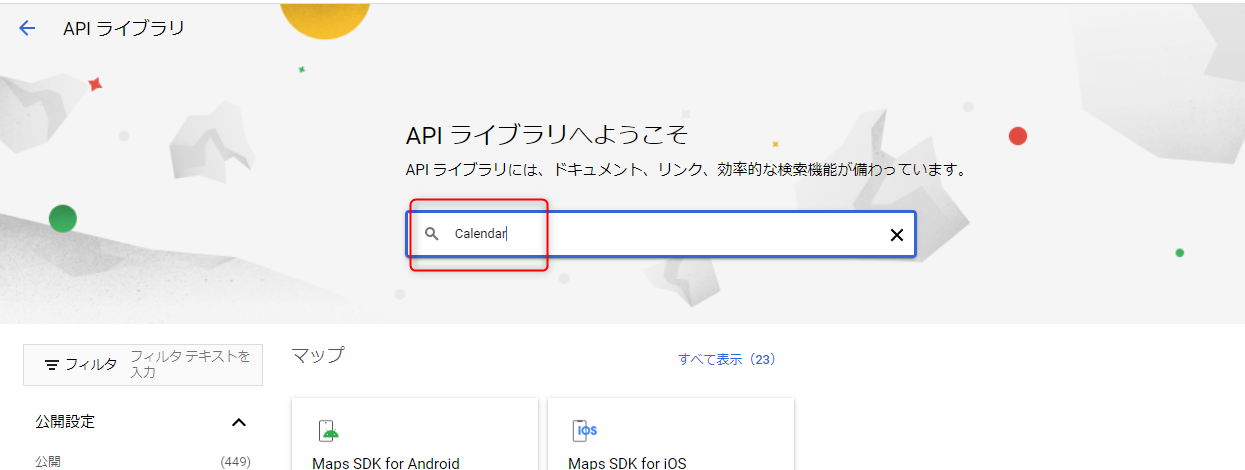
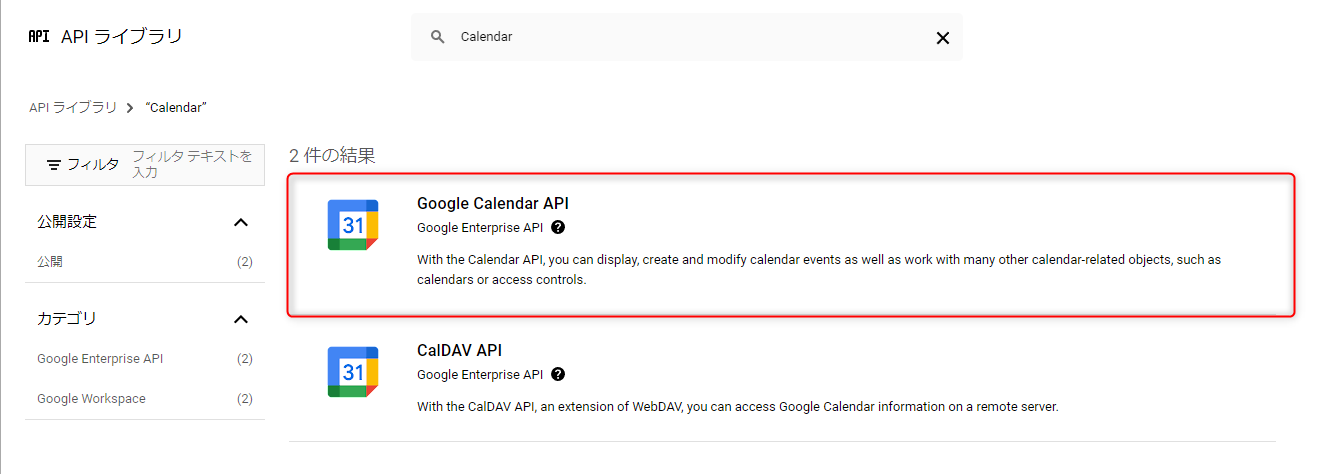
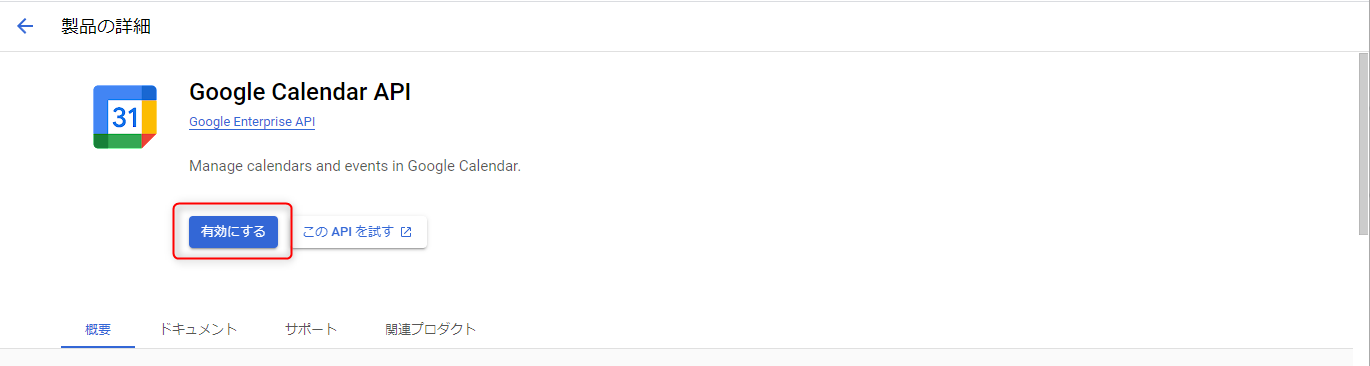
Enter "Calendar" in the search field and click "Google Calendar API" to enable the API.
-
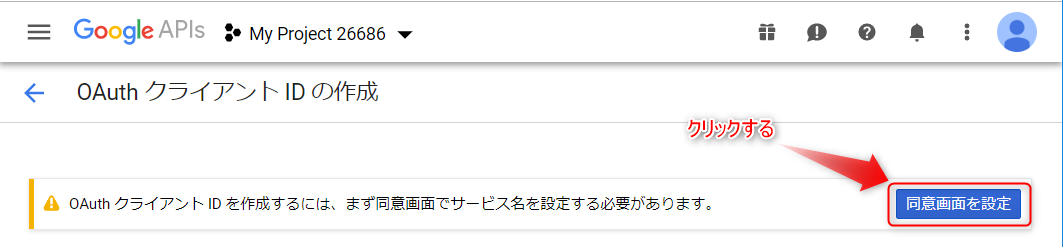
Return to the dashboard screen and select "OAuth consent screen".
-
On the OAuth client ID creation screen, click "Set consent screen".
 After clicking, select the User Type setting that is displayed according to your company's policy.
 -
Set the app information.
The following information must be set. (Other settings are not required.)Item Content Application name Set any name.
Example: TimeTracker_RX XX Company ApplicationUser support email
Developer contact informationRepresentative's address After setting the above, click the "Save and next" button.
On the transition screen, set "Scope" using the steps in the figure below.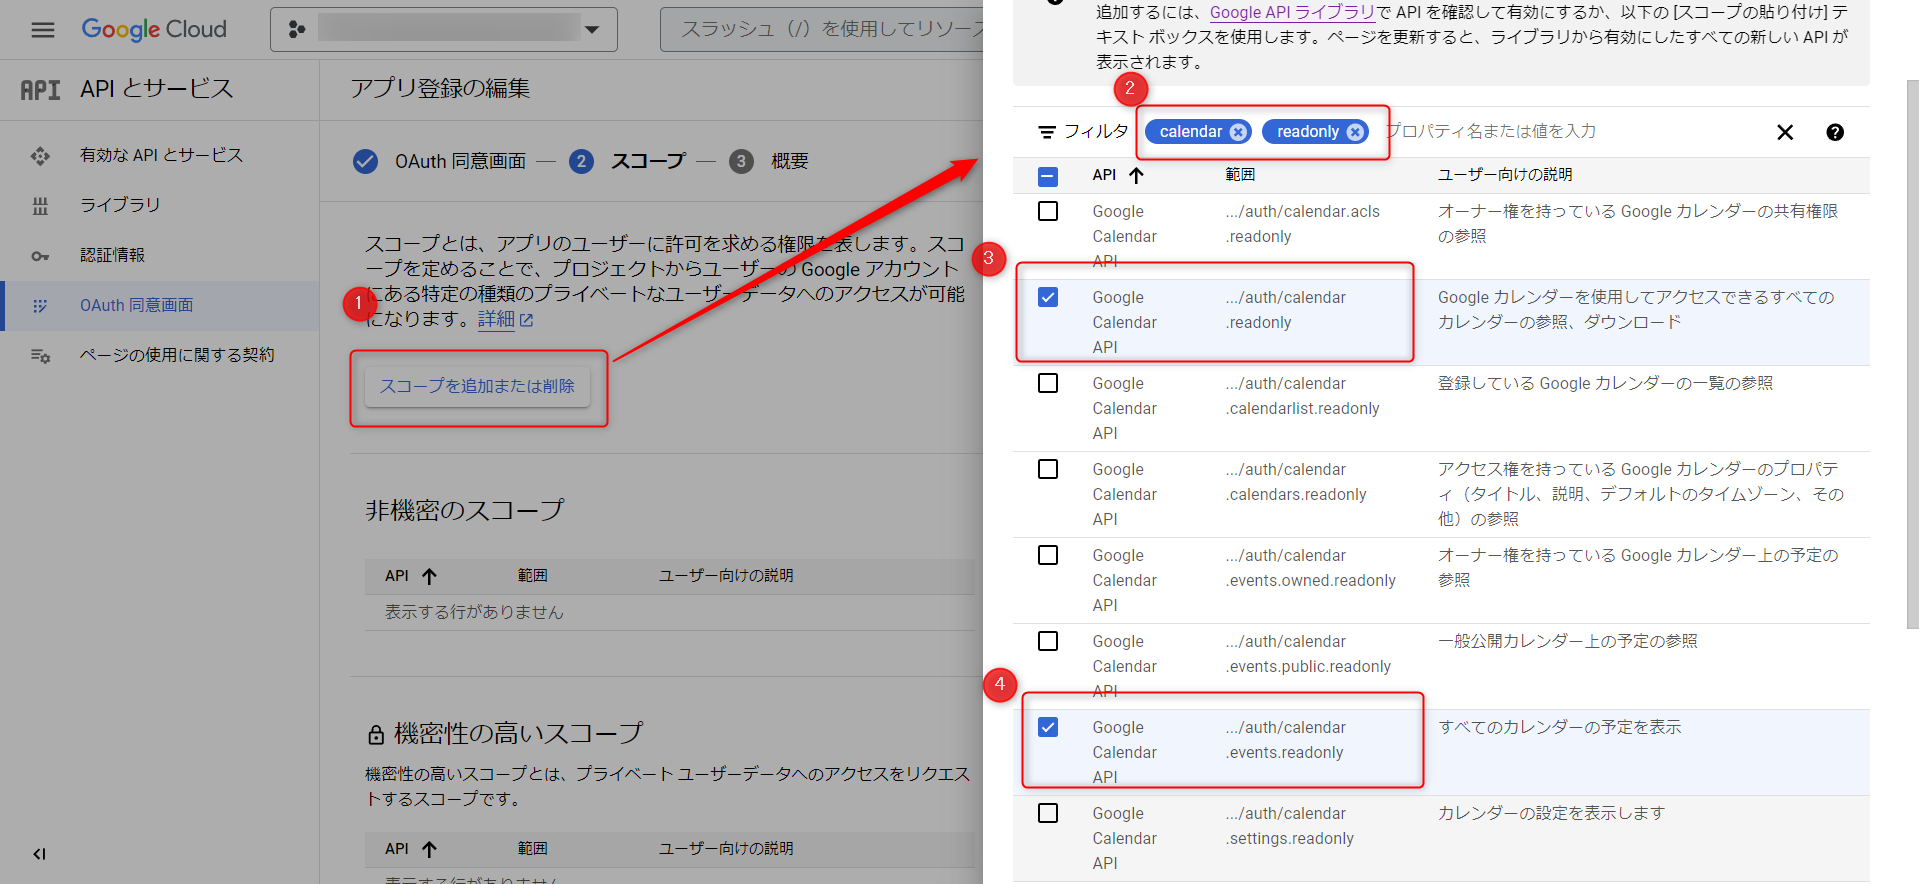
- ②: It is easier to find if you filter by "calendar" and "readonly".
- ③, ④: The scopes to select are as follows.
- .../auth/calendar.readonly
- .../auth/calendar.events.readonly
If the scope is not displayed, perform step 10 without setting the scope and refer to it again later.Once the settings are complete, click "Save and Next", and if there are no problems with the settings, return to the dashboard.
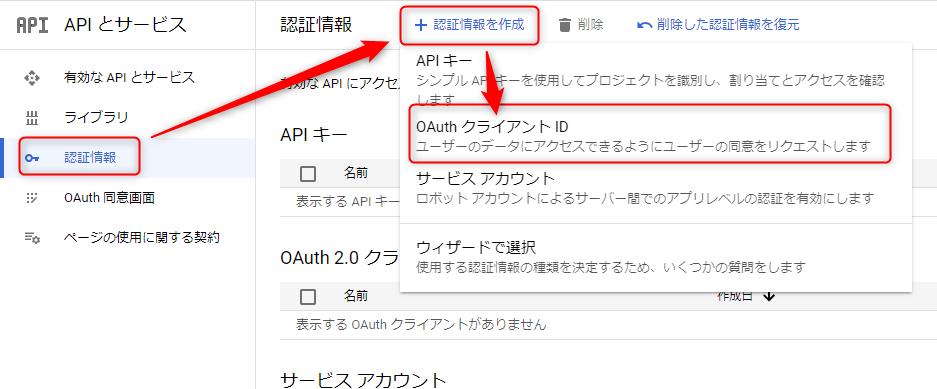
-
Click "OAuth Consent Screen" on the dashboard, select "Create Authentication Information" → "OAuth Client ID".
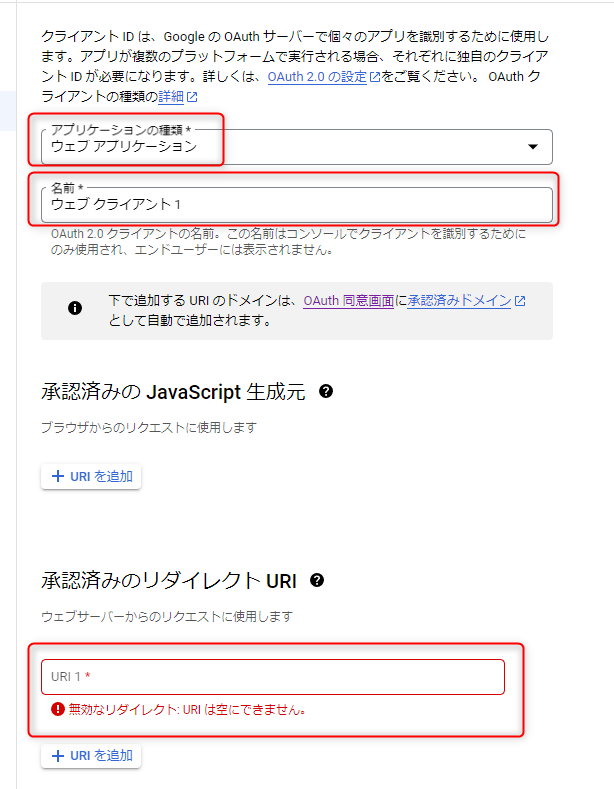
Select "Web Application" as the application type, set the following, and then click the "Create" button.
Please refer to the following for details.
Item Content Application type Web application Name Any name Authorized redirect URI {TimeTracker server URL}/auth_callback.html
Example: If the URL of the TimeTracker RX server is "https://www.timetracker.jp/TimeTrackerRX", enterhttps://www.timetracker.jp/TimeTrackerRX/auth_callback.html
Please note the following about the "Authorized redirect URI".
-
If there is an error in the settings, calendar integration will fail.
Please make sure that the "Authorized redirect URI" matches the URL where TimeTracker RX is actually located
including uppercase and lowercase letters. -
Due to restrictions on the application (Google Calendar) to which you are registering, special symbols and HTTP communication are not supported.
Please specify an address that starts with https:// for the URL.To change the URL from http to https, you need to configure IIS (Internet Information Services).For details, see the following link: "Switch to HTTPS communication for enhanced security" (https://dcinchelp.zendesk.com/hc/ja/articles/360044708173)
-
If the URL of the TimeTracker RX server is not in a public top-level domain, the following error will appear.
Invalid redirect: The end must be a public top-level domain (.com, .org, etc.).If you get the above error, publish your TimeTracker RX server in one of the public top-level domains listed above.
What is a top-level domain?A top-level domain is one of the components of domain names used on the Internet, and refers to a string equivalent to "jp", "com", "org", etc.
To link with Google Calendar, you need to specify a public domain. -
Depending on the firewall settings of the PC where the TimeTracker RX server is located,
messages from Google Cloud Platform may not be accepted.
Change the firewall settings in advance and make sure that messages are accepted.
-
Obtain the information required to configure TimeTracker RX.
Click the download button in the OAuth2.0 client ID list and
save the obtained JSON format file.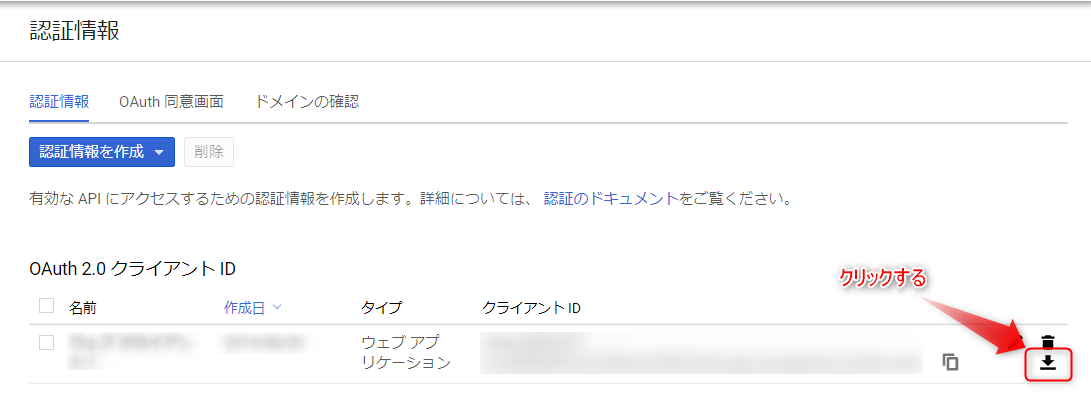
The following information written in the above JSON file will be used in the following settings.
- client_id
- client_secret
- client_id
Registering with TimeTracker RX
Set the information obtained in "Step 1. Obtaining an API key" in TimeTracker RX.
This operation should be performed by a user with system administrator privileges.
-
After logging in to TimeTracker RX, go to the following screen.
"System Settings" → "System Operation" → "Import Events" -
Set the following for Google Calendar.
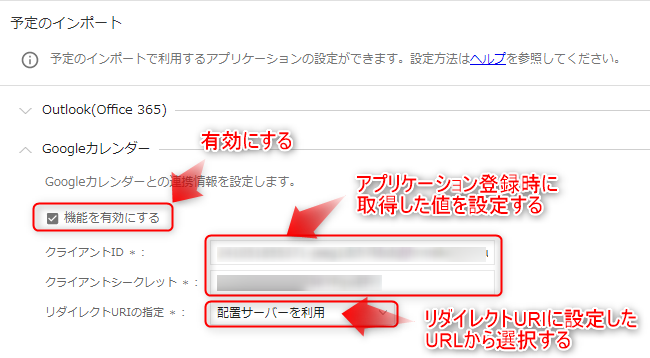
Item Content Enable feature Check. Client ID
/ Client secretEnter the client_id and client_secret obtained in Step 1.
Click the "Save" button to complete the settings.
Users can now import Google Calendar events.
Microsoft 365 Outlook settings
See below for a video on how to set up.
Please follow the specific steps below.
The screen may change depending on the provider. Please check with the provider for details.
Acquiring an API key
Copy it and keep it safe.
-
Log in to the following link with your Microsoft account. : "Microsoft 365 Admin Center"
-
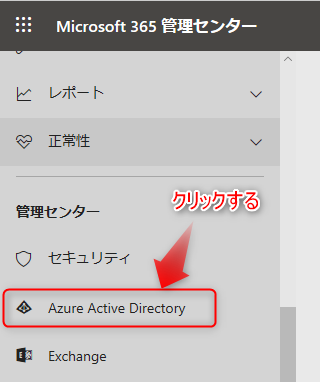
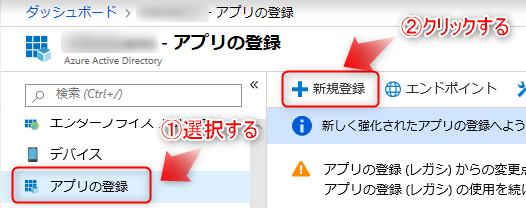
Click "Azure Active Directory" from the side navigation.
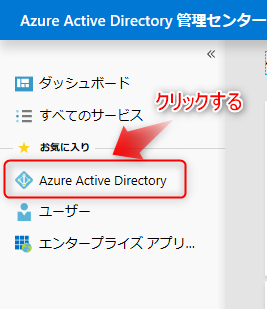
-
Click "Azure Active Directory" from the side navigation on the screen after the transition.
-
Select "Manage" → "App registrations" and click "New registration".
-
Enter the registration information for the application.
Enter the "Name" and "Supported account types".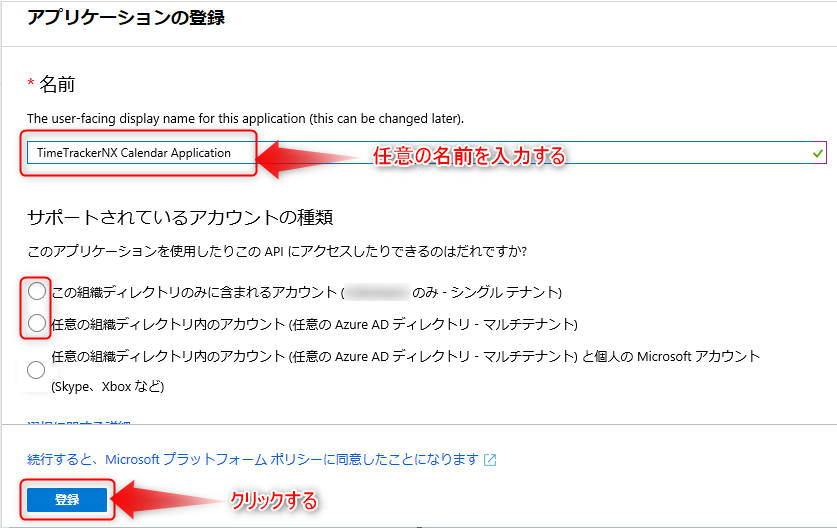
For "Supported account types", select the item that corresponds to your security policy.Copy the following information from the screen that appears after clicking the "Register" button.
- Application (client) ID
- Directory (tenant) ID (if "Single tenant" is selected in "Supported account types")

- Application (client) ID
-
Click "Manage" → "Authentication" to open the authentication settings screen.
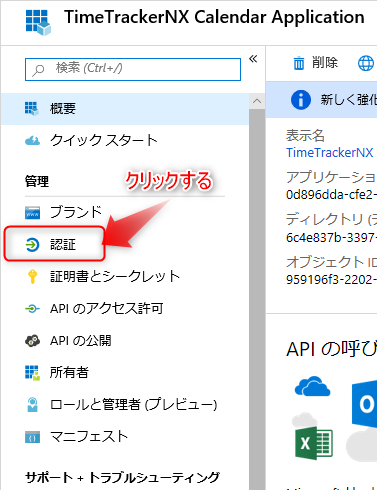
If the above screen does not open, click "App registration" on the screen in step 4 and
select the app created in step 5. -
Register the redirect URI.

Please see below for details. No other settings are required.
Item Content Type Web Redirect URI {TimeTracker server URL}/auth_callback.html
Example: If the TimeTracker RX server URL is "https://www.timetracker.jp/TimeTrackerRX", enterhttps://www.timetracker.jp/TimeTrackerRX/auth_callback.htmlNotes on "Redirect URI"
-
Calendar integration will fail if there is an error in the settings.
Please make sure that the "Redirect URI" matches the URL where TimeTracker RX is actually located, including uppercase and lowercase letters. -
Due to restrictions of the application (Microsoft 365 Outlook) to which you are registering, special symbols and HTTP communication are not supported.
Please specify an address starting with https:// for the URL.To change the URL from http to https, you need to configure IIS (Internet Information Services).For details, see the following link: "Switch to HTTPS communication for enhanced security" (https://dcinchelp.zendesk.com/hc/ja/articles/360044708173)"
-
Depending on the firewall settings of the PC where the TimeTracker RX server is located, messages from the Azure Active Directory Administrative Center may not be accepted.
Change your firewall settings in advance to make sure that messages are accepted.
-
-
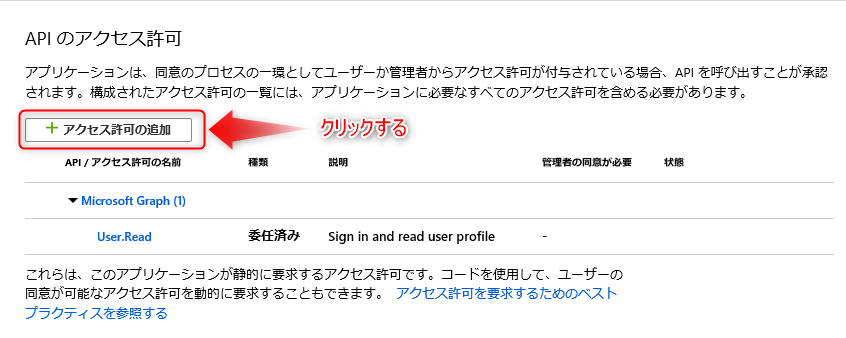
Set "Management" → "API permissions".
Select "API permissions" and click "Add permissions".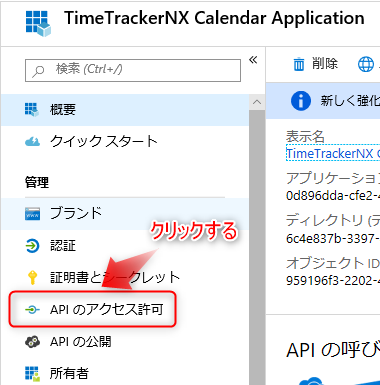
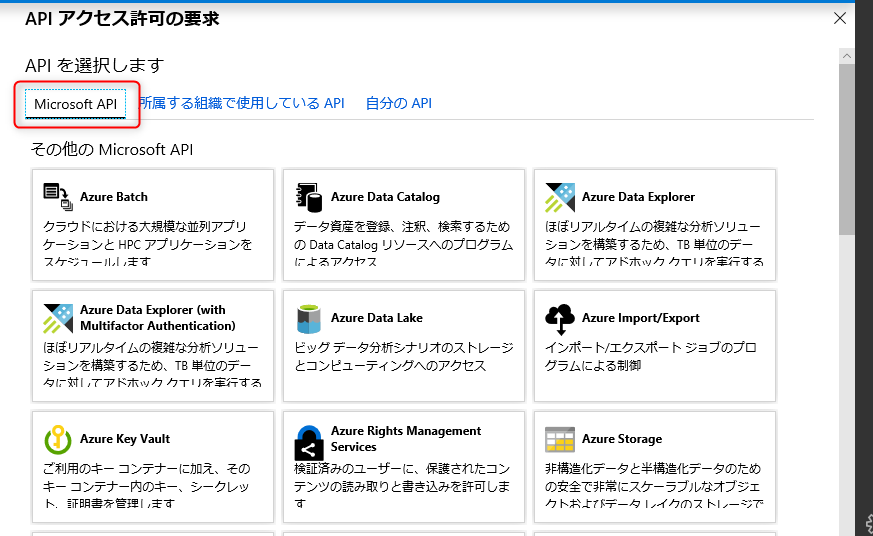
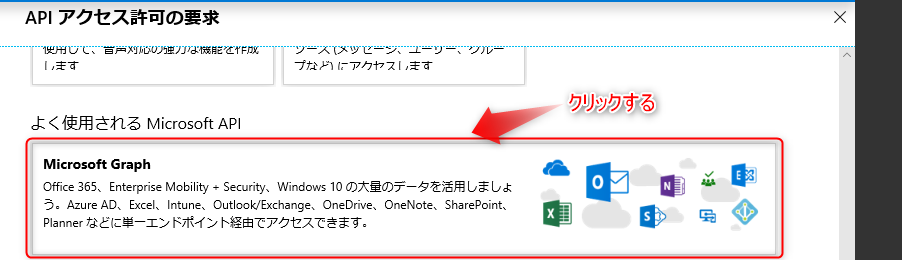
Scroll down on the "Microsoft APIs" tab and select "Microsoft Graph".
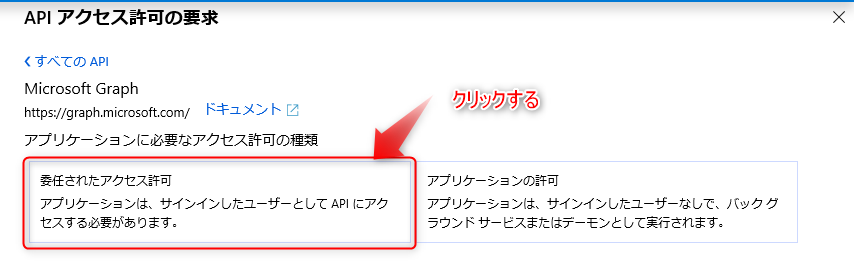
Select "Delegated permissions" from "What types of permissions does your application require?"
Select "Calendars" -> "Calendars.Read".
After making your selection, click "Add permissions".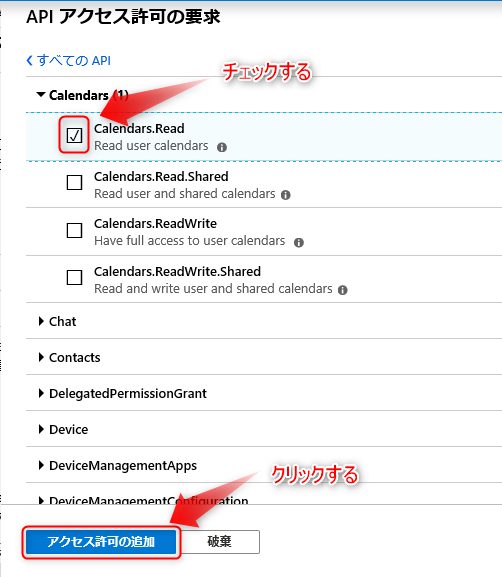
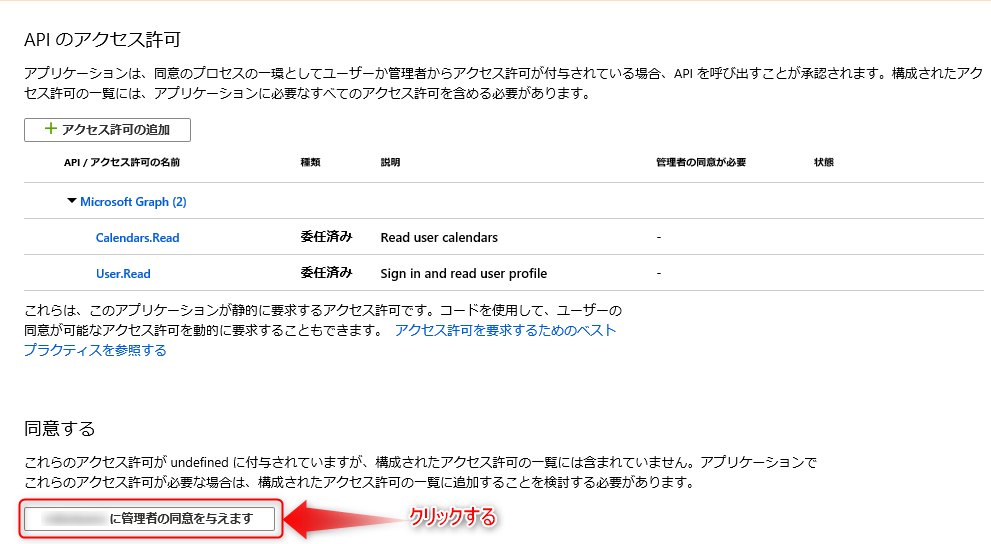
Click the "Give consent to the administrator of {Domain name}" button and
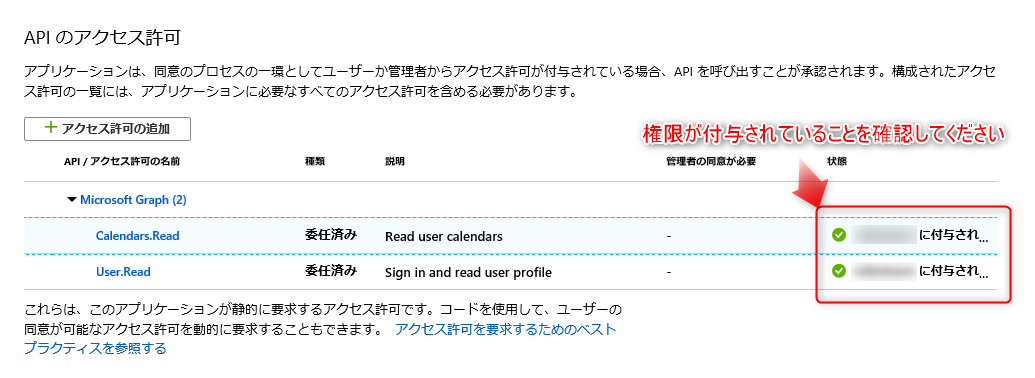
Verify that the Status field has been updated (see figure below).
(If you are asked whether you need to carry out the process, select "Yes")-
Before setting
-
After setting
-
-
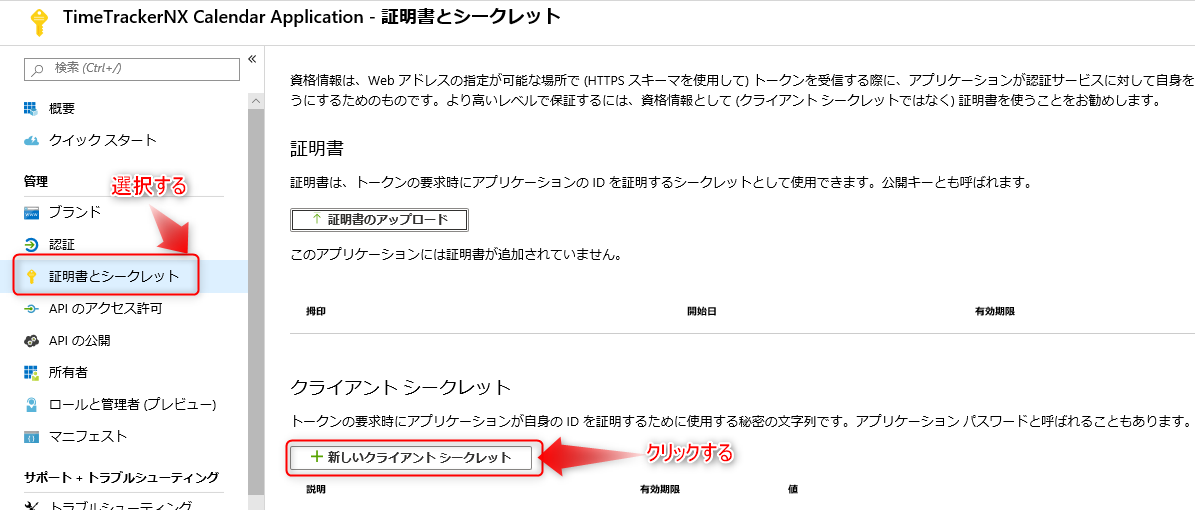
Set a client secret.
Select "Manage" → "Certificates and secrets" and click "New client secret".
Set the expiration date and click the "Add" button.
To ensure security, we recommend updating the expiration date regularly.
Copy the client secret and keep it safe.
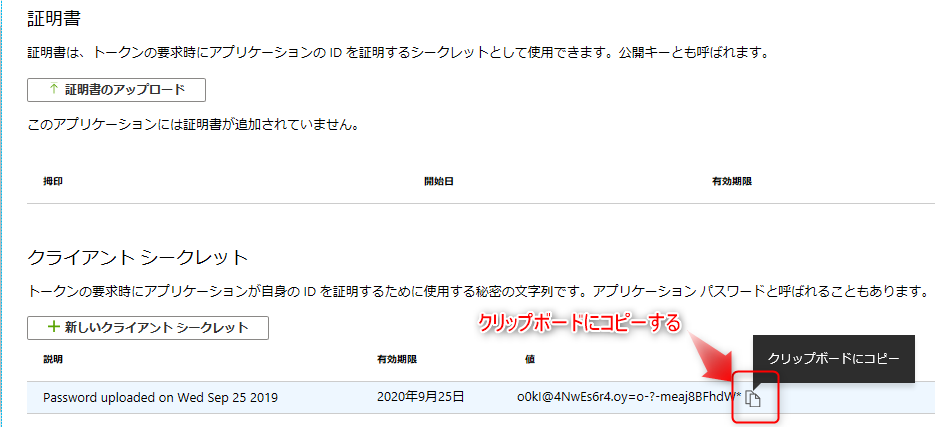 The client secret value will not be displayed if you move to another screen.
If you lose your client secret, repeat this procedure and reissue the client secret value.
Registering for TimeTracker RX
-
The basic settings are the same as the following link: "Google Calendar Setup Step 2"
Please change it to Microsoft Outlook (Microsoft 365) and set it up. -
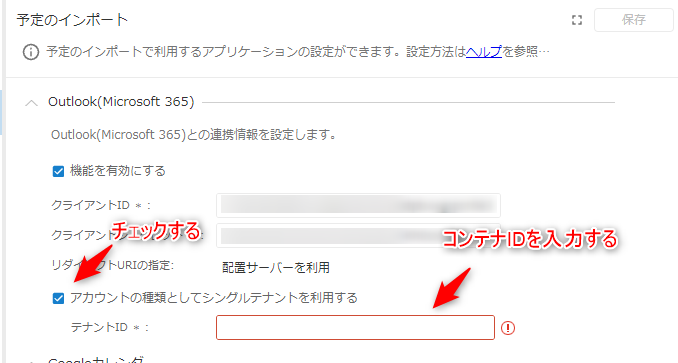
If you specified "Single Tenant" for "Supported Account Types" in step 5 of Step 1,
In addition to the above steps, please set the following items.