Report operations
Create/Edit Report
You can create/edit new reports from the report list.
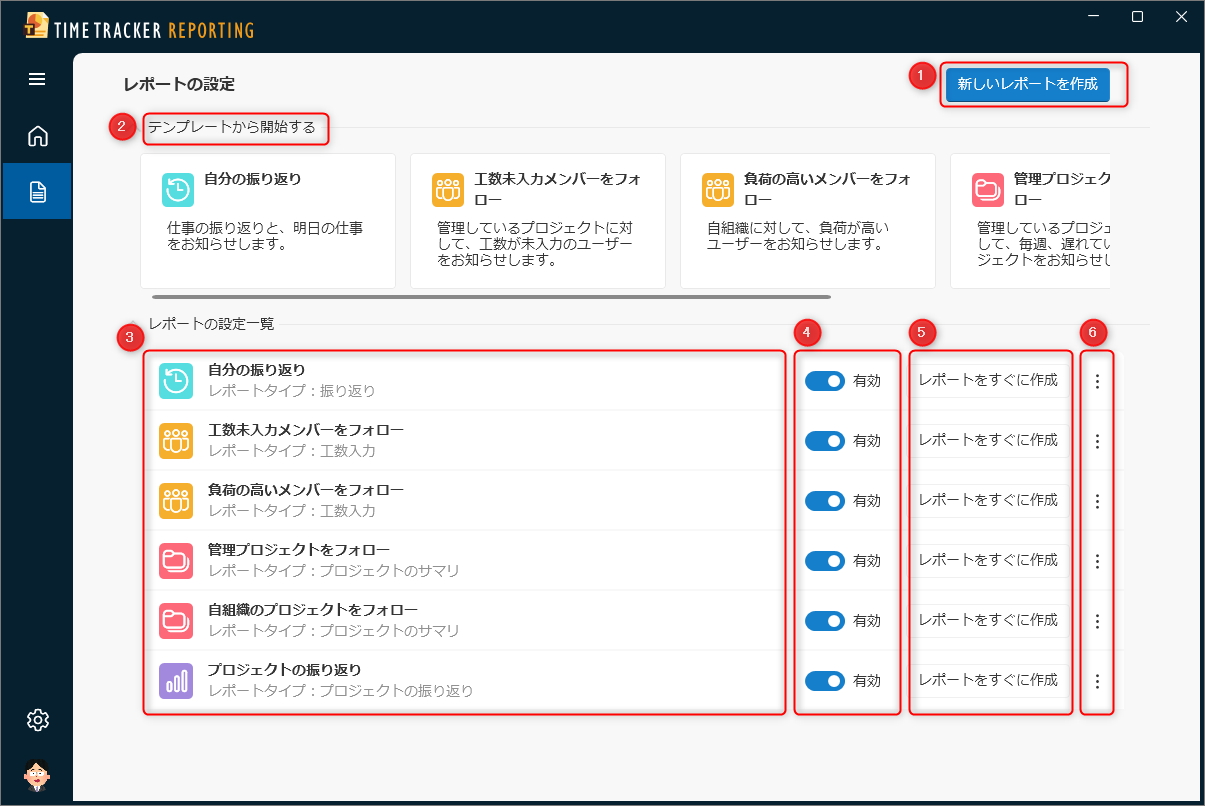
- Create a new report
You can easily create reports by using templates.- ①: Create a new report.
- ②: Create a report using a template.
- Operate the created report
- ③: Edit the report settings.
- ④: Switch report notifications on/off.
- ⑤: Notify with the settings when clicked.
- ⑥: Duplicate/delete the report.
Create a report
Select the report type and set the following.
Common settings
- Report name
- Enable/disable report
- Report creation conditions: Select a report only when there is a regular report/warning.
The criteria for determining whether there is a warning can be viewed from "Warning settings" after creating a report.

- Notifications: Switch between showing/hiding new reports in the Windows Action Center.
- Schedule: Specify the unit for receiving reports (day/week/month).
Target data
Specify the project and member to be notified.
Operations on the list of output reports
The list of reports can be operated as follows.
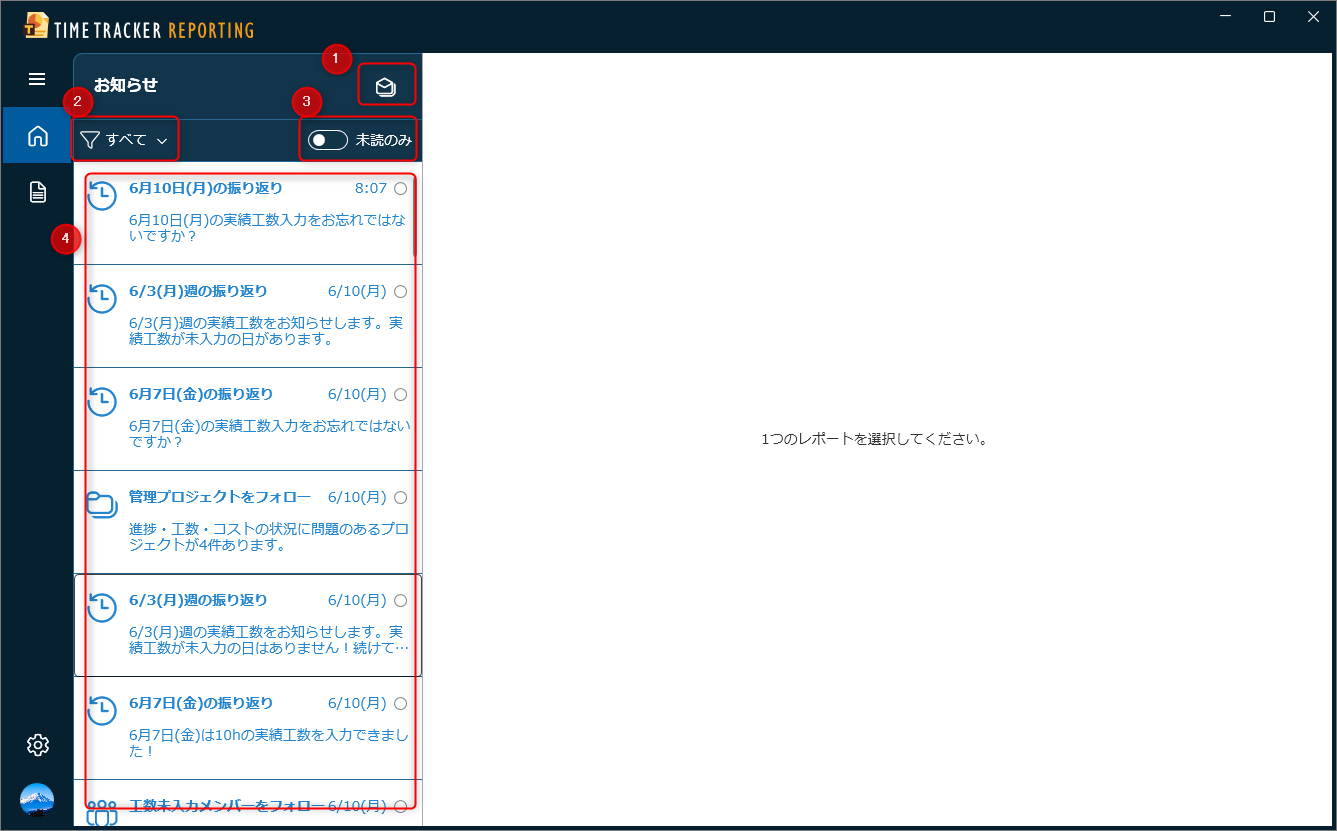
- ①: Mark all reports as read.
- ②: Filter by report type.
- ③: Filter by only reports that have not yet been opened.
- ④: Hold down the Ctrl or Shift key and right-click on the selected reports to perform operations (read/unread/delete) all at once.
Share reports with members
You can also share the reports you receive with members.
If you want to share the project or load status with related parties, click the red frame in the image below.
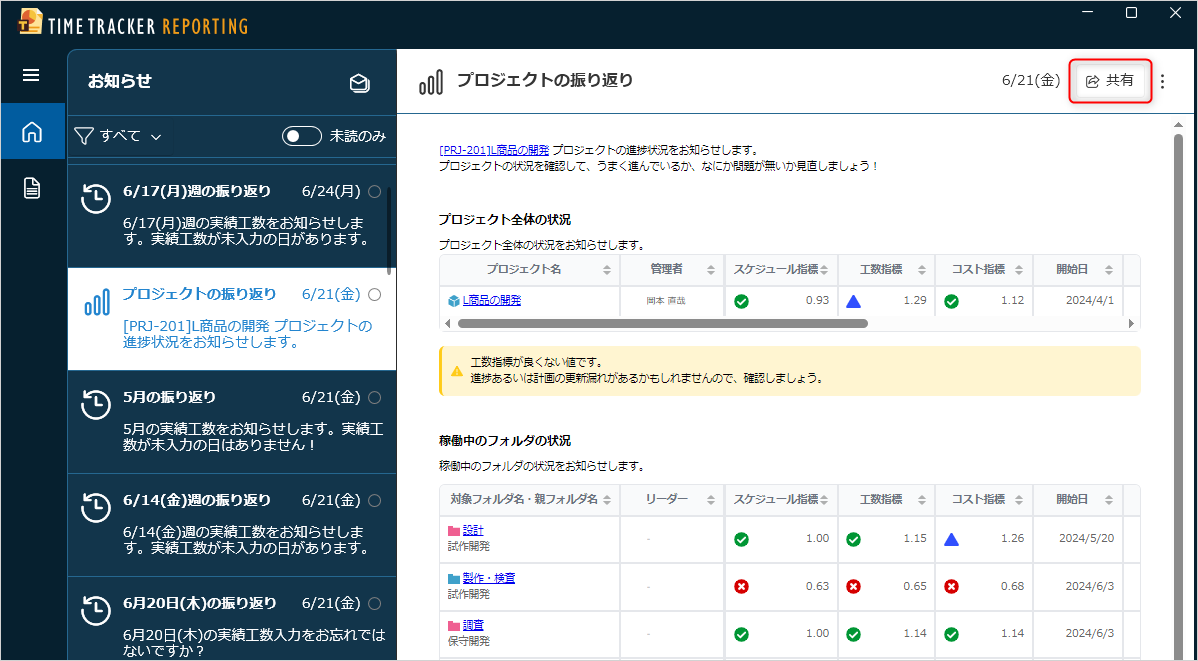
You can share the same information by sharing the issued URL with related parties.
Open TimeTracker RX from a report
Clicking on a link in a report will open the relevant section in TimeTracker RX.
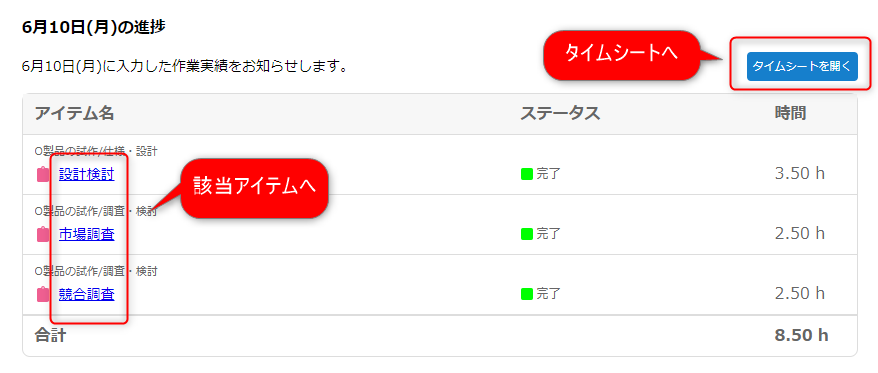
You can then check the relevant section and identify the problem area.
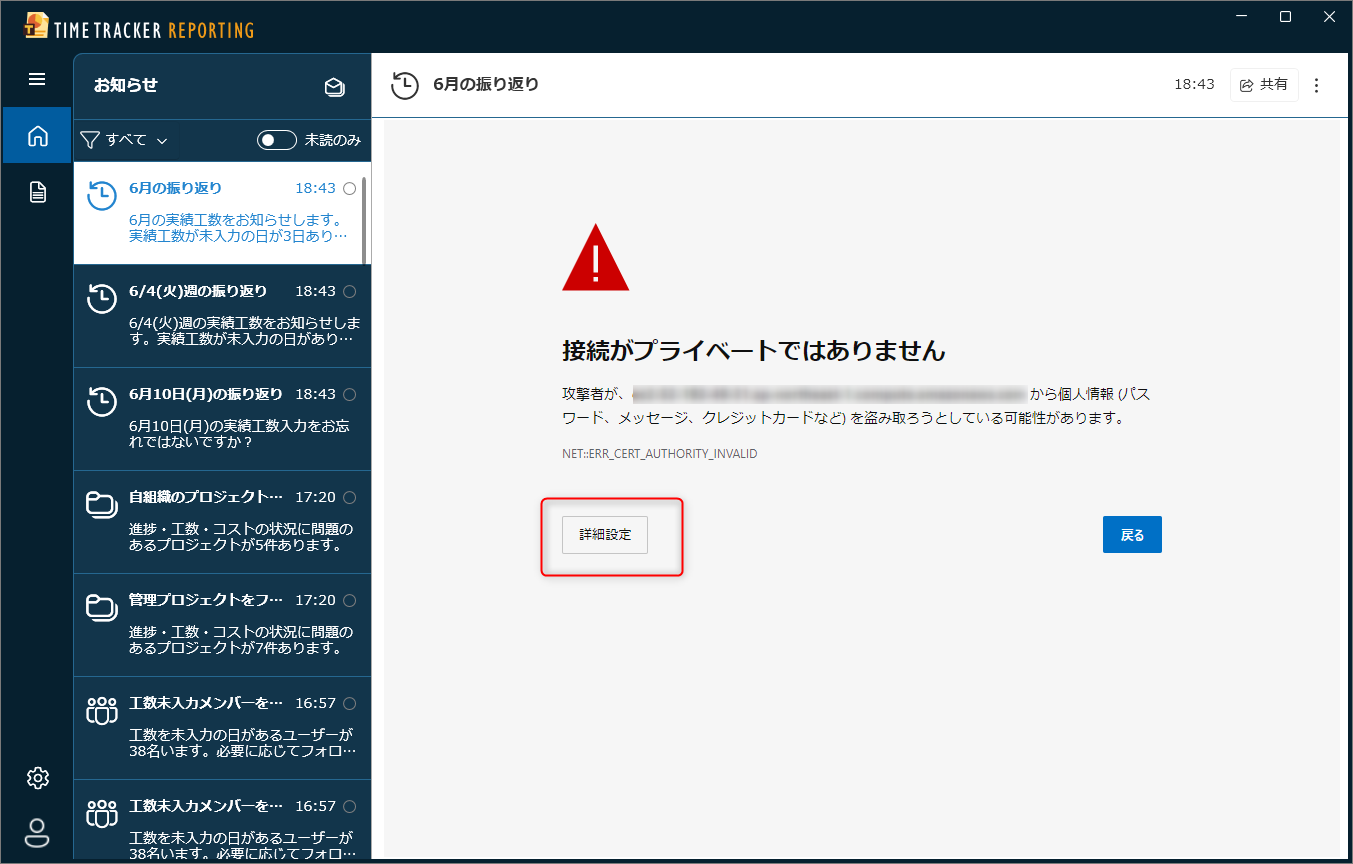
Notes
If you are using a self-certified SSL certificate, clicking on the link will take you to the following screen.
In that case, click on the area in the red frame.
The screen will switch to the image below, so click ① to open TimeTracker RX.
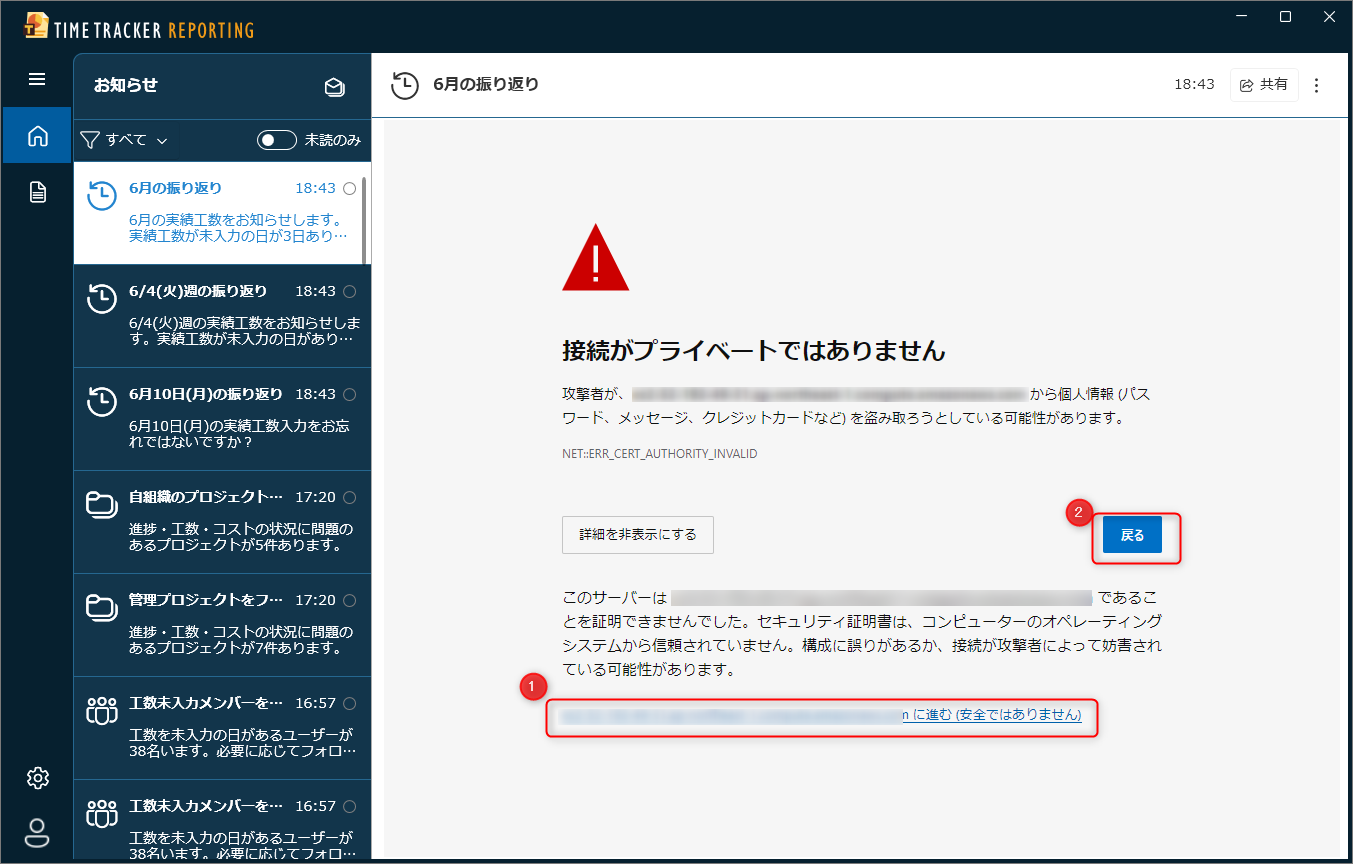
Then click ② to return to the original screen.
This will not occur the second or subsequent accesses.
Also, if you have applied an SSL certificate issued by a public institution, the above screen will not be displayed.