Managing System Roles
Overview
System roles define permissions grouped by function.
You can also define the scope of access.
By assigning system roles to users, the user's permissions are determined.
This section explains the procedure for defining system roles.
Actual permissions are determined by 'system-level permissions' and 'project-level permissions'.
Common Procedure
To define system roles, perform the following steps as a common prerequisite:
-
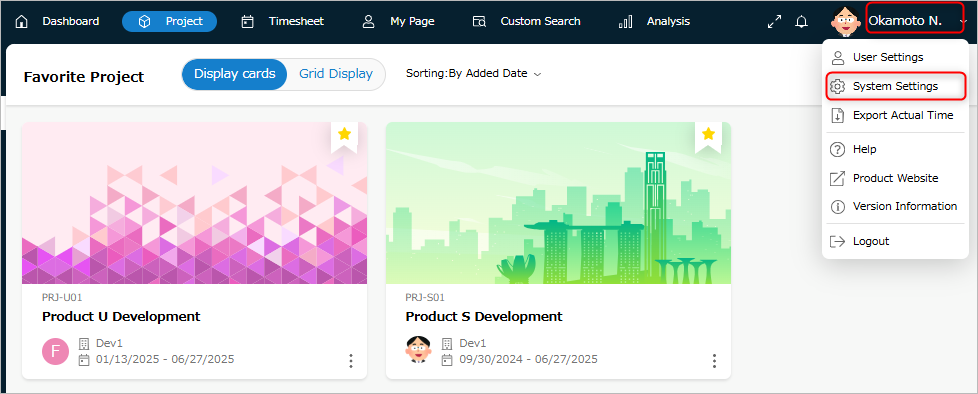
Click your login name in the TimeTracker RX global navigation.
-
Select "System Settings".
-
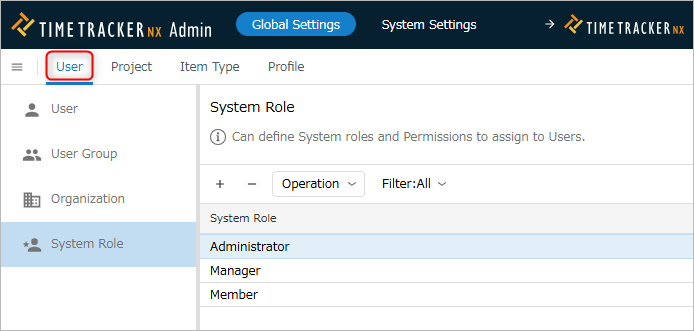
Click "Users" in the local navigation.
-
Select "System Roles" from the left menu.
System Role Operations
Adding
Add the system role to be set for the user.
- System roles define the permission settings for various functions such as "Project Creation" and "Dashboard."
- By changing a user's system role, you can achieve the following:
- Grant the user permissions common to all projects.
- By subdividing system roles, you can centrally manage security according to organizational rules.
Operating Procedure
-
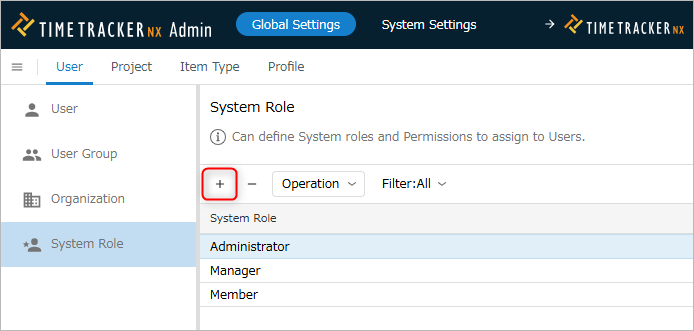
Click the "+" icon at the top of the system role list.
-
Enter the system role information in the "Create System Role" dialog.

The input fields are as follows:
No. Item Description 1 Name System Role Name 2 Description System Role Description -
Click the "OK" button.
Changing
You can change the information of registered system roles later.
By changing the permissions defined in the system role, you can change the permissions of users in bulk.
The changed permissions will be reflected when the target user refreshes the screen.
Operating Procedure
-
Select the target system role.
-
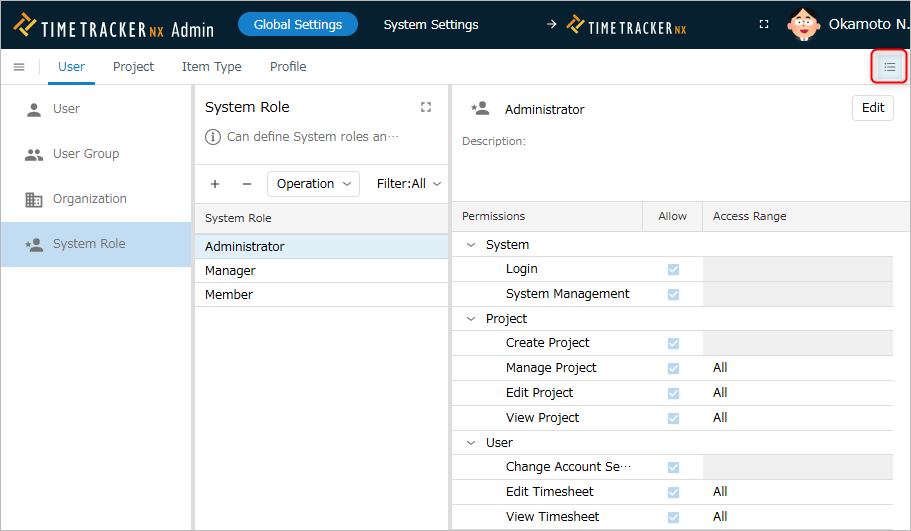
Click the "Properties" icon in the local navigation.
-
Click the "Edit" button.
-
Set the permissions and access range of the system role.
-
Click the "Save" button.
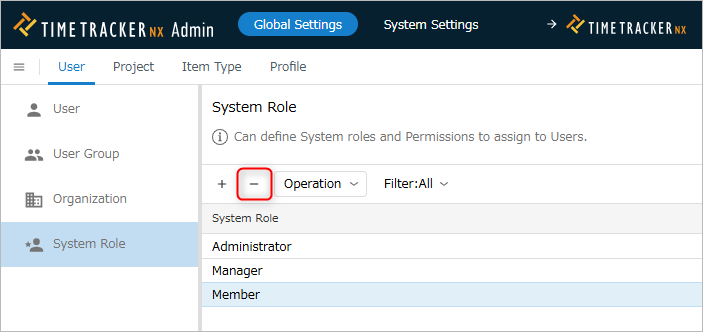
Deleting
You can delete system roles that are no longer needed.
Users who were granted the deleted system role will lose all privileges and will no longer be able to log in.
Procedure
-
Select the system role to be deleted.
-
Click the "-" icon at the top of the system role list.
Restoring
You can restore deleted system roles.
Use this if you accidentally deleted a system role or want to reuse a deleted system role.
Procedure
- Select "Deleted" in the "Filter".
- Select the target system role. Multiple selections are possible.
- Click "Actions" at the top of the system role list.
- Select "Restore".
Permissions Set by System Roles
List of Setting Items
The following describes the permissions defined by system roles.
| Function | Item | Permission Details |
|---|---|---|
| System | Login | Can log in to TimeTracker RX. |
| System Administration | Can use Admin. | |
| Project | Create Project | Can create a new project. |
| Project Management | Can view and edit project settings. | |
| Edit Project | Can edit work items. | |
| View Project | Can view work items. | |
| User | Change Account Settings | Logged-in users can edit their own user information. |
| Edit Timesheet | Can edit timesheets. | |
| View Timesheet | Can view timesheets. | |
| My Page | Work Item List | Can display My Page. |
| Analysis | Dashboard | Can display the dashboard. |
| Cross-Project | Can display the cross-project screen. | |
| Pivot Analysis | Allows displaying the pivot analysis screen. | |
| Resource Load | Allows displaying the resource load screen. | |
| Performance Export | Allows performing performance export. | |
| Cost | Cost Editing | Allows viewing and editing costs. |
| TimeTracker Desktop | Allows the use of TimeTracker Analytics (*) | Allows the use of this function. (Applies to versions later than Version 1.0.1.30830) |
| Staffing Plan | Allows the use of staffing plan | Allows the use of this function. For details on staffing plan, please refer to "What is a Business Plan?". |
- For details, please refer to "Using TimeTracker Analytics".
The following features cannot be used.
Work Item List, Pivot Analysis, Resource Load, and TimeTracker Analytics Usage
About "Using TimeTracker Analytics"
TimeTracker Analytics allows you to freely analyze project and user performance and visualize it in graphs.
However, there are some important points to note, as described in the following link.
"Analytics Notes"
Therefore, you can control the functionality by unchecking this item for users you do not want to use it, as follows:
- Check this box for department heads who want to visualize multiple projects together.
- Do not check this box for team members who do not want to access other projects.
Defining Access Range
The items to set in the access range are introduced by category.
(Categories for which there are no permissions to set access ranges are omitted)
Understanding Access Ranges for Affiliated Organizations
There is an item for access ranges called "XX (Projects, Users, Analyses) under Affiliated Organization".
When this item is specified, the following permissions are granted.
- Permissions are granted to the following organizations via the user settings "Organizational Permissions".
- If "Authority Organization" is set: The organization set in "Authority Organization"
- If "Authority Organization" is not set: The organization to which the user belongs
- In addition to the organizations to which permissions are granted, access rights are also granted to the projects to which the member belongs.
- It is common to start work on projects outside of one's affiliated organization.
If permissions are simply granted only to those under the affiliated organization, access to the above projects will not be possible. - Therefore, permission is granted to the projects to which the member belongs to enable access.
If you do not want to allow access, please deny access in the project's security settings.
- It is common to start work on projects outside of one's affiliated organization.
Project
| No. | Item | Description |
|---|---|---|
| 1 | All | Access to all project and user data. |
| 2 | Projects under the organization | Access to project data under the specified organization. |
| 3 | Member's projects | Access to project data to which the logged-in user belongs. |
| 4 | Administrator's projects | Access to project data managed by the administrator. |
| 5 | Settings for individual projects | Initially, users cannot access projects. By granting permissions to users in "Project Security", they will be able to access the target project. See the following link for details. : "Project Security" |
User
| No. | Item | Description |
|---|---|---|
| 1 | All | Access to all project and user data. |
| 2 | Users below affiliated organization | Access to data of users belonging to the specified organization (#setting-image). |
| 3 | Myself | Access to data only for the logged-in user. |
Analysis
| No. | Item | Description |
|---|---|---|
| 1 | All | Access to all project and user data. |
| 2 | Data below affiliated organization | Access to data in the specified organization. |
| 3 | Member's Projects | Access to data of projects the logged-in user belongs to. |
| 4 | Administrator's Projects | Access to data of projects managed by the logged-in user. |
| 5 | Myself | Only the logged-in user's data can be accessed. |