Defining User Groups
Overview
You can group users who use TimeTracker RX into user groups.
In project management, you can grant project management and other permissions to multiple users at once.
Examples: Job title group "Department Head," Qualification holder group "Project Administrator," "Project Auditor," etc.
This section introduces the features related to user groups.
Common Procedure
To define a user group, perform the following steps as a common prerequisite:
-
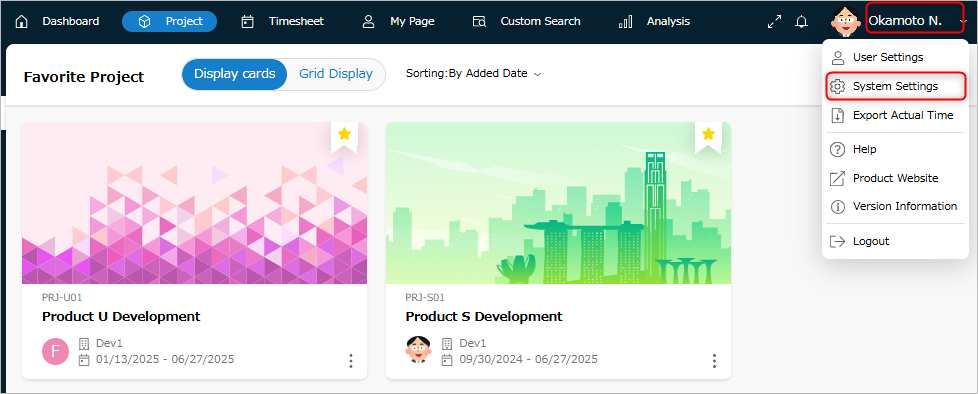
Click your login name in the TimeTracker RX global navigation.
-
Select "System Settings."
-
Click "Users" in the local navigation.
-
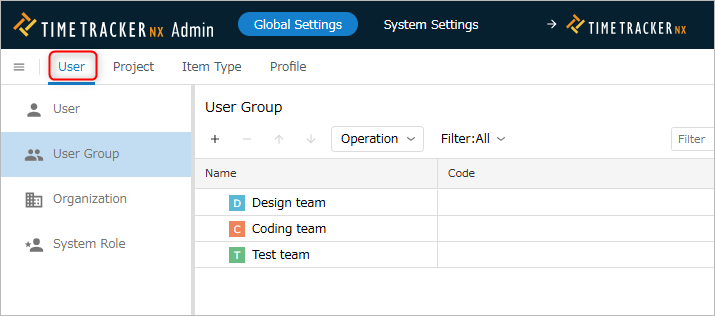
Select "User Groups" from the left menu.
Adding User Groups
By grouping users together to manage project permissions, you can apply project permissions to all users at once simply by adding them to that group.
To group users, add a user group and then assign the target users to that group.
Procedure
-
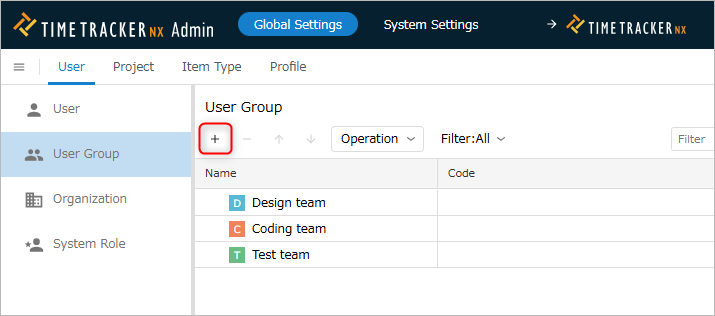
Click the "+" icon at the top of the user group list.
-
Enter the user group information in the "Register User Group" dialog.

The input fields are as follows:
No. Item Description 1 Name User group name 2 English name Name used to represent the user group in English
Used as a filter when selecting user groups.3 Code Code to identify the user group
Used for searching for user groups, etc.4 Description Description of the user group -
Click the "OK" button.
Deleting User Groups
You can delete user groups that are no longer needed.
Deleting a user group does not delete users.
Procedure
-
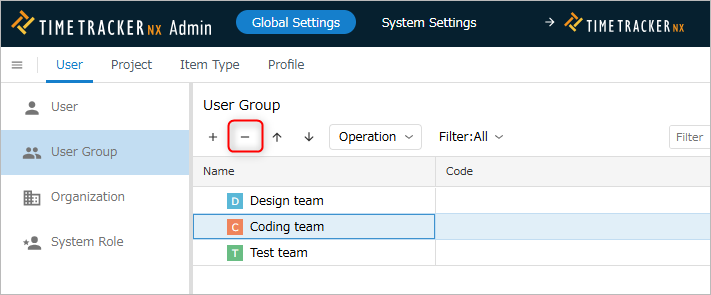
Select the user group to delete.
-
Click the "-" icon at the top of the user group list.
Changing User Groups
You can change the information of registered user groups later.
Use this when changing the users belonging to a group.

Updating Field Values
- Select the target user group.
- Click the "Properties" icon in the Local Navigation menu.
- Click the "Fields" tab① in the Properties pane.
- Click the "Edit" button.
- Modify the contents of the user group field.
- Click the "Save" button.
Updating Group Members
- Select the target user group.
- Click the "Properties" icon in the Local Navigation menu.
- Click the "Group Members" tab② in the Properties pane.
- To add, click the "+" button.
- In the "Select Users" dialog box, check the target user.
- Click the "OK" button.
Restoring User Groups
You can restore deleted user groups.
This is useful if you accidentally deleted a user group or want to reuse a deleted user group.
Procedure
- Select "Deleted" in the "Filter."
- Select the target user group. Multiple selections are possible.
- Click "Actions" at the top of the user group list.
- Select "Restore."
Utilizing User Groups
The user groups you've set up can be used when configuring project security.
For example, members belonging to a PMO (Project Management Office) refer to individual projects across the organization.
By adding a group of such members to a user group, when setting security permissions for a project,
you can set the permissions for individual members simply by configuring that group.
