Preparation (System Administrator)
Overview
This page introduces the preparations required before users can use TimeTracker RX.
The preparation flow is as follows.
- Install TimeTracker RX
- Set up master data
- Create an organization
- Create a system role
- Create a user
1. Install TimeTracker RX
First, install TimeTracker RX.
For details on the installation procedure, see the following link. : "Setup Guide"
This guide assumes that the database is empty.
2. Setting the master data
In the steps up to this point, the server environment has been built and a database for TimeTracker RX has been created.
Next, set up the master data.
- This master data must be set in order for users to use TimeTracker RX from a browser on a client PC.
- Master data refers to basic information common to all databases, such as the following.
- Organization information
- System role information
- User information
Launch your browser and access TimeTracker RX with the following URL.
http://(TimeTracker RX server machine name)/TimeTrackerRX/admin
The login screen will be displayed, so enter the login name and password below.
| Item name | Input content |
|---|---|
| Login name | Login name of the administrator account registered when creating the database |
| Password | Password of the administrator account registered when creating the database |
Points
When setting up master data, some people have trouble defining "organizations" and "roles".
There is no need to define the actual organizational structure as is.
By designing in the following steps, you can effectively operate TimeTracker.
- Classify users according to the purpose of using TimeTracker.
- Design the "role" configuration.
- Reflect the actual organizational structure (organization hierarchy) at the required granularity.
The following is an example case.
| Role | Scope of visibility |
|---|---|
| TimeTracker administrator | All information |
| Department head (general manager or section manager) | Project information for the entire department |
| Manager | Project information for the department |
| Leaders and members | Project information for the project |
2-1. Creating an organization
First, create an organization on the Admin screen.
You will be able to calculate man-hours by the unit of the defined organization.
Creation procedure
-
Click "Organization" from the list on the left side of the screen.
-
Click "+".
-
Enter the following items in the "Create organization" dialog.

Item name Input content Name Name of the organization to be defined English name Name in English used for searching Code Arbitrary string to be set when managing organizations systematically Description String to describe the defined organization -
Repeat steps 1 to 3 until all required organizations are defined.
Points
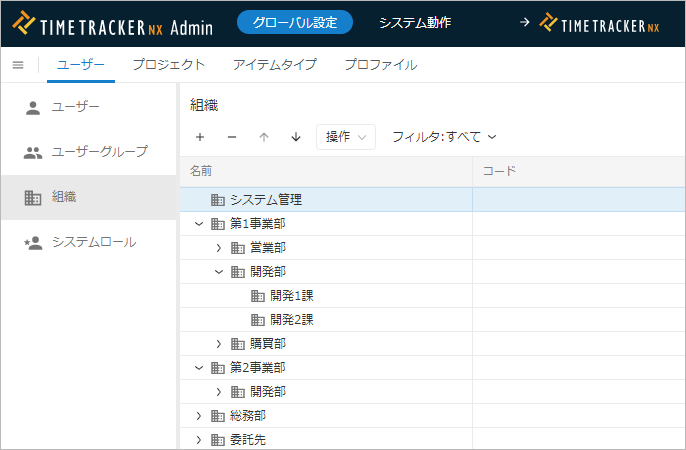
Organizations can be hierarchically structured up to 16 levels.
You can easily change the structure by dragging and dropping organizations to any position.
The following is an image of a hierarchically structured organization.
2-2. Creating a system role
A system role defines the functions available to users.
By assigning the system role defined here to a user, the functions available to each user will be determined.
Creation Procedure
-
Click "System Roles" from the list on the left side of the screen.
-
Click "+".
-
Enter the following items in the "Create System Role" dialog.
Item name Input content Name Name of the system role to be defined Description String describing the defined system role -
Click the "Properties" icon.
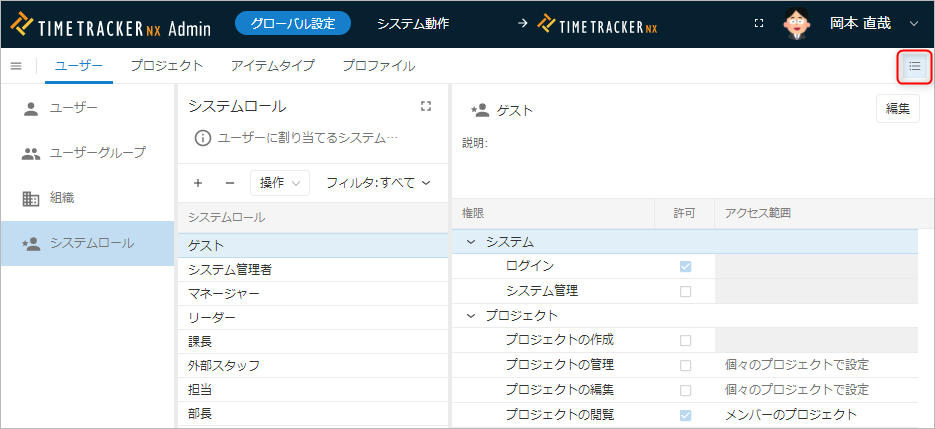
-
Click the "Edit" button.
-
Enter the permissions and access scope for the system role.
For details, please refer to the following links:- Target permissions: "System Role Configuration Item List"
- Access scope: "Access Scope Definition"
-
Click the "Save" button.
-
Repeat steps 1 to 7 until all required system roles are defined.
Below is an example of defining permissions by job title.
-
What you want to set
- Department head: Analysis and cost management
- Manager: Create and edit projects
- Leader: Edit projects
- Person in charge: View projects (editing not possible)
-
Setting results (permissions granted by "○")
System role name System administration Create projects Edit projects View projects Dashboard Cross-project View costs Department head ○ ○ ○ ○ ○ ○ ○ Manager ○ ○ ○ Leader ○ ○ Person in charge ○
2-3. Creating users
Now it's time to create users.
Each user will use the user information defined here to log in from their browser and use TimeTracker RX.
Create one for each user who plans to use it.
Creation Procedure
-
Click "User" from the list on the left side of the screen.
-
Click "+".
-
Enter the following items in the "Register User" dialog.

Item name Input content Name Display name of the user to be defined English name Name in English, used for searches Code Arbitrary string to set when managing users systematically Login name Login name to enter when logging in Password/Password re-enter Password to enter when logging in Organization Organization to which the user belongs System role System role that defines the permissions to be granted to the user -
Repeat steps 1 to 3 until all required users are defined.
Point
If you have a large number of users to register, registering them manually is tedious and may result in input errors.
If you want to register a large number of users at once, we recommend that you use the "Import user information function".
- For details, see the following link. : "User information import function"
- You can register users in bulk based on information written in an Excel or CSV file.
With the above process, the preparations to start using TimeTracker RX are complete.
If you are the system administrator, please inform each user of the following information.
- Access URL
- Login information for the configured user (login name and password)
With the above information, each user can use TimeTracker RX through a client browser.