Formulating a Plan
overview
Determine the resource allocation for each member for each task.
The staffing plan defines the monthly plan (person-months/hours) for each member.
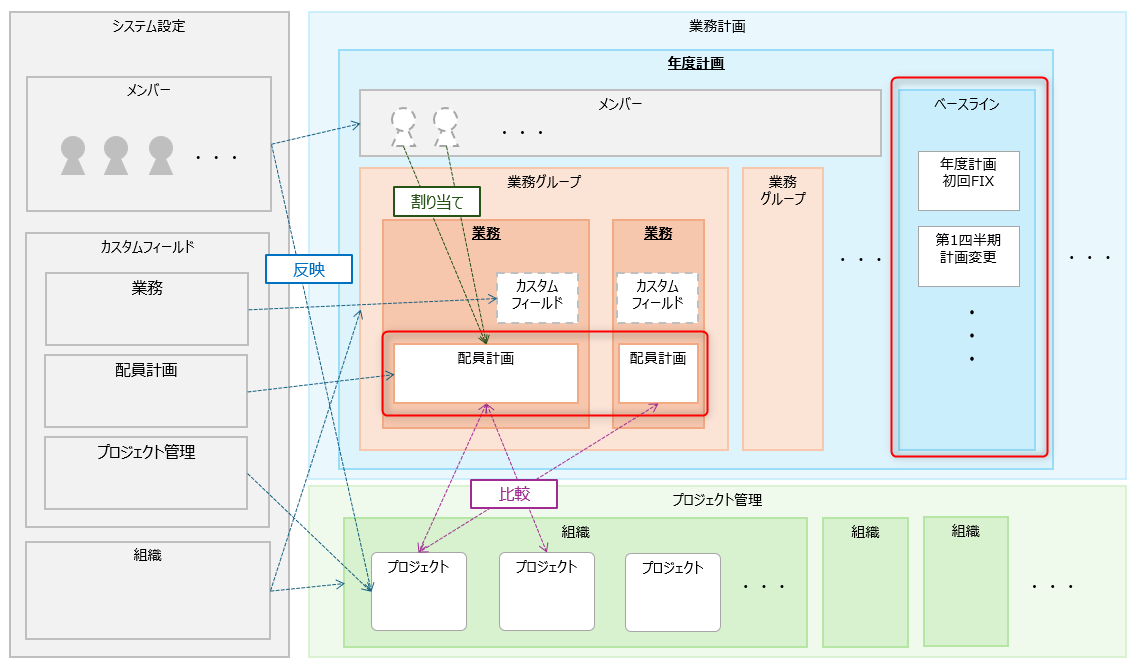
Assign staff on a task-by-task basis.
After assignment, check the staffing assignment across tasks and by member using "Check Staffing Assignment Status".
Staffing Planning Screen
By clicking the "Name" of a task in the task list, you will jump to the staffing planning screen for that task.
Staffing is planned on the following screen.
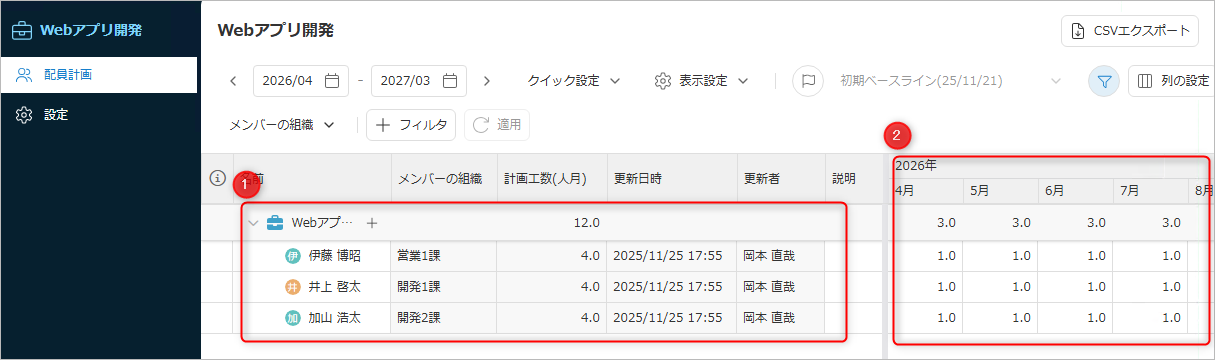
- ①: Displays a list of members for the task.
- Custom fields can also be displayed for members.
- ②: Displays the monthly plan for each member.
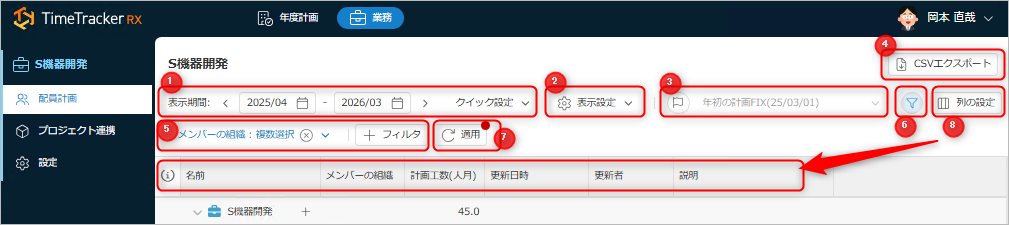
Switching Screen Display
You can switch the display using the following operations.
-
①: Switches the display period.
-
②: Switches the following display content.
- Switches between single-line and multi-line display of custom fields.
- Unit of effort (person-months/hours)
-
③: Displays the baseline. See "Compare with Baseline" for details.
-
④: Outputs staffing plan information. See "Export Data" for details.
-
⑤: Filters the displayed content of the staffing plan.
- Filter items are system fields/custom fields.
Implementation Details Operation Add Item Click "+Filter" and select the target Delete Item Hover your mouse over the item to delete and right-click 
- Filter items are system fields/custom fields.
-
⑥: Toggles the display/hide of filter settings. Hiding it does not remove the filter.
-
⑦: If the information displayed by the filter is not up-to-date, a red circle will appear in the upper right corner.
Click to display the latest status. -
⑧: Changes the display content and order of columns.
Assigning Members
Assign members to create a staffing plan.
Click the "+" button in the diagram below to register members.
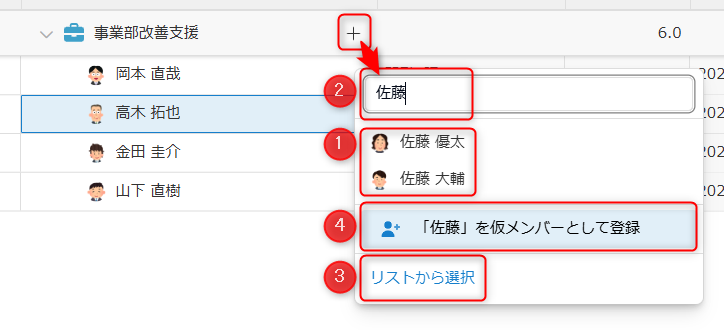
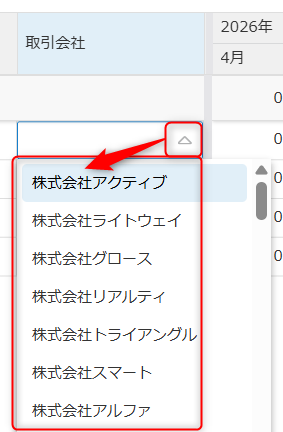
- Select the target member from ① and ②.
- Members registered in the annual plan will be displayed.
- Entering a keyword in ② will display candidates, including temporary members.
- ③: Click to register multiple members at once and register them from the dedicated dialog.
- ④: Click to register as a temporary member. They will be automatically registered as members of the annual plan.
Updating Member Information
You can check and add information on a member-by-member basis.

- ① (light gray cell): Reference field
- ② (white cell): Updatable field
- Double-click to update.
- Multi-line input: Press Shift + Enter to create a line break.
- List-style input: Add options in the custom field definition.
For details, please refer to "Custom Field Settings".
Replacing and deleting members
You can transfer the planned effort information assigned to one member to another member.
- When members change due to organizational changes
- Assign the plan assigned to a temporary member to a TimeTracker RX registered member.
Select the target member as shown in the figure below, right-click, and select the member to change from "Change Member".
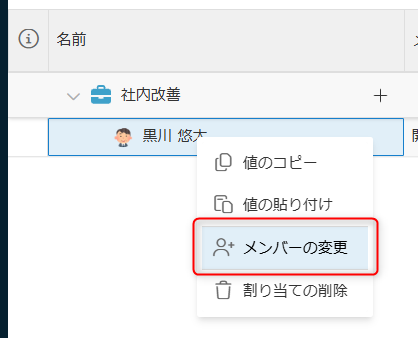
To delete a member, select "Delete Assignment".
Setting Planned Workload for Team Members
Set the planned workload for each month for the team members of your project.
You can enter the data using the following methods:
-
Double-click the target cell to enter the data.
If you select multiple cells and enter the data, you can set the values all at once. -
Copy the value from another cell.
- Use "Ctrl+c → Ctrl+v" or "Copy Value from Right-Click" and paste the value.

-
Copy using drag-fill.
Click and hold the "■" in the lower right corner of the selected cell, and drag it in the direction you want to copy the value.
- Copy and paste the staffing plan written in Excel.
Copy in Excel, select the target cell in the staffing plan, and paste.
Exporting Data
Staffing plan data can be exported to a CSV file.
- This is useful for saving individual change history or as a temporary comparison target.
- You can also revert to a previous state by pasting the exported values back into the staffing plan.
Click "CSV Export" on the staffing plan screen.

Please enter the information such as the period and fields to output.
Comparing with a Baseline
You can save milestone information such as plan fixes and plan changes as a "baseline" and
check the difference with the current plan.
For details, please refer to "Adding a Baseline".
In Figure ① below, enable the display of baselines, and in ②, select the baseline to compare.
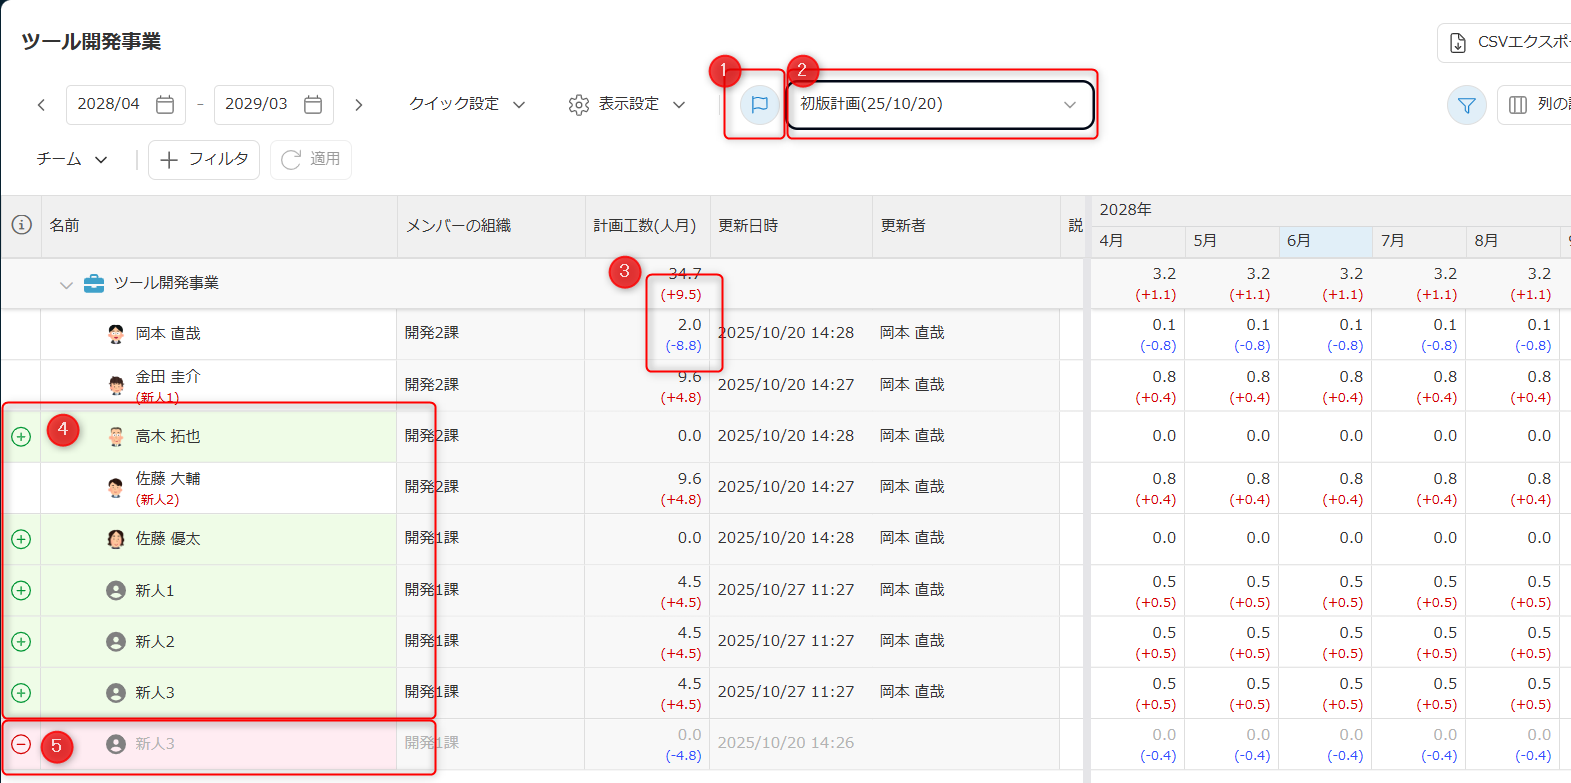
Compared to the baseline, the following will be displayed:
- ③: Difference from the plan saved at the baseline
- Red: Increase from the baseline.
- Blue: Decrease from the baseline.
- ④, ⑤: Member additions/removals from the baseline
- Green: Added members
- Red: Deleted members