Formulating an Annual Plan
Overview
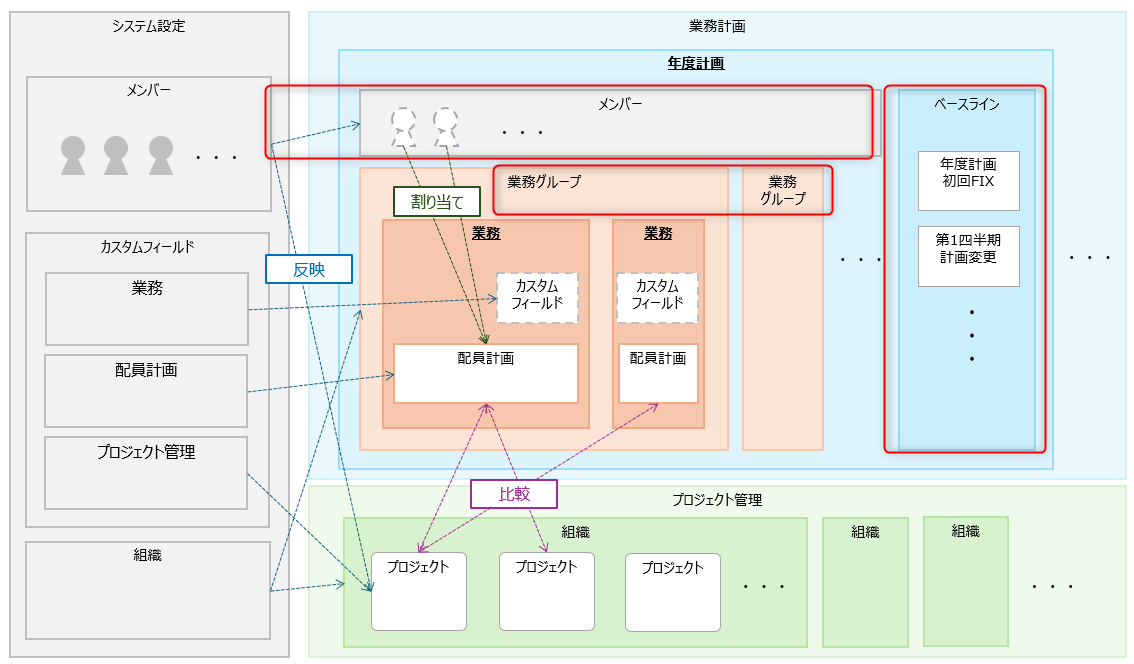
After creating the annual plan, prepare to assign tasks and member allocation plans within the target annual plan.
This page introduces the settings necessary to actually define tasks and assign personnel.
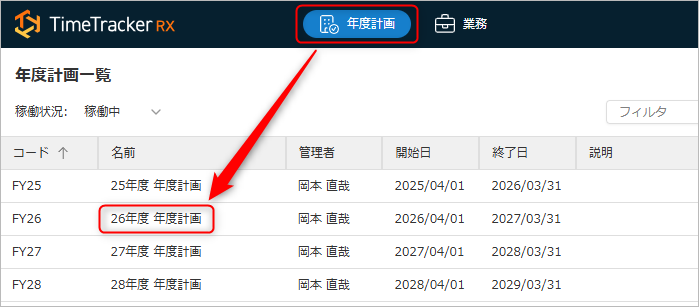
From "Annual Plan," double-click the name field of the annual plan you want to edit.
Setting Members in the Annual Plan
To create a staffing plan for the tasks created in "Define Tasks", you need to define the members to be assigned to the tasks within the annual plan.
Here's how to set members in the annual plan.
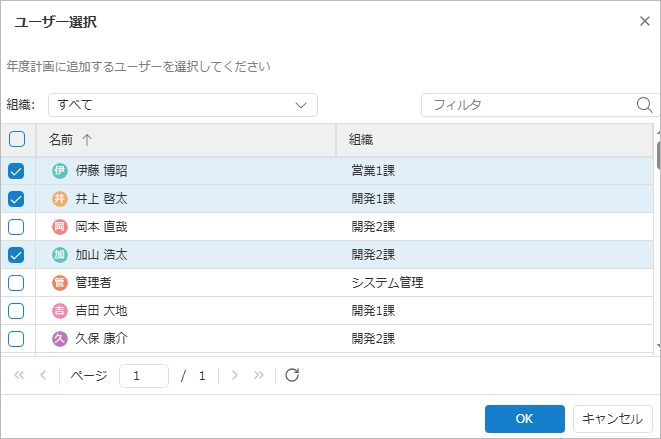
First, open the annual plan, select the member type to add from ①②, and add them from ③.
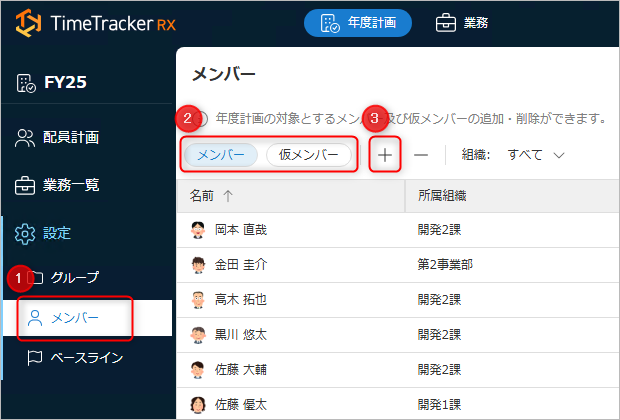
There are two types of members:
-
Member: A member with an account in TimeTracker RX In this case, select the members to be included in the staffing plan in the "User Selection" dialog and click the "OK" button.
-
Temporary Members: Members who do not have an account in TimeTracker RX
- There may be cases where members are not registered in TimeTracker RX at the time of formulating the annual plan.
In that case, please register them as members using the procedure "Set up temporary members". - By replacing them with accounts registered in TimeTracker RX later, you will be able to manage them in TimeTracker RX as well.
Temporary members are users limited to staffing planning.
If you want to display them in TimeTracker RX and compare planned/actual values, please replace them with TimeTracker RX accounts.
- There may be cases where members are not registered in TimeTracker RX at the time of formulating the annual plan.
Setting up temporary members
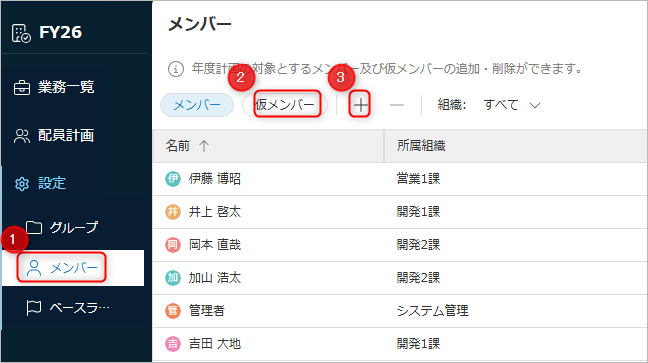
In the diagram below, ① select "Temporary Members" from "Settings" - "Members" (②), and click "+" (③).
For the added temporary member, please set the following:
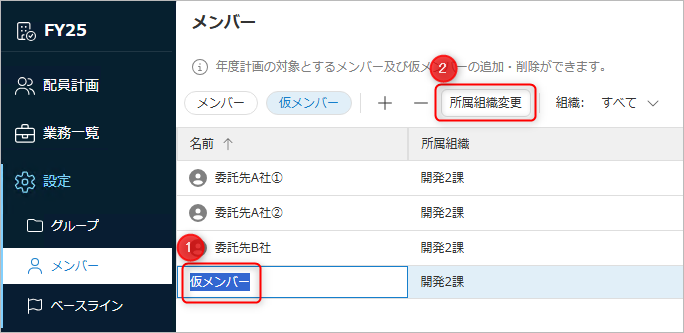
- Name: Double-click ① and change it.
- Affiliated Organization: Select the target and choose the organization from ②.
- The organization is the organization defined in TimeTracker RX.
- You can select multiple members and change them all at once.
- The initial value is the organization to which the user who registered the temporary member belongs.
Deleting a Member
Select the target member and click the "-" button.
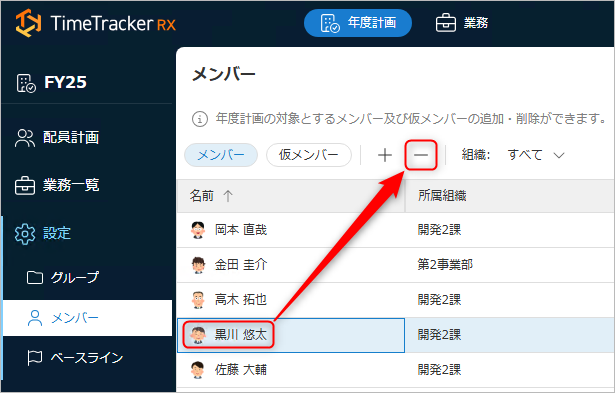
- The value set in the staffing plan for deleted members will be removed.
- Even if you delete a member from the annual plan, it will not be deleted from TimeTracker RX.
(The data as an annual plan will be deleted)
Setting up a business group
By setting up a group, you can group multiple business operations and manage them more easily as follows:
- Narrow down the business operations and staffing plans displayed.
- Compare with planned and actual man-hours registered in TimeTracker.
Groups can be created in the following two ways:
-
Import organizations from TimeTracker RX.
Click the red box in the image below.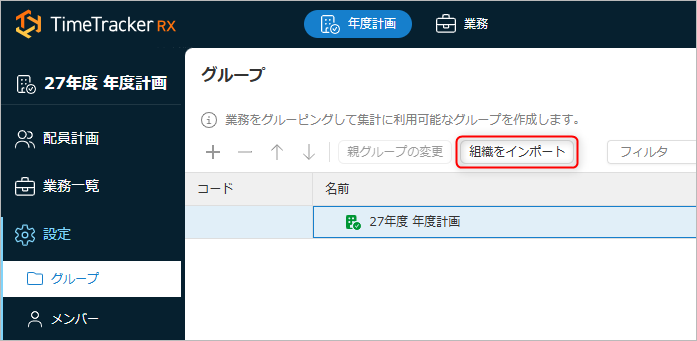
Select the following in the dedicated dialog:

- Selecting "Import all organizations" will import all organizations set up in TimeTracker RX.
- Selecting a target will import the selected organization and its sub-organizations.
-
Create a group manually.
Please create the group using the procedure described below.
Creating a Group Manually
Display the target annual plan and click "Settings" - "Groups" in Figure ① below.
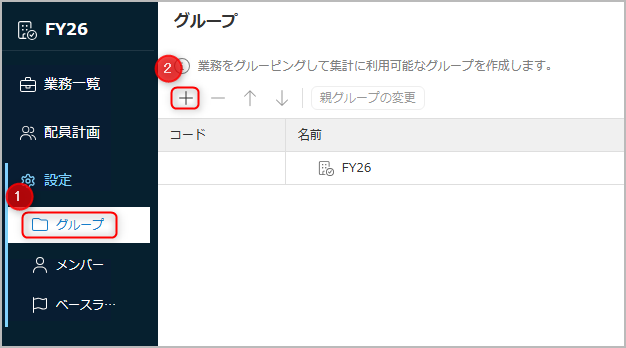
② Click the "+" icon to create a group, then double-click the "Name" and "Code" to change them.
A business group will be added.

Changing/Deleting Group Settings
Select the created group and modify it using the following operations.
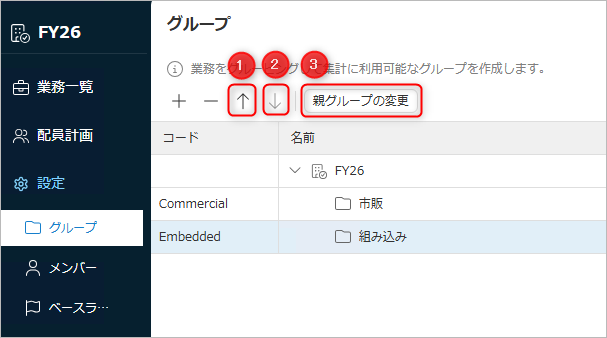
- ①, ②: Move within the same hierarchy
- ③: Change the hierarchy
To delete a group, select the target group and click the "-" button.
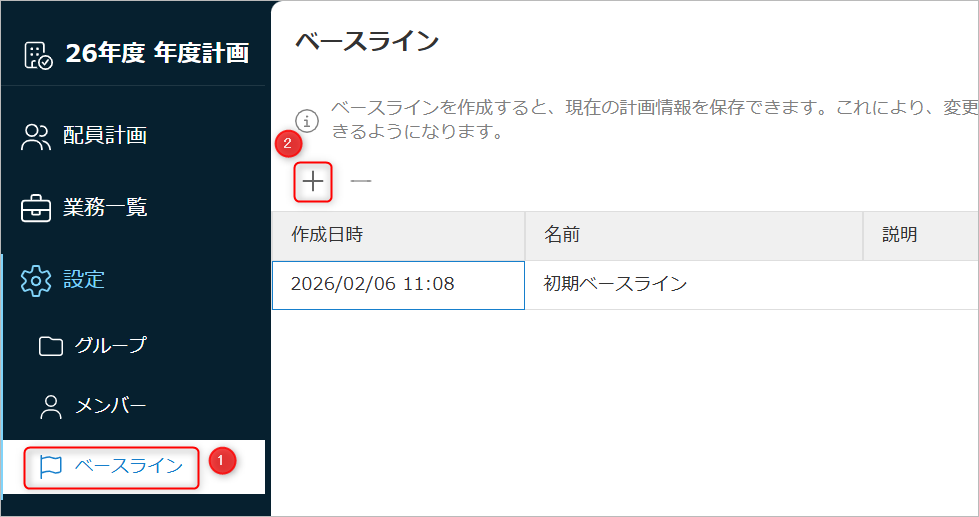
Managing Baselines
A baseline is a record of case information at a past point in time, serving as historical plan information.
You can compare the saved baseline with the current plan to check the differences.
By saving the baseline at the time of annual plan finalization or milestone revisions,
you can check the changes in the plan content after the revision.
Adding Baselines
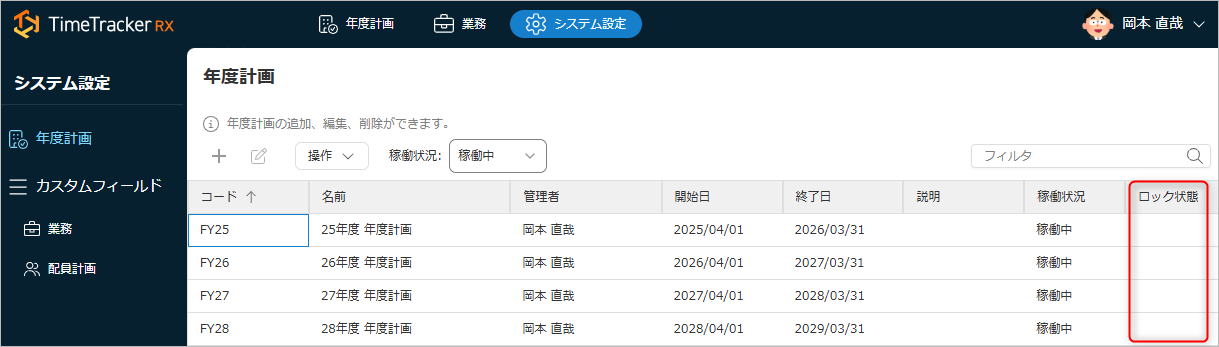
Baselines can be added by the following users:
- Users with system administrator privileges assigned by their system role
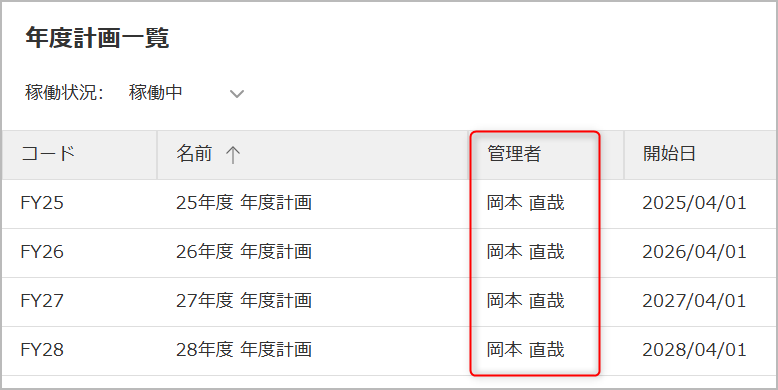
- Administrators of the target annual plan (red box in the image below)
Please add using the following steps.
-
Display the target annual plan and click the "+" icon (②) under "Baseline" in Figure ① below.
-
Click the "OK" button in the "Create Baseline" dialog box.

-
In the "Create Baseline" dialog box, enter the baseline information in each field and click "Save".

The task list will show "Locked," and you will not be able to edit tasks within the annual plan.
The time required to create a baseline varies depending on the number of tasks and members in the annual plan.
- Normally, this takes only a few minutes.
- If the lock is not released after more than an hour, please perform "Unlock" in "Edit/Delete Annual Plan".
Deleting a Baseline
To delete a baseline, select the target annual plan and click the "-" icon (②) from "Baseline" (①) in the figure below.
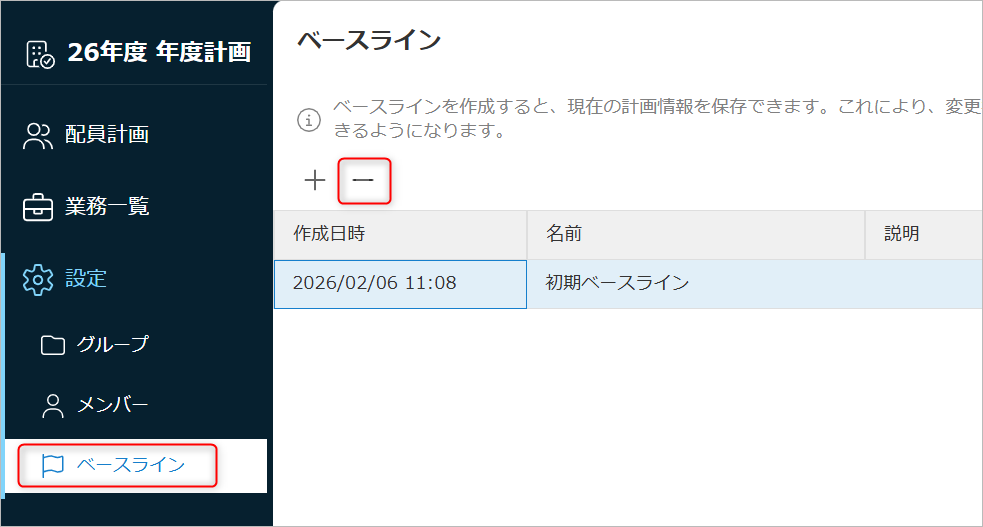
Click the "OK" button in the confirmation dialog to complete the deletion.
