Defining Status
Overview
Status expresses progress not as a numerical progress percentage, but as a meaningful string.
By expressing it with strings such as "Not Started," "Awaiting Review," and "Completed," progress management can be made simpler and easier to understand.
This section introduces the functionality related to defining statuses.
Common Procedure
To define a status, perform the following steps as a common prerequisite:
-
Click your login name in the TimeTracker RX global navigation.

-
Select "System Settings".
-
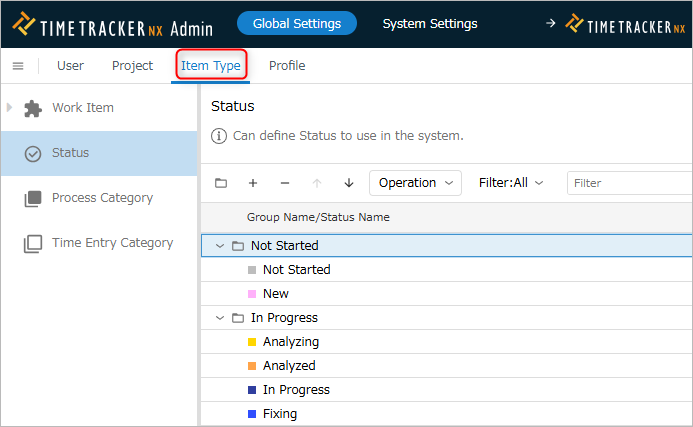
Click "Item Type" in the local navigation.
-
Select "Status" from the left menu.
Adding a Status
Add a work item status using the following method.
By adding it to the project status, you can use it for the work item status.
Please refer to the following video (4:50~) for the operation flow.
-
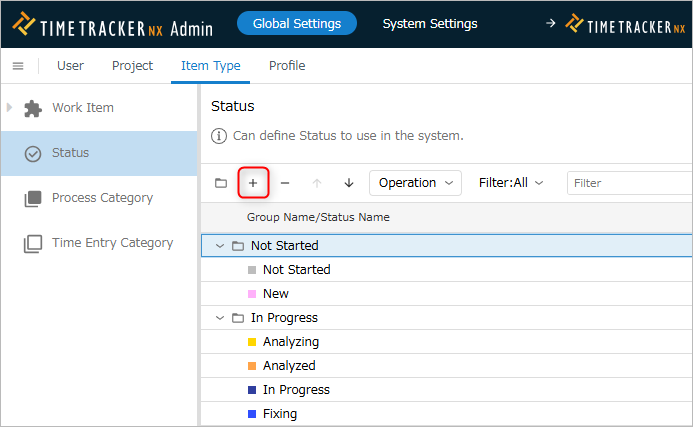
Click the "+" icon at the top of the status list.
-
Enter the status information in the "Create Status" dialog.

The input fields are as follows:
No. Item Description Required 1 Name Status Name ○ 2 Code Code to Identify the Status 3 Color Color Used to Display the Status 4 Description Status Description -
Click the "OK" button.
Deleting and Restoring Statuses
Deleting
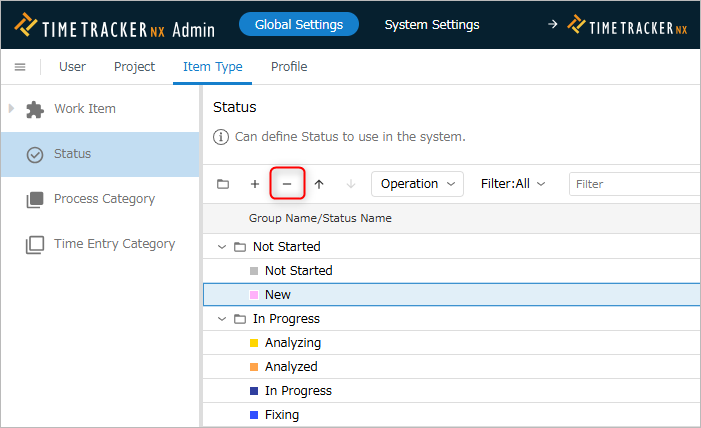
You can delete unnecessary statuses using the following steps.
Statuses already in use in the project can be continued.
-
Select the status to delete.
-
Click the "-" icon at the top of the status list.
Restoring
You can restore deleted statuses using the following steps.
Use this if you accidentally deleted a status or want to reuse a deleted status.
- Select "Deleted" in the "Filter" section.
- Select the status you want to change. Multiple selections are possible.
- Click "Actions" at the top of the status list.
- Select "Restore".
Changing Statuses
You can change the definition of added statuses later.
The display order of statuses set here will be reflected in all projects.
This cannot be changed for individual projects.
Procedure
-
Select the target status.
-
Click the "Properties" icon in the local navigation.

-
Click the "Edit" button.
-
Change the status information.
-
Click the "Save" button.
Adding and Deleting Status Groups
Adding
To group statuses into groups other than existing ones, add a new group.
Grouping statuses by type makes it easier to select a status.
Groups are added to the end of the status list by clicking the "Add Group" icon at the top of the status list.

Deleting
You can delete groups of statuses that you no longer need by following these steps. You cannot delete a group if it has active statuses.
- Select the group you want to delete.
- Click the "-" icon at the top of the status list.